

Understanding the Sourdough Bread Process

Understanding the sourdough process is extremely important to becoming a confident bread baker. This article will review baker’s percentages, sourdough formulas, and a step-by-step guide on the sourdough bread making process.
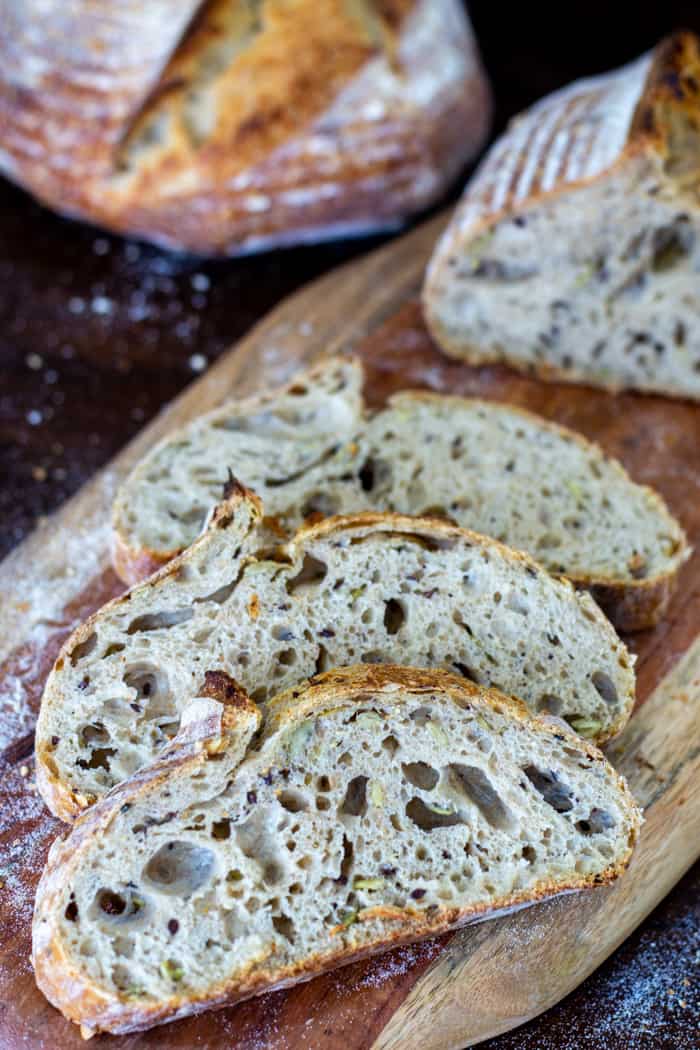
Overview
Learning to make sourdough is almost like learning a whole new language. When people ask me if sourdough bread is hard to make, my answer is that it is actually extremely easy, once you really understand the process. But getting over that hump can be a bit intimidating.
This article will help you get there! Sourdough recipes are less a recipe than they are a combination of a formula and a timeline. Understanding how to read the formulas, timelines, and steps is so helpful in this process. After you’ve mastered that then you can learn how to create your own timelines and formulas!
At the end of this article I will share my base recipe and timeline that I typically work from for my sourdough bread. You can use this as a starting point to find the timelines and ratios that work best for you. I suggest starting by watching my video below!
WATCH THE VIDEO!
What is Sourdough Starter?
A sourdough starter is a natural culture of wild yeasts and bacteria. Creating a sourdough starter is actually very easy and involves combining flour and water together and letting it sit until it ferments. This mixture is fed fresh flour and water over a period of time to create a strong culture of yeast and bacteria that can make your bread rise. Therefore, commercial yeast is not needed in sourdough bread.
Sourdough bread is bread that is leavened with a natural culture of yeast (a sourdough starter). This style of bread has a more complex sour taste (due to the lactobacillus bacteria) than bread produced with commercial yeast. It also keeps longer than bread made from commercial yeast. Any bread that can be made with dry yeast can be made with a sourdough starter.
This article will assume that you have an active starter and are ready to start baking! If not, here are some articles to get you started.
Baker’s Percentages (Baker’s Math)
Before we dive into the steps of actually putting together a dough, it is extremely important that you have a general understanding of how baker’s percentages (also known as baker’s math) works. Baker’s percentages are something that bakers (especially bread bakers) use to formulate their recipe. It is a calculation in percentages of every ingredient in the recipe compared to the amount of flour in the recipe.
How to Calculate Baker’s Percentages
To calculate baker’s percentages, you start with the total amount of flour by weight in your recipe. No matter how much flour it is, it is always set at 100%. Now, every other ingredient in the recipe is calculated compared to the weight of the flour.
The formula is: (weight of ingredient/weight of flour) x 100 = Baker’s Percentage
Formulas
Sourdough bread, in its most basic form, is only made up of 4 ingredients: flour, water, sourdough starter, and salt.
Example Formula
- 1,000 grams Flour (100%)
- 750 grams Water (75%)
- 200 grams Sourdough Starter (20%)
- 20 grams Salt (2%)
Flour
So using the example above let’s talk through a basic sourdough recipe. For the purposes of keeping the math simple, we will start with 1,000 grams of flour. A formula with this amount of flour would be enough to make two good size loaves of bread. So remember, no matter how much flour is in the recipe that quantity of flour is going to be set at 100%. Now every other ingredient in your recipe is going to be calculated as a percentage in relation to the flour.
Water
Now, the next ingredient in the recipe is your water. The water can vary widely in the amounts, or the percentage, you would use in your recipe. You might go as low as 60% and you can go up very high into the 90%s or even up to 100% if you are using a lot of whole grains. For the purposes of talking through the example, we are going to set the water at 75% which is 750 grams. This is a fairly standard percentage for a basic sourdough bread.
Sourdough Starter
Next up in the recipe is the starter. Now again, the amount of starter that goes into your bread dough can vary widely baker’s percentage wise. You could go as low as 5% and you can go up much higher than that. A smaller percentage of starter will require longer fermentation times but will also increase the flavor and acidity in your bread. I usually like to keep mine around 20% which would put the starter in this recipe at 200 grams.
Salt
The salt in a recipe typically stays around 2%. You can reduce that slightly to meet your own preferences, but 2% salt is very standard. So for this recipe that would put the salt at 20 grams.
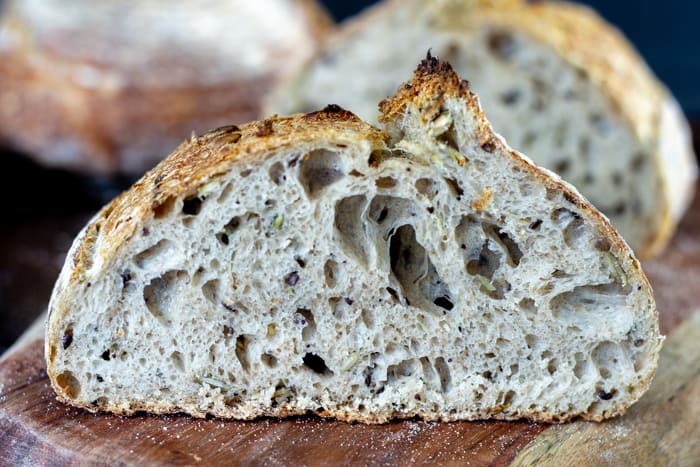
Understanding Hydration
You will often hear bakers refer to their loaves of bread or their recipe formulas in terms of the hydration percentage. They are referring to the water in their dough in regards to baker’s percentages. Sticking with our example above, you might hear a baker refer to this as a “75% hydration dough.”
This is important because the hydration of a dough is one of the major factors that contributes to the texture of the bread. Higher hydration doughs can lead to a more open crumb structure and a more moist final bread, but they are more difficult to handle. Lower hydration doughs tend to create a more closed structure bread, but are much easier to work with.
Note: It is important to note here that if you want to calculate a true hydration level in your sourdough bread you need to account for the amount of water and flour in your sourdough starter. It is most common for sourdough starters to be 100% hydration starters. This means that they are equal parts flour and water by weight. So in our recipe example we added 200 grams of starter to our dough. Of that 200 grams starter, 100 grams is water and 100 grams is flour.
So to calculate a true final hydration you would need to base your baker’s percentage off of 1,100 grams of flour and 850 grams of water. This would give our formula a true final hydration of 77%. But for the purposes of just getting started with sourdough baking, I wouldn’t stress about this part too much.
The Sourdough Process
There are endless ways to approach sourdough bread baking. Watch 100 bread baker’s make a loaf of bread and you will see 100 different methods. However, there is a general flow that pretty much all sourdough bread recipes go through. And in order to become confident in your own baking it is important to understand each of the steps. This will not only help you follow recipes, but will also help you develop your own preferred methods.
Feed Starter
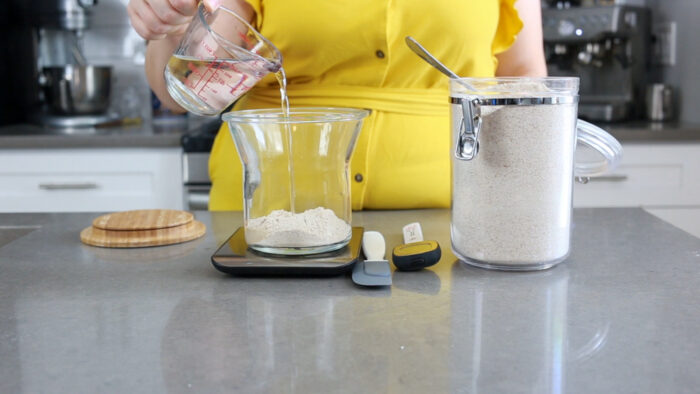
Before you make the dough, feed your starter fresh flour and water to get it ready to go into the bread. After your starter is fed it goes through several stages. It will start rising in it’s container as it feeds on the fresh food and begins to get very bubbly. It will start to dome on top and then eventually the dome will flatten out and the starter will start to fall. When the starter falls it means that it is out of food and it is no longer active enough to go into a dough.
Different bakers have varying preferences on when to use their starter in a dough. I like to use mine when it is just starting to flatten out on top but before it starts to fall. For me, it usually takes my starter around 6-8 hours after my normal feeding to get to this point so I will plan my dough schedule around this.
Autolyse (*optional but recommended)
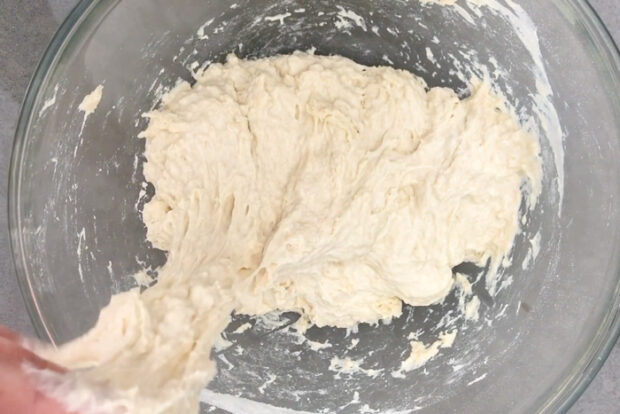
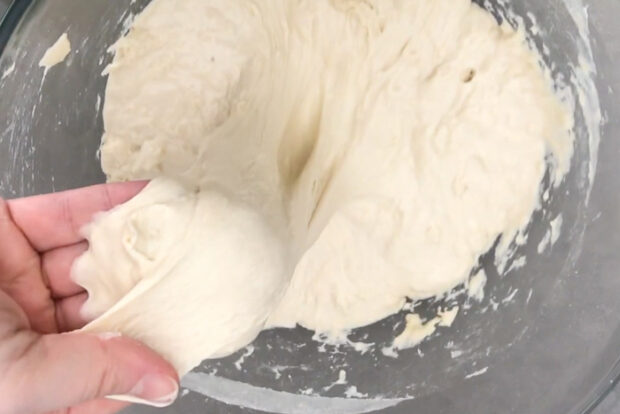
Autolyse refers to the process of mixing the flour and water together in your bread recipe before adding your salt and usually before adding your leaven (starter) as well. The benefit of mixing only the flour and water together before adding the salt is that it allows the flour to completely hydrate and it allows the gluten structure to begin building on its own.
Autolyse is particularly helpful in high hydration doughs as well as doughs that contain a lot of whole grain. Immediately after mixing the flour and water, you will notice how shaggy the dough is and how easily it breaks if you try to pull up on it. However, after the dough rests for a bit the texture completely changes. It will be smooth and silky and if you pull up on it it will have some elasticity.
Allow the flour and water to autolyse for at least 30 minutes to fully get the benefits of it. However, you can go for much longer, up to two hours. You do need to be careful not to allow your mixture to autolyse for too long, however, as the enzymatic activity can start breaking down the dough. I typically watch my starter to see when it is about an hour away from being ready, and then I go ahead and mix my flour and water together.
Mix Final Dough
Once the starter is vigorous and full of bubbles it is ready to go into your dough. If you utilized the optional autolyse step, mix your starter and salt into that mixture. If you did not utilize the autolyse step, mix all of your ingredients together now.
There are a lot of different methods that people utilize to mix their dough like the pincer method, the rubaud method, or using a mixer. This is something you can play around with to find what you like best. I like to use the pincer method which involves pinching and squeezing the dough all over and then folding it over itself until everything is well mixed. You can see my demonstrating the pincer method in my here.
Build Strength and Structure
After mixing the dough, it needs to build gluten structure and strength. There are three main methods for approaching this: the no-knead method, the kneaded method, and the stretch and fold method. With no-knead sourdough bread you are letting time do all the work for you. Gluten structure will form all on its own given enough time. However, if you want a taller and more structured loaf you will want to knead your dough or utilize the stretch and fold method.
Kneaded Method
Kneading dough by hand or in a stand mixer can be used for sourdough bread, though it is not the most common method. Kneading to build strength and structure works best for lower hydration dough- usually something around 68% hydration or lower. Dough that has a higher hydration is very difficult to handle in the same way and therefore a different method of building strength is typically utilized.
Stretch & Fold Method
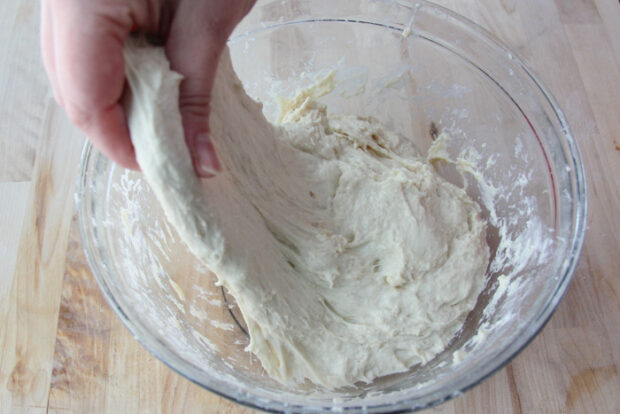
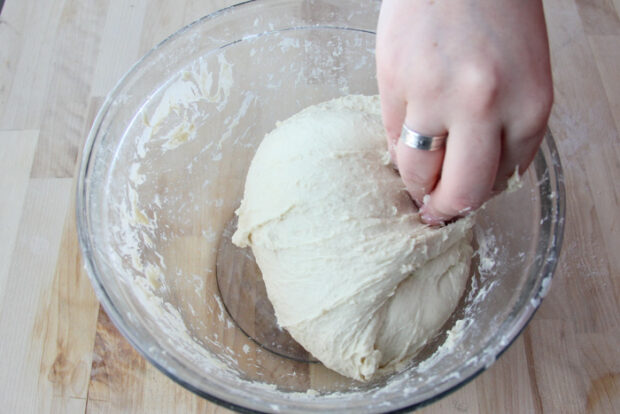
The stretch and fold method is typically used for higher hydration doughs and those that contain a lot of whole grain. This method is a more gentle way of building the gluten structure. It involves pulling up on sections of the dough, stretching it as far as it can go without tearing, and folding it down over itself. Perform this process all the way around the dough until it holds its shape into a tight ball. This is my preferred method.
Perform stretch and folds in 20-30 minute intervals during the first few hours of the fermentation process. The process of stretching the dough and folding it over itself serves to align the gluten strands and even out the dough temperature, allowing strength and structure to build. You can see me utilizing the stretch and fold method here.
Bulk Ferment
The bulk fermentation phase is sometimes referred to as the first rise. This phase starts as soon as the final dough has been mixed, so if you are utilizing the stretch and fold method it is happening simultaneously as you build structure in your dough.
The purpose of the bulk fermentation is to allow the yeast and bacteria to work in the dough to develop flavor and to build up gasses. The length of bulk can vary widely depending on the percentage of starter you put in your dough, how warm your environment is, and how sour you want your bread. Bulk can sometimes be as quick as 2 hours or as long as 24 hours. I typically allow my dough to bulk ferment for about 6-8 hours.
Essentially you want to allow your dough to build up a good amount of gasses in it before you shape. I usually look for my dough to be almost double in size and to see visible bubbles forming on top. It is also important to note that some recipes call for a short bulk ferment and a longer proof, and others approach it the other way around. I typically do the later.
*Optional Cold Retard (pause button)
At any time during bulk fermentation, the dough can go into the refrigerator for up to 3 days. This is a pause button on the process and you must continue where you left off when you use this step. (For instance, if the dough goes into the refrigerator 3 hours into bulk fermentation, it needs to sit at room temperature for 4 hours before shaping when you take it out).
Shaping
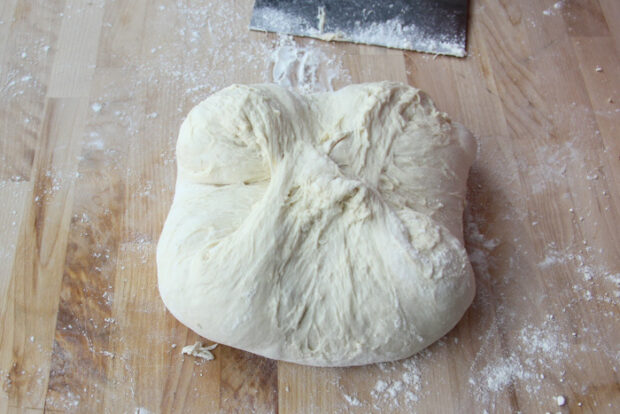
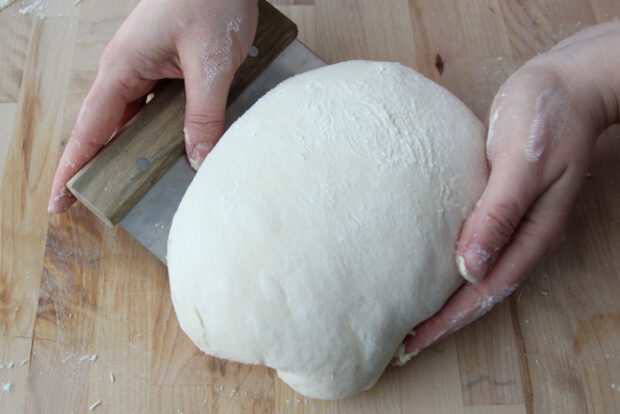
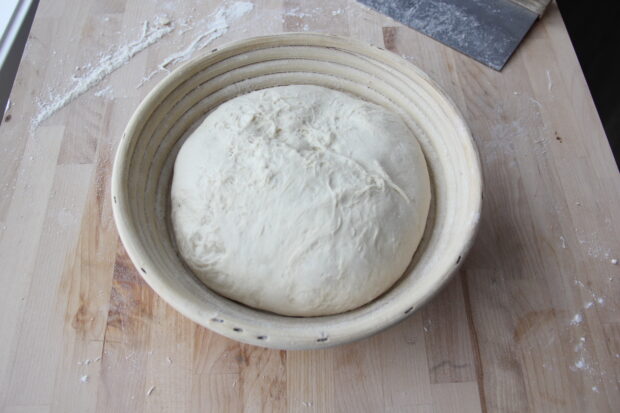
Once bulk ferment is complete, shape the dough. Typically when shaping a sourdough loaf, you want to be careful not to deflate all of the air out of the dough. This is a bit different from other recipes where you might “punch” the dough or degass it.
Pre-Shape (*optional)
A pre-shape is an optional step before the final shape. This is the process of gently working the dough roughly into the shape that it will be after the final shape. Less tension is given to the dough and this is usually done pretty quickly and then the dough is allowed to rest before the final shape.
The purpose of pre-shaping your dough is to work the gluten structure into the direction you want it to go during the final shape. This can develop a stronger structure for your loaf.
Final Shape
There are about as many different ways to approach the final shape of a dough as there is to approach a sourdough recipe. However, the main thing baker’s are trying to accomplish during a final shape is to build tension on the surface of the dough to help it hold its shape when it bakes. This step should be done in a gentle enough manner that as much air as possible is preserved inside the loaf.
Proof
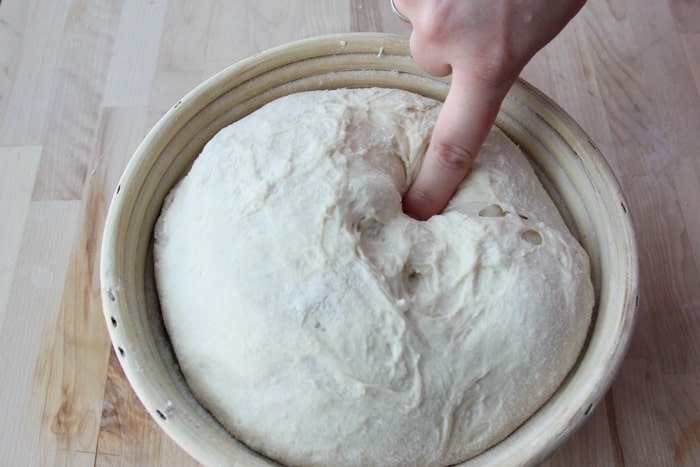
Once the dough is shaped, it needs to proof (or go through the second rise) before baking. Depending on how long your recipe called for bulk ferment and how well you preserved the air in the dough when shaping, the length of time for proofing can vary greatly. For some dough it might only be about 20 minutes, while others might need a few hours.
To check if your dough is done proofing, do what is called “the dent test.” Flour a finger and gently press in on the dough about ½ inch (1.2 cm). If the hole fills in immediately, you need to let it proof a bit longer before baking. If the hole fills in very slowly then you can go ahead and bake your loaf.
Over-Proofed Dough
It is possible to let your dough proof for too long, and if this happens your bread will end up deflating in the oven and will be very flat and dense. When you perform the dent test, as described above, and your dough feels very weak and like it might collapse that is a good sign that you have over-proofed your dough. You can still go ahead and bake it, but your loaf will not be as airy as if you baked it before it was over-proofed.
Retard (*optional but recommended)
The last optional step in the sourdough process is retarding your dough. The retard stage of bread baking is when you put your dough in the refrigerator. Cold temperatures will slow down the yeast activity while still allowing the bacteria to work in your dough. This creates a more flavorful and sour loaf.
Technically you can retard your dough at any point in the sourdough process and the refrigerator can be seen almost like a pause button on your timeline. You could even do a very long bulk ferment in the refrigerator for up to 3 or 4 days. However, I like to retard my dough after it has been shaped. I find that baking from a cold loaf helps it hold its shape much better and helps with a nicer oven spring.
If you do retard your dough after it is shaped, be aware that it can over-proof in the refrigerator. While the yeast activity does slow down a lot, it doesn’t stop completely. I typically retard my shaped loaves around 8-16 hours for a really nice sour flavor without over-proofing.
Bake
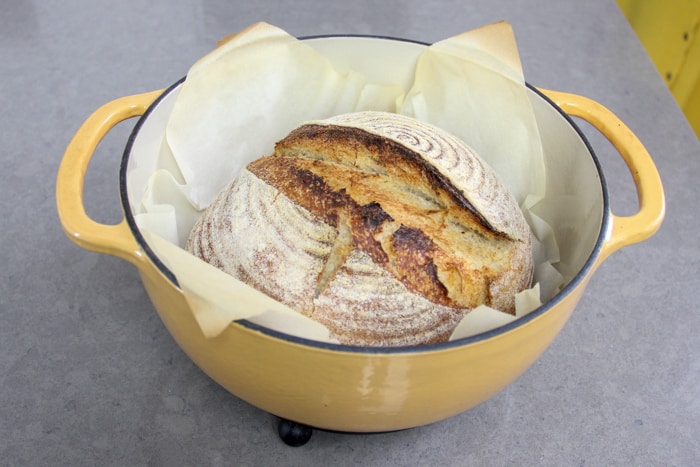
There are quite a few different ways to approach baking a loaf of sourdough. The most common method is to bake the loaf in a pre-heated dutch oven or oven safe pot. This is the method I use the most. Other options are to bake on a pre-heated pizza stone or pizza steel with a roasting pan underneath filled with water to create steam.
Whatever method is used, the important part here is the utilization of steam. Commercial ovens have steam injectors in them that allow the baker to utilize steam during the first part of the baking process. This keeps the outside of the loaf moist and allows it to fully rise and open up before the crust sets. This is also known as oven-spring. A dutch oven tool for a home bread baker because the lid traps the moisture from the loaf inside the pot, creating a steamy environment.
Cool
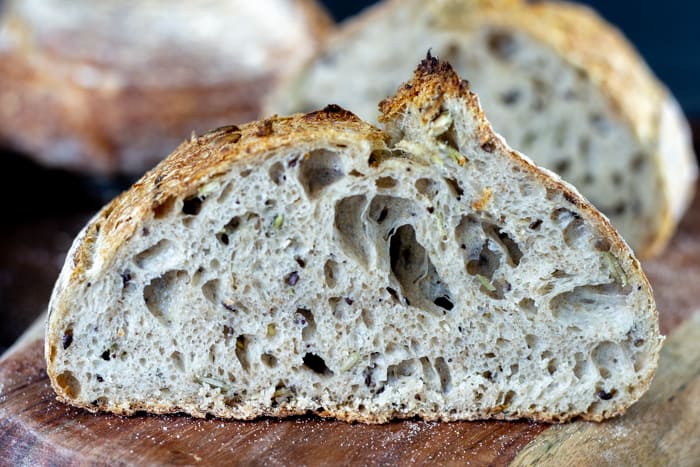
While some people may think cooling their loaf before slicing is optional, I’m going to tell you it is absolutely crucial for the most flavorful sourdough bread. Cutting into a loaf of bread before it is cool will release all of the moisture and cause the bread to stale very quickly. The texture of the bread will also be very gummy if you cut it while hot. Allowing the bread to cool completely also helps develop the flavor of the bread more fully.
STORING YOUR BREAD
To store traditional loaves of sourdough bread I leave my loaf sitting out on a cutting board either uncovered or with foil loosely tented over the top. Once I cut into the bread, I turn it cut side down onto the cutting board. Any bread that I have not eaten in 72 hours after baking, I slice and freeze in a ziplock bag this way it is easy to pull a slice and toast it to refresh.
FREEZING AND REFRESHING WHOLE LOAVES
To freeze a full loaf of sourdough, let it cool completely then wrap it well in plastic wrap or foil. Store for up to 3 months. When you are ready to refresh it, unwrap the loaf and let it thaw a few hours or overnight at room temperature. Get the outside of the thawed loaf damp and then place it in a 350°F/ 176°C oven for 15 minutes until the crust is crisp.
I know this is a lot of information to take in and it can feel overwhelming. The most important part of the sourdough process is to continually ask yourself why? Learn about the processes and techniques and practice them over and over again.
When you have a failure that is the perfect opportunity to learn something new. No “failed” loaf is ever a complete bust. It is all part of the process of becoming a confident bread baker.
Resources
In my journey to become a confident sourdough baker, I have used many different resources. These are the ones I have used the most.
- The Bread Bible by Rose Levy Beranbaum
- The Bread Baker’s Apprentice by Peter Reinhart
- Flour Water Salt Yeast by Ken Forkish
- The Perfect Loaf Blog by Maurizio Leo
- Elaine Boddy on Instagram
*Some of these links are affiliate links, which means I earn a small commission off any purchase at no extra cost to you.
Bettie's Basic Sourdough Bread
This is the basic sourdough recipe that I work from. It is not my most advanced or highest hydration recipe, but it is a good standard sourdough bread. You can use this as a guideline to work out your own ratios and timelines.
Ingredients
For the Dough
- 100 grams active fed starter, about ¾ cup after stirring down
- 350 grams (1 ½ cups) barely warm water (85-90°F/ 29-32°C, use cooler water if your room is very warm and warmer water if your room is cool)
- 500 grams (4 cups + 2 tablespoons) bread flour or unbleached all-purpose flour
- 10 grams (2 teaspoons) fine sea salt or kosher salt
- rice flour or whole wheat flour for dusting
Instructions
- Feed starter to prepare for making dough: At least 4 hours and up to 12 hours before mixing your dough, remove your starter jar from the refrigerator and add 50 grams of flour and 50 grams of barely warm water (around 85-90°F/ 29-32°C). Stir well, cover loosely with the lid, and let sit in a warm spot. When the starter has at least doubled in size, you can proceed with mixing your dough.
- Mix the Dough: In a large mixing bowl, combine 350 grams of barely warm water (85-90 F) with 100 grams of active starter. Add 500 grams of bread flour and 10 grams of salt. Stir to begin combining until a rough, shaggy dough forms. Use your hand to squeeze and pinch the dough until everything is evenly combined. Spend a few minutes doing this and make sure there are no dry bits of flour. The dough will be quite sticky.
- Bulk ferment (first rise) & Stretch & Folds (gluten building): After mixing, the dough needs to bulk ferment (rise) at room temperature for 6 - 7 hours total. During the first 2 hours of bulk fermentation, perform 4 rounds of stretch and folds every 20-30 minutes after mixing the dough. This helps strengthen the gluten structure. See video here for tutorial.
- *Optional Cold Retard (pause button): At any time during bulk fermentation, the dough can go into the refrigerator for up to 3 days. This is a pause button on the process and you must continue where you left off when you use this step. (For instance, if the dough goes into the refrigerator 3 hours into bulk fermentation, it needs to sit at room temperature for 4 hours before shaping when you take it out).
- Shape & Into a Banneton or Bowl: After the dough has bulk fermented it is ready to be shaped. The dough should easily be pulling away from the sides of the bowl, have small bubbles on top, have increased in volume by at least 50%, and not be so sticky that it wants to attach itself to your hand if you touch it. Be gentle as you transfer the dough from the bowl to the counter, and use very little pressure as you manipulate the dough. Perform an envelope fold, then turn the dough over and pull some more tension by rounding a few times. Liberally dust a banneton basket or a medium bowl lined with a tea towel with rice flour. Turn the dough into the banneton or bowl seam side up and cover.
- Proof (second rise): Let the shaped dough sit on the counter for about 1 hour to do a final rise, known as proof.
- Refrigerate (cold retard): After the dough has proofed, place it into the refrigerator for up to 24 hours before baking. I recommend refrigerating for at least 8-16 hours. However, you can utilize any amount of time up to 24 hours depending on what works in your schedule.
- Preheat: At least 20 minutes before baking, preheat your oven to 450°F/ 232°C with an oven safe pot with a lid inside like a dutch oven.
- Score & Bake: When ready to bake, take the loaf out of the refrigerator and turn it out onto a piece of parchment paper or a silicone bread sling. Score the bread with a bread lame or a serrated knife. Carefully transfer the bread on the parchment or bread sling into the preheated pot. Put the lid back on and place it back in the preheated oven for 30 minutes. Remove the lid of the pot and let it continue baking for 5 - 20 more minutes depending on the crust color you like.
- Cool: Allow the bread to cool on a cooling rack for at the very least 1 hour before slicing it. Preferably let it cool for 4-12 hours for the best flavor, texture, and to prevent it from staling too quickly.
Recommended Products
As an Amazon Associate and member of other affiliate programs, I earn from qualifying purchases.



126 Comments on “Understanding the Sourdough Bread Process”
Thanks so much for the sourdough series, can’t tell you how much this helped me. Is there anything I can do to keep the bottom of bread from charring when cooking in Dutch oven? The top looks perfect but bottom comes out pretty crispy.
I first place a thin metal trivet in the bottom of my dutch oven. I put my dough on parchment, to lift my loaf from my shaping bowl, and place into the dutch oven. The trivet keeps the bottom from being directly on the bottom of the dutch oven and so doesn’t burn. Just one idea that may help!
Krista Stewart
I like that idea. I baked my first loaf today and the bottom was pretty dark.
Hi Bettie I made your no knead sourdough & it was amazing , can I sub some flours ie 10% rye 30% whole meal & 70% white?
Many thanks
I haven’t tried it but I think that will be a successful experiment!
Such a great series … thank you so much for sharing! One question regarding the retarding stage – is it ok to leave the bread in the fridge for a couple of days and then bake?
Many thanks!
It is!
Hello when I make the lower hydration dough instead of kneading by hand I have a kitchaide stand mixer with hook attachment. How long and at what speed should I knead it? Thank you.
I have this same question. Did you ever get a reply
Hi! I am having trouble with my dough, it always seems to deflate while scoring, is it over proofed? I am following your timeline
My sourdough also comes out a little soupy/loose as others have mentioned. I just noticed in the video, she uses 450g of bread flour and 50g of whole wheat flour. This flour mix is not included in the written recipe above. Could this be the reason for the loose dough as whole wheat flour holds more water than bread flour? I will try making the video recipe with the mix of 50g of whole wheat flour and 450g bread flour. Possible fix? Your thoughts?
I’m curious how your dough did with the 450 g bread flour and 50 g wheat flour? Was it less wet/soupy? The one I’m making now is the least wet I’ve had using the 500 g bread flour, but I added olives, Asiago cheese, and rosemary to the dough so it may be that the dry cheese absorbed some of the wetness. IDK. I put it in the frig to retard and I’ll bake it tomorrow afternoon so I don’t know yet if the baked bread will still have the crusty outside and hole-y inside I had the last time I made it without the added ingredients.
Hello, I am super new to sourdough. My starter is half bread flour and half whole wheat. I tried the recipe with 50 wheat and 450 bread flour. Mine was still a bit too wet.
Very informative tutorial! Thank you. I live at 6100 Ft and baking is different at this altitude. I make the 75% Hydration Recipe and did several hours of stretch and fold. My dough was very sticky! I did sprinkle a little flour over the loaf before the last two stretch and folds before I put it in the refrigerator. I covered it and put it in the refrigerator overnight and took it out the next morning about 7:30 and let it sit on the counter with a cloth over it until about 11:30. When I took off the cover it looked PERFECT! I put my finger in it and it sprung back. When dumping the dough on the counter to form the loaf it was so manageable! I was super stoked that the process was working at this altitude. I baked it and it looks like success. I am waiting until dinner to slice it open. I have never had a sourdough dough act like this so I think it will be just right on the inside. Your guide is now my bible of sourdough recipes and will go forward from here experimenting with more knowledge and a purpose rather than guessing what I did wrong. Thanks again
I have been making sourdough bread for several years, but I have always struggled with the higher hydration bread dough. I followed your recipe and instructions exactly, and with the help of your shaping tutorial, my bread turned out perfectly. The shape stayed nice and tight, it had a wonderful oven bloom, and the crumb is very light and airy. I am thrilled. Thank you so much for sharing your expertise with all of us online. Your videos are so informative and well done, and I love the retro-look.
Would I be able to fast forward 6 and 7. What I mean is could I do 4-6 rounds of stretch and fold and then put it in the fridge for 12 hours and then resume the steps at 7?
Signed,
New at baking but eager and trying right now
Yes, Bettie has said as much in the video.
If you’re using a pizza stone … is the baking time 40 minutes without interruption? Or do you need to adjust the temp after 30 minutes?
I’d turn it down. Maybe 30-40 degrees less. And remove the water (if it hasn’t boiled off) tor the last 20 mins. But experiment and you’ll nail it.
Hi Bettie! Thank you for being such a great teacher. I have enjoyed your videos and they have helped me a lot. How long can you retard the dough? Something came up and I can’t bake tomorrow. Can I leave it until the next day?
B said (either on the video or this page) 3-4 days, so yes!
Just wanted to say thank you so much for this video and your sourdough series. I have watched many videos in the past but yours truly helped me grasp the process and I am now finally baking beautiful loaves of sourdough. Everyone is quite impressed…my husband brought a loaf to work for a potluck and they thought he purchased it at a bakery!! Once again thanks, I truly appreciate your hard work!! I even named my starter after you 🙂
I like that idea. I baked my first loaf today and the bottom was pretty dark.
This video is absolutley amazing! We made our 1st sourdough bread this weekend following the recipe and the bread turned out amazing. Thanks so much for sharing your video and recipe. It was so much fun to make and it was delicious!
I’m so glad!
I want to thank you for all the work and information on your site. I have learned more in the last few days of reading your information here than in months of researching on other sites. Thank you, thank you, thank you.
I’ve made 13 loaves with this recipe. Equal 65% & 75% hydration tried. The only one that ever rose like yours is the first 65% recipe where I forgot to retard over night in fridge.
I can’t figure out why fridge proofing doesn’t work for me???
Should I bring bread back to room temp before baking?
I don’t like the the open crumb or the holes,I think that is what they are called. Is there anything I can do to have a more closed crumb. Thank you, your tutorial is very easy to understand and not sound so complicated. And yes I have had failers and you are right you learn something from each failure.
There are several things you can do. Betties yt video on this page talks about some. But you could add rye or other whole grains, ground or whole seeds (e.g. flax), use less water, have less proofing time. You can find other info online for recipes with these things and many have pictures or what they turn out like, or you can just experiment. I recently stuck 30% rye flour into a recipe and it was still a great loaf but much less airy.
This is a very impressive tutorial. I have mastered sourdough bread making thanks to Baker Bettie. I floundered around an entire year trying to get the process down and was not successful at all. Then I discovered Baker Bettie. I now make a couple of loaves a month. Bettie’s video tutorial is also most excellent. Her professionalism is 5-star! Thanks Bettie, Hugs Elaine
This is essential reading for anyone who wants to start on the sourdough baking adventure. I had tried other sources, with no success. This set me on the right track. I have had great success following Baker Bettie’s instruction. I LOVE her. She is my exclusive source for all things baking related.
I’ve baked from several different recipes and used a few different flours now, but often the processes were a bit abstract. This is a great summary and really helps me understand the process. Thank you for putting this together as a free resource.
I read this because I received an active starter last evening from a friend. I want to start this during my free time over the summer when my kitchen is warm (no central A/C). I need to understand what is happening at each step and this was a very good start. I will learn more as I go, of course, but in my mind, I think I understand the process. As a scientist, it makes sense. I am also good with metrics and record keeping so I’m excited to approach this kind any other experiment. Document the process for myself, see the results, and tweak. Of course, I have a built-in taste tester (husband). I am excited to take Betty out of the refrigerator and put her to work.
What is the purpose of salt in the recipe?
Sourdough starter is the levening agent, flour/water is the food. What does salt bring to the table other than flavor? Or is flavor is sole purpose?
Bread made without salt would taste incredibly horrible. It makes a big difference in taste. It also helps slow down the growth of the yeast. Without it, the yeast would grow wild and uncontrollably.
Finally it makes sense! Thank you so much, you really helped me to understand the process, the hows and the whys, and broke it down so simply. I’m recommending you to every group I’ve been involved in.
Thanks so much! So glad this is helpful!
Loved your sourdough bread tutorials and recipes!! Helped me enormously as I struggled with sourdough for over 2 years. Happy to say I can now make decent loaves that my family enjoy!
I’m so glad! I bet they are far better than “decent” 🙂
I ran out of time and had to put my dough in the frig just after the stretch and folds. I’m now letting it come to room temperature before I shape it. Do I still need to put it back in the frig for the 12-14 hours after shaping? Or can I just let it rise for the 3-4 hours after shaping and then bake it?
Thank you for informative videos and written directions.
I would like to know why my dough, after mixing, resting, and refrigeration, is still quite sticky and loose.