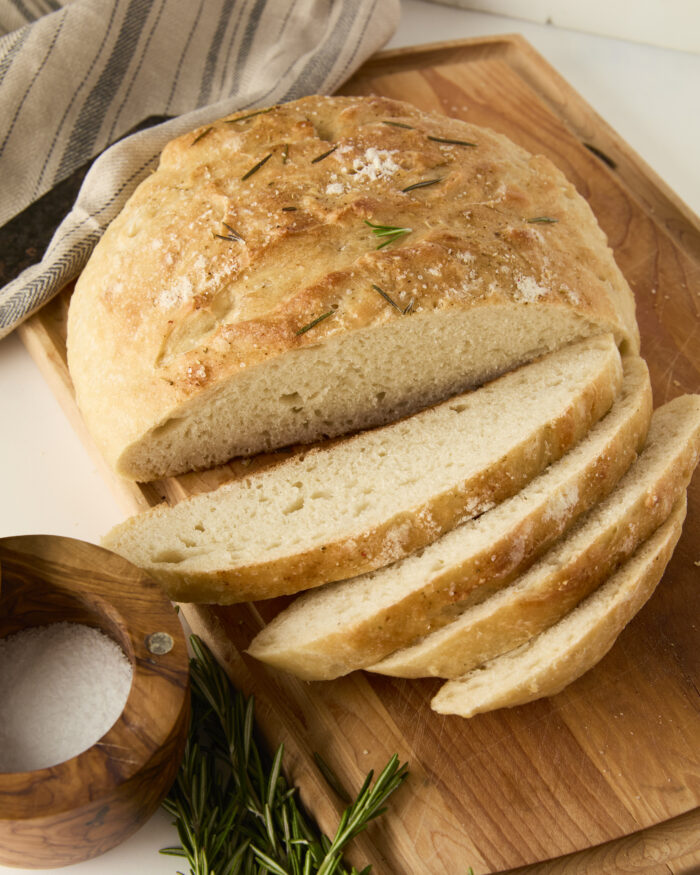
Easy No-Knead Skillet Bread
This is the easiest bread recipe you will ever make! The recipe only calls for 4 simple ingredients and there is no kneading or shaping required. Simply mix together, let the dough rise, pour into a skillet, and bake. That’s it!

Overview
- Skill Level: Beginner
- Technique Used: No-Knead Lean Dough Master Recipe
The first yeast bread I ever made was a no-knead skillet bread. It’s the easiest bread recipe to get your feet wet if you’re not feeling confident baking with yeast. It’s very beginner friendly that makes a delicious and rustic loaf of bread.
This lean dough recipe calls for only 4 ingredients: warmed water, salt, yeast, and flour. That’s it! Simply mix the ingredients together, let it rise, place it in a skillet, and bake. You don’t have to worry about kneading or shaping the dough. This will make a large loaf perfect for buttered toast, garlic bread, and sandwiches.
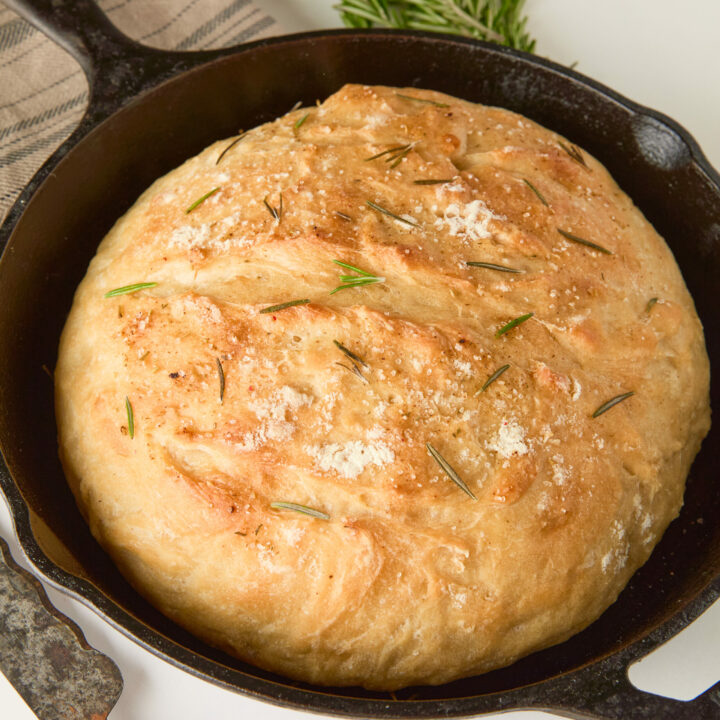
This dough can be baked several different ways but one of my favorites is using an oiled cast-iron skillet. It gives the bottom of the dough a nice crunch. Throw in some chopped herbs for beautiful color and flavor.
What makes this recipe so easy
- The recipe only calls for 4 simple ingredients that you probably already have at home.
- With this method, there is no kneading or shaping the dough.
- No messy counters! Only a mixing bowl and skillet required.
- Very little hands-on time is involved in this technique.
Bonus Recipe! Garlic Paste
Simmer peeled garlic cloves in oil for about 45 minutes stirring frequently. Strain oil and reserve for other uses. Mash garlic cloves and add coarse salt and chopped herbs. Store in the refrigerator for up to 3-4 days.
Spread on bread to make the BEST garlic bread, stir into soups, or use to flavor mashed potatoes.
How to make easy no-knead skillet bread
This recipe utilizes my lean dough master recipe. A lean dough only requires flour, water, salt, and yeast. This is the same dough I use to make pizza crust and focaccia.
Make the Dough
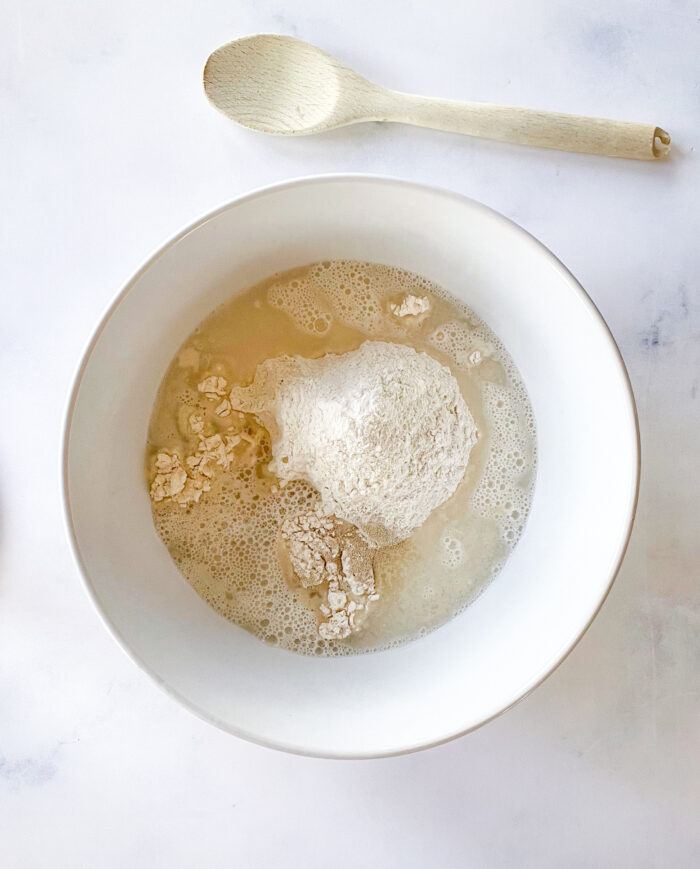
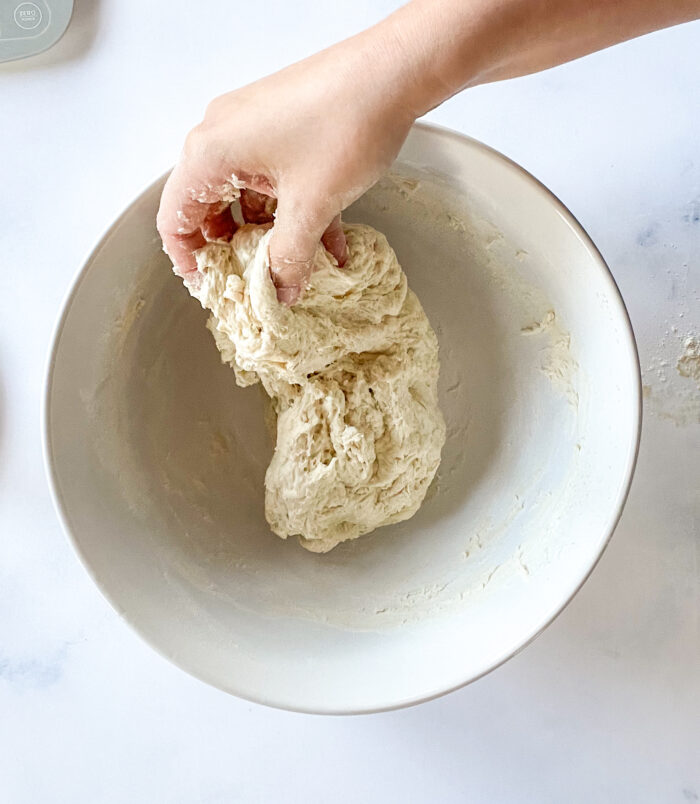
In a large mixing bowl, mix together the flour, salt, yeast, warmed water, and any fresh chopped herbs if using. Start mixing with a spatula and then switch to using clean hands. Squeeze the dough until all of the flour is fully hydrated.
Cover the bowl with plastic wrap (or a shower cap works really well) and let sit at room temperature for to bulk ferment for about 3 ½ hours. It is ready to be used once it is at least double in size and bubbly on top.
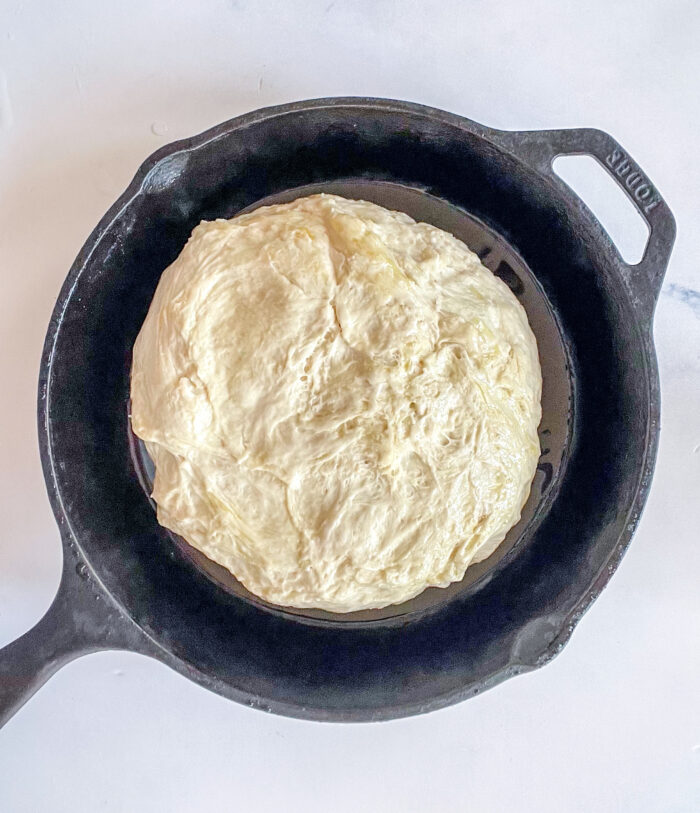
Gently pour the dough out of the bowl and into an oiled cast-iron skillet and dust with a little flour on top. Let proof for 30-45 minutes until puffy and full of air.
Bake

After proofing, slash the top of the dough a few times with a sharp knife or bread lame. You can also sprinkle additional chopped herbs and coarse salt over top of the dough.
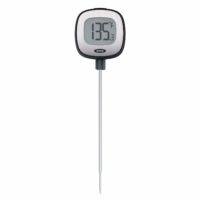
Place the skillet into the preheated oven and bake for about 35 minutes until it’s a deep golden brown or has an internal temperature of 200°F/93°F.
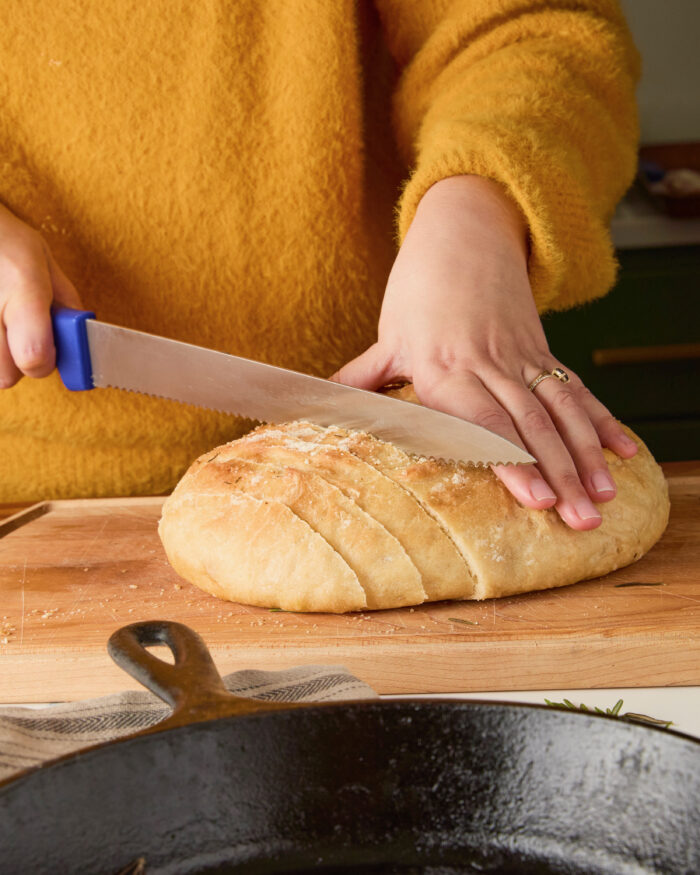
Let cool for at least 1 hour before slicing. Slice wedges right out of the skillet or remove the loaf from the skillet with a large spatula. Do not slice too early or you will stop the bread from fully setting and it will be gummy. It will also cause it to stale faster.
Storage
Store uneaten bread cut side down on a cutting board at room temperature for up to 2 days. After that, slice the rest of the loaf and place in a zipper bag in the freezer. Freeze for up to 2 months.
Toast individual slices in the toaster or toaster oven to refresh. No need to thaw, you can toast straight from the freezer.
FAQ
Do I have to use a cast-iron skillet?
There are several options for baking this bread dough. If you don’t have a cast-iron skillet, try my method for baking bread in a Dutch oven. You can also bake the loaf on a piece of parchment paper on a baking sheet.
Can I refrigerate the dough and bake later?
Yes! After mixing the dough, cover the bowl with plastic wrap and refrigerate for 12 hours and up to 3 days. The longer it sits, the more flavorful it will be.
When ready to bake, take it out of the refrigerator and let it sit at room temperature for about 2 hours. Continue with the recipe as instructed.
MORE RECIPES FROM BAKER BETTIE!
If you enjoyed this easy bread recipe, you might like to try these other delicious recipes.
Easy No-Knead Skillet Bread
This is the easiest no-knead skillet bread. Just mix all of the ingredients together, let the dough rise, put it in a pan and bake! You won't get your hands or counters messy!
Ingredients
- 630 grams (5 ¼ cups) all-purpose flour or bread flour
- 2 ¼ teaspoons kosher salt
- ¾ teaspoon instant yeast or 1 teaspoon active dry yeast
- 420 grams (1 ¾ cups) water at about 120°F-130°F/48-54°C
- 1 tablespoon fresh chopped herbs, like rosemary or thyme (*optional)
Instructions
Make the dough
- In a large mixing bowl add all of the ingredients and stir to combine. Use your hands to squeeze the dough until all of the flour is fully hydrated.
- Cover the bowl with plastic wrap (or a shower cap works really well) and let sit at room temperature for to bulk ferment for about 3 ½ hours. It is ready to be used once it is at least double in size and bubbly on top.
- Lightly oil the bottom and sides of a cast-iron skillet. The skillet should be 8-10 inches (20-30 cm) in size.
- Gently pour the dough out of the bowl and into the skillet and dust with a little flour on top. Let proof for 30-45 minutes until puffy and full of air.
- Meanwhile, position an oven rack on the center position and preheat to 400°F/205°C.
Bake
- As an optional step, slash the top of the dough a few times with a sharp knife or bread lame. You can also sprinkle additional chopped herbs and coarse salt over top of the dough.
- Place the skillet into the oven and bake for about 35 minutes until it's a deep golden brown or has an internal temperature of 200°F/93°F.
- Let cool for at least 1 hour before slicing. Slice wedges right out of the skillet or remove the loaf from the skillet with a large spatula.
Notes
I used a 10 inch (25 cm) cast-iron skillet. You can also use an 8 inch (20 cm) or 12 inch (30 cm) skillet. Bread baked in an 8 inch size will result in a taller bread and will likely take a few extra minutes to bake. Bread baked in a 12 inch size will result in a wider and shorter loaf and will likely be done a few minutes quicker.
Recommended Products
As an Amazon Associate and member of other affiliate programs, I earn from qualifying purchases.


805 Comments on “Easy No-Knead Skillet Bread”
The bread turned out perfect on the first try. I didn’t have a Dutch oven and used a regular baking dish. I also poured water into my oven to give it more moisture. Very delish!!!
So great to hear Annette!
Just a tip for anyone trying to decide what to bake in – I use this recipe regularly and make it in a cast iron pan which works great, but the other day I used a dutch oven instead and it stuck like the dickens despite using lots of oil to coat the dish! Maybe parchment paper lining would be worth trying if using a vessel that has enamel coating?
This bread is simple and delicious! I have a bottom broiler and would recommend skipping that step. I only broiled it for 1 minute but it still got too dark. It looked golden and perfect after the initial bake so I will just leave it at that next time.
Thanks for a fabulous recipe!! I’ve made your bread every week or two for the past three months. My family loves it! (It only lasts 1 day with teenage boys.) And I love how simple it is! One time I forgot about it for three hours when it was in the bowl on the counter – oops- It still turned out great! Sometimes I use bacon grease in the skillet instead of olive oil. My question: Can I use dried rosemary in the dough? I never seem to have fresh rosemary on hand.
I put dried rosemary in mine and didn’t realize till watching the YouTube video that it was intended to have fresh rosemary. Mine is proving right now but did you use the dried rosemary and how was it??
I also put “Everything but the Bagel” seasoning from Trader Joe’s in it so we’ll see how it comes out.
Thanks!!
I’ve made this several times now with dried rosemary and it turns out great! I use a couple teaspoons in the dough and sprinkle some more on top prior to baking.
I have a couple of questions. Can you use sourdough starter instead of the yeast options or in addition to? Also when I want to add jalapeno and cheddar cheese can I add that directly to the dough mix or do I have to just add it on the top like the herbs/rosemary?
I don’t know what I missed but it seems I must have. I measured out the flour and dry ingredients and added the water. This became a dough. A dough that didn’t even absorb all of the flour. It wasn’t like a batter at all. 4 1/3 cup flour to 2 cups water. I don’t see how that makes a “batter”. I am in NC. I don’t know if that makes a difference.
I agree, I added more water and it definitely wouldn’t form to be transferred. It also seems huge for a 10-12” pan. In the oven now so, we’ll see!
I’m having the same experience now. I’m hoping the dough gets better when it’s resting. It is also a very big and I don’t know how it’ll fit in my 12” skillet.
Did you watch the video tutorial? It might be helpful for you: https://www.youtube.com/watch?v=R5s1ecf2oLw
I made this twice with perfect results, with it being a batter-like dough. Today I made again and the dough was a dry ball. So I started over and weighed the flour that I measured…..the flour measured out in 4 1/3 cups was way more than the 520 grams she calls for so I did end up with the batter -like dough this time around….
I am still proceeding with the drier ball of dough and will bake…will see what I get. If nothing else it’ll be croutons!
Did it work?
I know this is an old comment, but I came here to say the same thing. 2 cups didn’t even cover all the flour mix, I had to add more just to get it all combined.
Hoping it rises well and bakes up nicely! It looks delicious in the pictures here! Excited!
same here +2 cups of water worked.
You didn’t say if you leave the bread in skillet to cool or remove to cooling rack
Was this recipe updated? If so it’s even better than I remembered it!
I haven’t made it in a while and it’s delicious and always garners me compliments.
Pingback: EASY NO-KNEAD SKILLET BREAD - Eat Fit Skinny
I love this bread!! I make it all the time and all my friends and family members love it! I was curious…do you cool the bread inside the skillet or take it out of the skillet to cool?
Great recipe; delicious bread. I would tell everyone to make this bread.
So glad you like it!
Tried this bread tonight and it is delicious,
So glad you enjoyed it!
A question: could I use some whole wheat flour in this recipe? I try to use whole grains as much as possible.
I’ve made this bread a couple of times and it’s fantastic. It’s so easy and the results are delicious! The crust is perfect for sandwiches. I highly recommend this recipe.
Thanks so much for the kind words!
My bread making skills are so so but i thought this recipe was something I could do. Wow! The bread looked beautiful coming out of the oven. I followed the recipe but my rosemary was sitting in the back of my pantry for who knows how long. Fresh rosemary would really do the trick. The flavor and texture is perfection. So delicious and so easy to make. This will become my weekly winter staple with soups and stews. Thank you!
I’m so glad you liked it!
I’ve been making this recipe for a few years now…so much I know it almost by heart…why did you change it? I still make it that way and it always comes out great. Anyway just wondering, and thank you for this recipe, its one of my favorite things to make a d so delicious, I always get compliments!
Hi Mary, I’m so happy to hear you enjoy the recipe! Nothing has fundamentally changed with the recipe. I have updated it to be written more properly as I first published this 8 years ago and it was written in pretty vague terms. I updated the instructions to be more clear and to help those who have had some issues with it. The ingredient amounts and general process are the same. The only thing in the process that has changed is proofing the yeast in the water, which is not absolutely necessary and I typically don’t do it anymore. However, you can still do that if you prefer. Hope that clarifies!
Thank you for asking this! I thought I was losing my mind today!
Nice idea, i am gonna try the same for my web site. thanks.
a-1 appliance service
Pingback: Cast-iron skillet recipes for an easy fall meal - cupcoffeeco
So I broiled for TWO MINUTES and the top BURNED!!! It was so sad and it would have been so perfect. I’m going to cut off the top portion but still so bummed. When they say watch closely, do it because I’m so sad 🙁
wow she is so gorgeous, nice pics.
Hello,
Great bread! How would I adjust the recipe to make with whole wheat flour instead? Thanks
Thanks for the post. I’m a big fan of the blog, i’ve even put a little bookmark right on the tool bar of my Firefox you’ll be happy to find out!
That’s awesome! Thanks so much!
Amazing bread, so good! Airy and perfect! Entire family gave it a thumbs up!!
I’m so glad! Thanks for sharing!
Could you bake this on a stove top instead of in an oven? If so, would you need to adjust the cooking time?
No, this recipe needs to be baked in the oven.
I just made this tonight and can’t stop munching it after i sliced it to put in a ziplock bag.
I followed everything, but on 2nd proofing was almost coming off my 12 in. cast iron skillet and it was sticking on the cloth. I might over proof it?
I still baked it and it gave me a very crunchy shell but nice and soft inside. I hope it will stay that way for couple days.
This recipe is fantastic and easy. Now that I’m retired I’m going to take on even greater moves. I also thank the author for adding notes on other possible recipes. Love the site. Thanks
Wow
I made this today . With some modifications to spices
Superb! So yummy! Wish I could post a pic of my bread!
Thank you so much
The cup measurement in your recipe – is it american cup size ( 240 ml liquid in one cup ?)
I didn’t feel it was a super wet dough- definitely more wet than bread that I knead . But not as wet as your video. Nevertheless it turned out delish
Social net working? is that social media, i listen about it but have no information. can you share some more info about it? thanks
garage door repair blog
I made this according to the recipe, adding the fresh rosemary. It was fantastic. Just wondering if this recipe could be used to create cheddar cheese bread (incorporating cheese in the dough as well as on top).
Absolutely! You could add some garlic powder to the dough as well 🙂
Lovely pictures, awesome these are looking so funny interesting but professional and artistic pics.
ez battery reconditioning reviews
Very good recipe, l put everything bagel spice on top which was delicious. I also added black olives and rosemary in the bread as suggested. Yummy.
Yum! Sounds great.
wow i love t hat SO much… can i cut and paste it into my blog?? but give u credit, of course???
Garage Door Max
Nice blog. I think your readership must be high
garage door repair Ajax
Have tried 10 bread recipes. This is absolutely the best, my #1. I weighed out all ingredients. I used instant rise yeast and bread flour. This is the most accurate way to make a recipe. Did not use the rosemary. Baked in a 10 inch cast iron skillet. It browned beautifully. Internal temp 200. Take out if pan to cool on cookie sheet, otherwise it gets soggy on the bottom. Dense, soft, excellent crumb. Made toast with my homemade strawberry jam (oh yes I did!!!). Fabulous. Also did a loaf of cheese bread. Added cheese into dry ingredients. Incorporated very nicely. I have shared with friends who clamor for more.
I make this often and always share a loaf. Thank you for sharing this fantastic recipe!
You’re welcome!
Really appreciate this wonderful post
Finance news
Can you use butter instead of oil?
I don’t recommend it as butter will burn faster than oil.
Which brand of kosher salt are you using?
Morton’s
This bread was so easy! It really does freeze great too! Just as good from the toaster! Thanks for sharing
Glad you like it!
Nice service there are just few who are providing this service great job.
duct cleaning pittsburgh
thanks for giving that type of information.
air duct cleaning pittsburgh
This amazing post impressed me
garage door repair in pittsburgh
Thanks for sharing your thoughts with us.. they are really interesting.. I would like to swervey more from you.
San Jose Garage Door Doctor
This amazing post impressed me
garage door repair burlington
This amazing post impressed me
Cleveland Plumbing Guy
Really enjoy your baking and your style. Happy to subscribe to your YT channel and Instagram!
Thanks for the nice blog. It was very useful for me. I’m happy I found this blog.
emergency garage door repair akron
This bread turned out terrible. A flat disk with no flavor. Deleted the pin so I don’t make it again. Disappointing.
Hi Brenda, I am so sorry it did not work out for you. This recipe has been tested many times by multiple readers with great reviews.
Thank you so much for this recipe! It was so easy and so delicious. I added everything bagel seasoning to the top. Well done!
How many servings does this make?
About 12-15 servings.
I just have to say…. YUMMMMM!!! This break is easy AND delicious! Great recipe! I will definitely be making this again!!
So glad you enjoyed it!
I’ve tried making this bread twice and I still can’t make it right!