Mastering Perfect Pound Cake
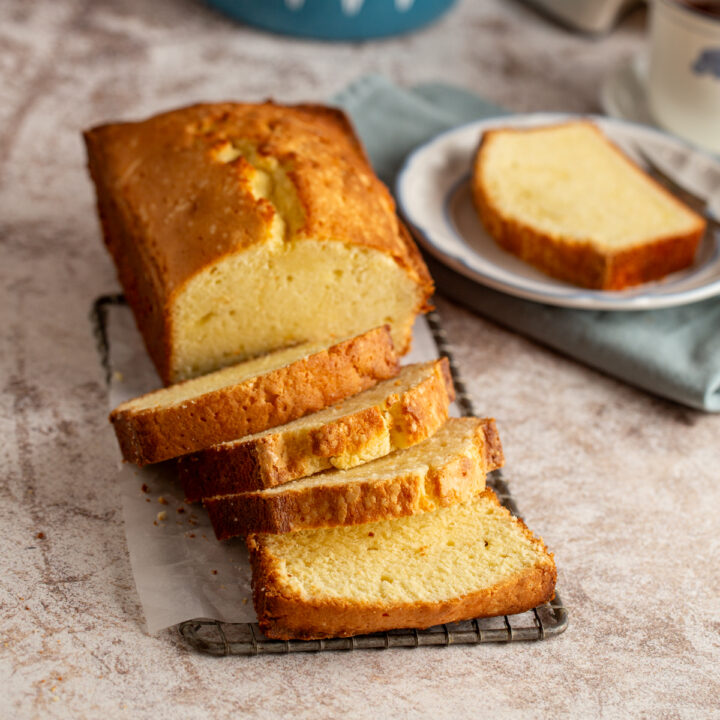
Creating the perfect pound cake requires a little attention to detail. With notes of butter and vanilla, this classic pound cake is buttery, rich, and moist. Serve with fresh berries and whipped cream or use this recipe as a base for endless flavor ideas.

OVERVIEW
- Skill Level: Beginner
- Technique Used: Creaming Method for Cakes
Truly perfect pound cake requires a lot of attention to detail and using the proper ingredients. There are many nuances to this seemingly simple recipe.
Often an overlooked dessert recipe, plain pound cake is one of my favorite things to make – in large part because it’s so simple. A good classic pound cake lends itself to the perfect accompaniment for fresh fruit, a dollop of whipped cream, or scoop of ice cream. But plain pound cake is also a blank canvas for you to paint with any flavor you like!
What makes this the perfect pound cake
- A perfect pound cake is buttery with a perfect crumb and very moist. This recipe gives you all 3!
- Add spices, mix-ins, and other flavors to customize this pound cake to your liking.
- Made using the proper technique, this pound cake is flavorful and dense without being dry.
Flavor Ideas

Marble Pound Cake: Divide the batter in half and stir 10 grams (2 tablespoons) of cocoa powder into one half of the batter. Spoon each batter into the pan, alternating between plain and chocolate. Use a butter knife to swirl the batter to make a marble pattern. Once the cake has completely cooled, top with chocolate ganache glaze.
Lemon Pound Cake: Add 3 tablespoons fresh lemon juice and 3 tablespoons of lemon zest to the sour cream and mix together before adding to the cake batter. Once the cake has completely cooled, top with a simple lemon glaze.
For a lemon poppy seed pound cake, in addition to the above, add ¼ cup poppy seeds to the batter.
Almond Pound Cake: Add 1 teaspoon of almond extract to the wet ingredients. As an optional step, add up to 2 cups of chopped almonds to the batter.
Crumb Cake: Transfer the batter to a greased 9 x 13 inch (23 x 33 cm) pan. Top with a double batch of streusel topping and bake for 45-55 minutes.
How to Master the Perfect Pound Cake

The original recipe for pound cake (and why it’s called pound cake) calls for 1 pound of sugar, 1 pound of butter, 1 pound of eggs, and 1 pound of flour.
The 1:1:1:1 ratio creates a very dense, rich, and somewhat dry cake that most of our modern palates do not enjoy. It was intended to be a lasting cake that could hold up to sitting out for many days without spoiling.
Many modern pound cake recipes greatly deviate from the “true” pound cake in order to meet today’s cake expectations. However, when creating this recipe, I wanted to stick as close to the classic pound cake as possible. You know what they say about learning the rules so you can break them? The goal is to create a cake that highlights the richness and density of the original version while keeping it moist, flavorful, and not too heavy.
Tips for Success
Use High Quality Ingredients
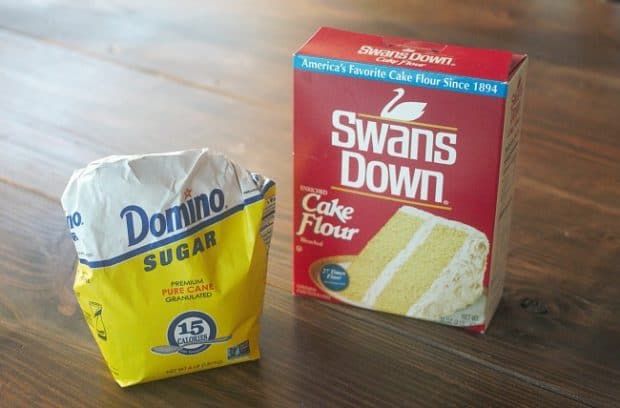
While I don’t typically believe that using name brand ingredients over generic ingredients makes a huge difference in baked goods, for this recipe, it does. With so few ingredients, each one plays a huge role – the quality of the ingredients really does matter for pound cake.
When comparing a generic brand of sugar to a name brand of sugar, such as C&H or Domino, you may notice a difference in the size of the sugar crystals. Generic brand sugar crystals are often much smaller than name brand sugar crystals.. Why does this matter? The rise of pound cake is completely dependent on the sugar’s ability to hold a web of air with the butter. Because of this, smaller sugar crystals can cause this web to break and fall. For best results, use a name brand sugar for this pound cake recipe!
Did You Know: If the package of sugar does not specify “cane sugar,” chances are that it is actually beet sugar? Most generic store brand sugars are beet sugar. While those in the sugar industry claim beet sugar and cane sugar are chemically identical, many baking tests have proven that cane sugar creates much more superior baked goods.
You may notice that this recipe calls for cake flour instead of all-purpose flour. Cake flour has a lower protein content than all-purpose flour keeps the cake tender. It really is the best flour to use for this tender cake.
If you absolutely cannot find cake flour, make your own cake flour substitute with all-purpose flour and cornstarch. If you make this substitution, sift the flour and cornstarch 3 times before adding it to the recipe. While that might seem excessive, it truly helps create a more accurate substitution that closely mimics cake flour.
Check for Proper Oven Temperature
It is very common for an oven to not be properly calibrated. Many ovens heat too low or too high compared to what the temperature is set at. This can vary greatly from oven to oven, so I recommend buying an oven thermometer to test your oven’s temperature. It’s a small investment that makes a huge difference for pound cake and anything else you make!
Pound cake, in particular, bakes at a fairly moderate temperature. An oven that is too hot will cause the cake to set too quickly and prevent the cake from rising. An oven that is too cool can cause the cake to fall because it won’t set quickly enough.
Prep Before Starting (Mise en Place)


Mise en place, or the concept of “everything in its place,” is key to most any baking recipe. It is especially important with pound cake because ingredient temperature matters.
Read through the recipe fully, measure out all of your ingredients, and gather any equipment you might need before starting. I like to line my ingredients up in the order that they will be added into the recipe. This step serves two purposes: 1) it ensures that you have all of your ingredients on hand before you start the recipe and 2) ensures you do not forget to add any ingredients into your batter.
Baking Tip: If a recipe is written properly, the ingredients will be listed in the order they will be needed.
Make sure your ingredients are at the proper temperature

A simple classic pound cake recipe does not include any chemical leavening (baking powder or baking soda). Instead, this cake relies solely on the air that is mixed into the batter during the creaming process for it to rise. This process is known as physical leavening.
It is important that the butter, eggs, and sour cream are at room temperature, around 70°F (21°C), before starting the recipe. The physical leavening process happens as the butter is beaten with the sugar (also known as creaming) and air is trapped in a web of sugar and fat. If the ingredients are too cold, the structure will remain weak causing the batter to break.
Baking Tip: Many kitchens are warmer than 70°F (21°C). Make sure that your butter is soft but still solid when you begin a recipe that calls for softened butter. If your butter is too warm and starting to melt it can greatly impact the recipe.
Use the Proper Creaming Technique

Properly creaming the butter and sugar together is crucial for perfect pound cake. This creaming technique is not difficult at all, it just requires some patience.
Start with the room temperature butter and sugar and beat it in the bowl of your stand mixer on medium speed for about 5 minutes until the mixture becomes very light and fluffy. If you don’t have a stand mixer, you can use a large mixing bowl and hand mixer. Scrape down the bowl with a rubber spatula to evenly incorporate the ingredients. The purpose of this process is to force air into the mixture that will leaven the cake. You do not want to rush it.
In the oven, the cake will rise when the air bubbles expand and as the steam generated from the water evaporates off the cake.
After the butter and eggs have been properly whipped, mix in the vanilla extract.
Add the Eggs Very Slowly
Now that you have forced air into the butter and sugar, it is time to add the eggs. The way in which the eggs are added is equally important.
In order to create an emulsion, the eggs must be added very slowly. Keep the mixer running on medium speed and add the eggs one at a time. The process of incorporating the eggs should take about 5 minutes in total. Rushing this process will cause the emulsion to break and curdle and you will have a dense cake on your hands.
Emulsion: An emulsion is a mixture of two liquids that are normally unmixable. In this case, butter is already an emulsion because water is suspended in fat when it is created. Because eggs have a high percentage of water content, another emulsion is created when they are incorporated into the fat/sugar mixture.
Do Not Over-Mix the Batter
“Do not over-mix” is included in so many recipes, and this instruction is especially important when you are working with delicate baked goods as well as baked goods that are being leavened with air. Pound cake falls into both of these categories.
Alternate adding the dry ingredients and sour cream in stages, starting and ending with the dry ingredients.
Once flour is added into the batter, only gently work it and stop mixing once the flour is incorporated because gluten formation begins as soon as flour is hydrated. The more the batter is worked, the more the gluten structure will develop. For very tender cakes, you want to limit this as much as possible. Additionally, you don’t want to deflate the air that you worked so hard to beat into your butter.
Bake to Proper Doneness

Many baking recipes state that the cake is done when the tester inserted into the middle of the cake comes out clean. This instruction actually leads to an over-baked cake.
Instead, you want to remove the cake from the oven when the tester comes out with a few moist crumbs. The residual heat will continue the cooking process even after the cake is out of the oven. If you wait to pull the cake out until it is completely dry in the middle, you will have a very dry pound cake.
Allow to Cool Properly
Once your cake is done baking and you have taken it out of the oven, immediately remove it from the pan and place it on a wire rack to cool completely. If the cake stays in the loaf pan to cool, the heat will be trapped in the pan and will steam the cake around the edges, resulting in an undesirable texture.
Quickly moving the cake out of the pan also ensures your cake does not continue cooking for too long, helping to prevent an overdone cake.
Baking Tip: Line your loaf pan with parchment paper so you can easily pull the cake out of the pan once it is done baking. Watch the video on how to easily line a loaf pan!

FAQ
WHY IS IT CALLED POUND CAKE?
In the original pound cake recipe which dates back to 1700s Europe, it called for a pound of each ingredient: flour, butter, sugar, and eggs. I slightly changed those ratios and added sour cream for moisture.
How do I keep pound cake moist?
Although pound cake is a dense cake, that doesn’t mean it should be dry. The sour cream in this recipe is what makes the pound cake rich but also keeps it very moist. When storing the cake, keep it at room temperature (or freeze). Refrigerated pound cake tends to dry out.
HOW TO STORE POUND CAKE
Wrap fully cooled cake tightly in plastic wrap and store at room temperature for up to 3 days or in the freezer for up to 2 months. While pound cake can technically be stored in the refrigerator to extend the shelf life, the flavor will diminish and the texture will dry out.
MORE RECIPES FROM BAKER BETTIE!
If you loved this recipe, you might like to try these other delicious cake recipes!
Perfect Pound Cake
Creating the perfect pound cake requires a little attention to detail. With notes of butter and vanilla, this classic pound cake is buttery, rich, and moist. Serve with fresh berries and whipped cream or use this recipe as a base for endless flavor ideas.
Ingredients
- 215 grams (2 cups minus 2 tablespoons) cake flour
- ¼ teaspoon fine sea salt
- 226 grams (1 cup, 2 sticks) unsalted butter, room temperature
- 300 grams (1 ½ cups) granulated sugar
- 1 teaspoon vanilla extract
- 4 large eggs, room temperature
- 60 grams (¼ cup) sour cream, room temperature
Instructions
Prep:
- At least 30 minutes before mixing the batter, take the butter (226 grams/ 1 cup), eggs (4 large), and sour cream (60 grams/ ¼ cup) out of the refrigerator to come to room temperature. It is especially important that the eggs are room temperature for this recipe due to the large quantity. Measure out the rest of the ingredients.
- Position an oven rack to the center position. Preheat the oven to 350°F/175°C.
- Prepare your pan loaf pan with non-stick spray and parchment paper.
To make the cake:
- Sift the cake flour (215 grams/ 2 cups minus 2 tablespoons) into a large bowl and add the salt (¼ teaspoon). Whisk together and set aside.
- In the bowl of a stand mixer fitted with the paddle attachment, or in a large bowl with a hand mixer, combine the butter and sugar. Cream together on medium speed until very light and fluffy, about 5 minutes. Stop the mixer and scrape down the sides of the bowl several times during mixing. The mixture should be very pale yellow after mixing.
- With the mixer running, add the vanilla extract (1 teaspoon). Next, add in one egg (4 large eggs total), at a time mixing on medium speed and allowing each egg to fully incorporate before adding the next. Scrape down the sides of the bowl frequently. Do not rush this process.
- Alternate adding the dry ingredients into the bowl in three additions with the sour cream in two additions, starting and stopping with the dry ingredients. Mix on medium speed in between each addition until fully incorporated.
- Transfer the batter into your prepared pan and bake for 55-65 minutes until a cake tester inserted into the middle of the cake comes out with moist crumbs.
- Set the pan on a cooling rack and allow the cake to cool for 20 minutes before turning out of the pan to fully cool.
- Wrap leftover cake in plastic wrap after fully cooled and keep at room temperature for up to 3 days.
Notes
To Make Into a Bundt Cake
- Prepare a 12-cup Bundt pan or a 10-inch (25 cm) tube pan with non-stick spray. Add a few tablespoons of flour to the pan and tap it all around, dumping out any excess.
- Make a double batch of the cake batter (note, this will be a very large quantity and will require a mixing bowl at least 5 quarts in size).
- Bake at 350°F/175°C for 1 hour 10 minutes - 1 hour 20 minutes, until a cake tester inserted into the middle of the cake comes out with moist crumbs.
Recommended Products
As an Amazon Associate and member of other affiliate programs, I earn from qualifying purchases.


84 Comments on “Mastering Perfect Pound Cake”
This was a really good and fun tutorial. Thanks so much for putting the time in to share with us, and for the little tips I didn’t know. Just had a tooth pulled so I won’t be making this in the next few days, but once I’m feeling better . . . mmmmmmm. I think it would be perfect with my berries I have stashed away in the freezer. I look forward to your next tutorial!
Hi Julie! I hope you are starting to feel better! Having a tooth pulled is not fun! I can’t wait to hear if you try and it and how it is with your berries!
Always loved to bake pound cakes but needed your tips for perfection. Mother used to bake pound cakes in tube pans and got crunchy tops. Everyone raved about her cakes. They were awesome. Loved your post.
Hi John! What a lovely memory of your mother! Do you know if she sugared her tube pan to get her cake to have a crunchy top? It sounds lovely! If you do want to make this in a tube pan make sure you double the recipe!
Can this recipe be used in a tube pan or bundt pan?
Hi Cheryl,
This recipe would need to be doubled if you want to use a tube or a bundt pan. I haven’t specifically tested it that way, but I would assume it would need a longer baking time. Let me know if you try it and how it turns out!
Any suggestions for mini loaves time/temp?
Hi Erinn, I have not tested this with mini loaf pans. I would guess 350 F for about 20-25 minutes. But definitely watch them and test them to see where they are at in the process!
Hi there.
Can you tell me what the British equivalent is of your cake flour?? Do I just use self raising flour, like I do in my cakes here in UK or is the cake flour imperative?? Thank you
Hi Wendy!
Great question! Self-raising flour is a completely different animal. I’m actually working on a post about that coming up on Thursday! Self-raising flour is plain flour that has baking powder and salt mixed throughout it, while cake flour is a lower protein flour that has been more finely ground. If you cannot find cake flour or pastry flour (which is very similar and would be a good substitute), you can use make a cake flour substitute with plain flour (all-purpose flour) and cornstarch. The cup for cup ratio for this substitution is 1 cup all-purpose flour minus two tablespoons and replace that with 2 tablespoons of corn starch. After you measure it, sift it 5 times. I know that sounds insane, but it is necessary to be a close substitute. So for this recipe you would want to measure out 1 1/2 cups + 1/2 tablespoon of plain flour & 3 1/2 tablespoons of corn starch and sift those together! I will add a note in the recipe about making this substitution!
I know I’m a little late to the game, and I’m just learning this myself, but there’s a definite difference between self raising flour in the UK and self rising flour in the US. There is no salt added to self raising flour! It is the equivalent of flour with baking powder added while self rising flour has baking powder and salt added.I almost made the fatal mistake (to my scones) of using self rising instead of self raising.
I made this yesterday for family. Topped if with fresh strawberries and whipped cream. It was a big hit! Your detailed directions were wonderful and the reason for my accomplishment of the perfect pound cake.
Hi Janet! That makes me so happy to hear! I love that you took the challenge and perfected it. Amazing job!
I made this pound cake for my mother’s birthday yesterday and let me tell you…… It was ABSOLUTELY AMAZING and everybody LOVED it so much that there was NOTHING left! We ALL had 2 pieces….. Thank you for posting this recipe and explaining the difference of genetic sugar and the all purpose flour! Go buy “cake flour, & Dominion sugar” like she says. Thanks again and I’ll be baking another one REAL SOON .
That is so great to hear Tanya! I’m so glad everyone loved it! <3
This is a great tutorial! Very detailed and organized. I really appreciate the work put into this. Would I be able to use two cake pans with this recipe?
Hi there! This recipe is not enough to fill two cake pans. To make 2- 9″ round cakes, you will need to double this recipe.
Hi, Kristin!
I live in Prescott, Arizona. The elevation here is 4,700 feet.
Would you be able to tell me the adjustments I need to make to the above recipe?
Thank you!
Hi Dori! Unfortunately, I do not have any experience with high altitude baking. But according to my culinary school book these are the adjustments I would suggest: Decrease the sugar to 1 cup + 2 TBSP (224 gr), increase the water to 2 1/2 TBSP, and increase the oven temperature to 375 F. I hope that helps!
I am completely amazed how absolutely gorgeous this pound cake looks, tastes perfect just perfect.
I don’t say this lightly. We had a wonderful catering Co. and appreciate good easy wonderful foods.
Thank you so much for how you explained the steps a d tips are great.
Made this for my sweet husband 50th bday!
Complete Success! He said His grandmother would be proud- huge compliment! WHOOHOO!
Wow Dorothy! This comment means so much to me. Thank you so much. I am beyond happy that you enjoyed this recipe and that it was a hit for your husband’s birthday! <3
Would you please double the recipe for me. Mine is just a little different.
Looking forward to this recipe, but yikes. I’m using cake flour and sifted it. Noticing there’s more than the recipe calls for post-sifting. Do you measure the flour pre or post-sifting? Or do do even sift at all? Help and quick! Lol
Hi John, just seeing this comment as I was taking some time with family over the holidays. You never want to measure your flour after sifting it unless a recipe specifically calls for it which it rarely does. Sifted flour will be much more volume than pre-sifted flour. So you want to measure your flour and then sift it. Hope that helps!
what if i wanted to add citrus juice to this recipe? do i take out a yolk or two to make up for the liquid? thank you!
Hi Mary! If you want to make this a citrus pound cake my best recommendation would be to use zest in the cake and then use the citrus juice to make a simple glaze to pour over the top. I would suggest zesting 1 large or 2 small lemons and add that into the butter/sugar mixture when creaming it. The fat will really carry the flavor through the cake. You can then make a simple powdered sugar glaze like this one with the lemon juice.
Can u double a pound cake recipe?
You absolutely can! Let me know it goes!
Hi, Can this be bake in a vintage glass bread pan? The pan size is 10×5, Thank you for sharing.
Hi Evy! Unfortunately, glass pans are not ideal for cakes. The way the heat is conducted makes the cake brown a lot on the outside while not getting enough heat to the inside. If you do want to try it, I recommend turning the heat down by 25 F and watching the cake closely. But for best results, a light grey metal pan is best.
Thank you so much for replying back with this great information. I have no ideal! Thanks again: )
I’ve made it twice and twice the center has collapsed, what am I doing wrong? The taste and texture are great.
Hi Ronald, so strange. Are you testing the center? I have a feeling it might not be baked all the way through when you pull it. Try increasing your bake time by 3-5 minutes. It’s also possible that your oven is not heating properly. Do you by chance have an oven thermometer to check if your oven temperature is heating to what you have it set at? One other thought, are you by chance at high altitude?
Thank you for the quick reply. I’m not at high altitude. But you maybe right about my oven not heating correctly. I’ll try cooking it 3-5 minutes longer. Once again than you for your quick reply.
You’re welcome! I hope it helps!
Hi Bettie! Love your site.
I was thinking about adding dried fruits to the pound cake, i.e. dried cherries then make a glaze with cherry juice. What changes , if any should I make to the recipe and how much and when should I add the dried fruit?
Hi Dawn! You shouldn’t need to make any changes if you want to add dried fruit to your cake! Gently fold it in right at the end! I would add about a cup to start!
I am wondering since you are so detailed and precise why you haven’t specified whether the loaf oan is metal or glass?
Hi Jo, thank you for bringing this to my attention. Sometimes I just forget what might not be common knowledge and overlook details like this. I try to be as detailed as possible, but it is easy to forget certain things might not be common knowledge when you have baked for a long time. Class pans really aren’t great for any cakes or most baked goods. You want to reserve glass pans for savory dishes, like roasting chicken, or for casseroles, and especially for eggs as they can react with metal. Metal pans or ceramic pans are preferred for most all baked goods. I will add to the recipe details. Hope that helps!
I assumed it would be metal but I also have several glass loaf pans. When I use them, I adjust the temp to 325° and usually need to bake longer, 15-20 min depending on what I’m baking…i.e. Banana bread, etc. Use the old tried and true toothpick method but don’t want it dry either. I just made your recipe today and it was great. With metal pan! Thank you. Forgot to take a pic. Served it with whipped ctream, strawberries and blue- berries for a red white and blue dessert for Memorial Day dinner!
Hi Jo! I’m so glad tho hear that you enjoyed the cake! Sounds like the perfect memorial day offering!
My old Sunbeam Mixmaster doesn’t have a paddle attachment, just regular beaters. What adjustments should I make to account for this fact?
Hi JoJo! The regular beaters are fine. Those are kind of an in between the paddle and a whisk. You just don’t want to use a whisk attachment!
Many thanks. I’m looking forward to trying this recipe and more.
Heyyy! I’ve a very inportant question.How should I replace butter I live in Pakistan here 2ounces mean half cup so 8ounces would be 2 cups so should I use 4ounces then?also what about other recipes? Kindly answer this I have an exam
Hi Shanzey, 1 cup is a standard 8 fluid ounces. So for this recipe you want to use 226 grams which is 8 fluid ounces and 8 ounces by weight. Hope that helps!
I am surprised that you did not add to rap your pound cake in plastic wrap and leave it sit overnight….I do that all the time…I would like you to try it one time and let me know what you think…something wonderful happens…it is the only way to store a pond cake…IMHO
I’ll try it next time Maria!
Please explain sifting flour. I sift, then measure, because flour has been sitting in the box and is packed. Wouldn’t it be a truer measurement after sifting? I’m confused.
Reading back over a prior comment…..here’s my concern. You state you never want to measure flour after sifting because it produces more volume. So, I measure three cups, then sift. Ok, got that, but it’s confusing because, based on your comment, I will have more flour than three cups after sifting.
Hi Cynthia! This is exactly why I am a huge proponent of measuring by weight because 120 grams of flour will always equal that whether your sifted it before your measured it or after you measured it. The proper way to measure flour by volume is to take a spoon and stir it up so that it isn’t compacted from sitting there. Then lightly spoon it into the cup, overfilling it, then level it off. Making sure you do not pack it down while measuring. Then if you are going to sift it, you will sift it after measuring it. Yes, the volume will be more, but it is the correct amount. This is why measuring by volume can create so many issues. It’s so easy to get too little or too much flour into the measuring cup because of all these little nuances. If the recipe is written properly it is written to be measured with pre-sifted flour unless the recipe states “1 cup of sifted flour.” However, most recipes are not written this way. Hope that helps!
Hello!
What a beautiful looking cake, and but the reviews it tast good too!
Wondering about how long to cool the cake in the pan before turning it out.
You say to allow cake to cool completely, but then it says if left in too long it will make cake steam.
Exactly how long do you let the cake cool in the pan before turning it out to complete cooling on a rack?
Thank so much and I look forward to baking this cake.
Bettie, I see in your instructions and your pound cake recipe that you suggest mixing all-purpose flour with corn starch. You reference “the amounts listed in the notes section of the recipe”.
I also see it with an asterick in your recipe. However, under “Notes” I do not see any reference to this. Please give me the amounts and instructions ASAP, as I am making the cake today!
I made your cake last night and it came out wonderfully! I had one issue with the top of the cake. It seemed to form a skin that cooked and lifted somewhat from the actual cake. As it cooled it broke and collapsed and when served, separated from the cake body. When the cake was still batter, I did level it a little with my spoon. Should I let it take it’s own level? What did I do? The cake was still very delicious! Thank you for your tutorial!
Do you need to rotate pan? Also, which rack position do you bake the pound cake? We are talking precision here for it to be perfect. Thank you.
Thank you for this, once again, very informative post. I do have a question: “Once the flour is added into the batter, you want to gently fold it in. As soon as it is incorporated throughout, stop mixing.”
I always end up with lumps of flour when I add it to my batter, even when I sift the flour first. So I usually end up overmixing. Any ideas on how I can solve this issue? Thank you
I am considering adding cream cheese (4 oz) to this recipe, what do you think?
I would not suggest it. This recipe hasn’t been tested with a big change to the ingredients like that. If you are looking for a pound cake made with cream cheese I suggest specifically searching for a recipe that calls for it.
Hi,
I am new to your site and I have to say your pound cake looks great. I’m 72 and have been baking a long time. I moved recently but my kitchen aid was left behind. My question is will the cake still be ok if I use a hand mixer. I so miss my kitchen aid.
Thank you
Patti
Yes! A hand mixer will work just fine but you’ll definitely give yourself an arm workout. Thanks for joining my site!
I love to bake,thanks for the great information on flour type,butter usage whoo I learned so much today thank you
You’re welcome!
where in the notes is the recipe for the substitution for no cake flour using all purpose flour and corn starch? I don’t see it
My apologies! I just re-added that note in the Notes section.
Does it make a difference using Irish butter like Kerrygold that has less water content? I prefer it because I think the flavor and quality are better, but do I need to add a bit of water to get the rise I want?
Can I add maraschino or dried cherries to this recipe for pound cake. Any adjustments if any?
You can!I would recommend dried cherries so you don’t add too much moisture. Carefully fold them into the batter before baking.
Thanks so much for including all the explanations of the science behind this bake! So informative. I have read and reread this article, and I do have two clarifying questions,. You write: “Compare a generic store brand sugar to a name brand sugar, such as C&H or Domino, and you may notice that the sugar crystals are much smaller.” Do you mean that the name brand sugar crystals are smaller, or the generic store brand sugar crystals are smaller? Then, “a smaller sugar grain is significant because it can cause this web to break and the cake to fall.” Do do you mean that it’s BETTER to use the smaller sugar crystals, or is it better to use the larger sugar crystals? Thanks ever so much!
Would this recipe fill a lamb cake mold?
We made six of these yesterday and two came out still raw in the middle any idea why? If I had put back in the outside would have been over done.
Did you bake them all at the same time? I wonder if those 2 were in a bad spot in the oven. I would say to bake no more than 2 at a time for even baking. I would also check your oven temperature using a thermometer to make sure it is correct.
Hi Bettie. I’m ready to bake your pound cake but have a question about the flour. I’m from Georgia and we all swear by White Lily flour. It’s my understanding that cake flour has a 6-8% protein content and White Lily has an 8% protein content. Can I use my White Lily all purpose flour in place of the cake flour? Thank you for all the invaluable lessons you post on all your sites. You have opened a new venture for me with measuring ALL my ingredients. I love this new process.
Hi This Pound was a winner it turn out Perfect like it name a Perfect Pound it my go to cake recipe just putting the eggs in one tablespoon at time it really help it and ris3 up so high without any baking powder or soda it A PERFECT POUND CAKE
Thanks for sharing! I’m so happy you enjoyed it!
I just discovered vingar in my bread recipes. Can I also use it in cake too??
Hi,
What is the recommended loaf pan size for this receipe?
Thanks!
Thank you so much for your detailed directions. I learned the science behind baking a lot. I like your pound cake. But I personally prefer the one you posted before. I wonder if there is any way to access the previous one?
Same article first says to immediately remove the cake from the pan and place it on a wire rack to cool completely. Says If the cake stays in the loaf pan to cool, the heat will be trapped in the pan and will steam the cake around the edges, resulting in an undesirable texture.
Then later it says to set the pan on a cooling rack and allow the cake to cool for 20 minutes before turning out of the pan to fully cool.
Great!!
You said to double the recipe for tube or Bundt pan does that mean I should use 8 eggs.
Yes! Double every ingredient listed in the recipe.
These are excellent, spot on tips! Thank you!
You’re welcome!
I followed the directions. The cake was not as fluffy as in the picture. Was I supposed to put some baking powder. I wandered if the absence of baking powder was omitted in the directions. The cake had a very food flavor. The cake was very easy to make, that is something I wanted. I made it while my sister was taking a shower.
Hi Maria, pound cake is meant to be very rich and dense, it’s not a fluffy cake. There is no leavening agent like baking powder in a pound cake recipe. Was it moist and flavorful?