New York Cheesecake
Authentic New York Cheesecake is a tall, dense, and incredibly creamy style of cheesecake made with sour cream. The techniques used for mixing and baking this classic cheesecake create the best cheesecake that doesn’t crack, no water bath required!

New York Cheesecake Overview
- Difficulty: Intermediate
- Components Used: Classic Graham Cracker Crust
New York Cheesecake is an incredibly creamy and dense style of cheesecake that is a bit different from other cheesecakes due to the way it is baked and because we use sour cream and flour in the filling.
Perfect Cheesecake Without a Water Bath
One of my favorite things about a New York style cheesecake is that it is baked without a water bath, unlike many other cheesecake recipes. A water bath can be frustrating because the water can leak into the pan and ruin the cheesecake.
New York cheesecake initially bakes in a very hot oven for a short period of time, then remains in a low temperature oven for the rest of the bake time. This baking method forms a skin on top of the cheesecake which sets the top in place, keeps the filling dense, and prevents cracking on top – all without a water bath!

INGREDIENT FUNCTIONS
- Cream Cheese is the key filling ingredient and provides the main structure and flavor for the cheesecake. Full-fat cream cheese is the best choice for the creamiest, most flavorful cheesecake.
- Sugar sweetens the cheesecake filling.
- Flour is used to stabilize the filling and keep it dense. A little goes a long way!
- Eggs are the binding ingredient and help create a silky smooth texture.
- Sour Cream adds a slight tang and creaminess to the filling.
- Vanilla and Lemon Zest create the iconic classic cheesecake flavor.
How to Make New York Cheesecake
Before you start making the cheesecake, make sure the cream cheese, sour cream, and eggs are at room temperature. Let them sit out for at least an hour or more before getting started. This is extremely important for the creamiest and best New York style cheesecake!
Step 1: Make the Crust


Mix the graham cracker crumbs with the melted butter and sugar until well combined, then press the mixture into the bottom and a little bit up the sides of the springform pan. Bake the crust until it is set and slightly toasted.
Step 2: Prepare the Filling


Cream together the softened cream cheese, granulated sugar, and flour. This small amount of flour is unique to New York style cheesecake recipes and gives the cheesecake a little more structure.

Mix in the eggs one at a time until they are well incorporated. The eggs will bind our cheesecake together and create a silky smooth texture.

Mix in the sour cream, lemon zest, and vanilla extract. Along with the lemon zest, the sour cream adds a bit of tang to the cheesecake. While totally optional, I think the zest adds the perfect flavor (and it won’t taste like a lemon cheesecake!).
Step 3: Bake the Cheesecake


Pour the cheesecake batter on top of the crust in the springform pan (no need to wait for the crust to fully cool). Place the filled pan on a sheet pan. The batter should come almost all the way to the top of your pan.
Initially bake the cheesecake at a really high temperature, then turn down the temperature and let it finish baking. This burst of high heat sets the top of the cheesecake while the low temperature will slowly cook it so it stays creamy and the top doesn’t crack.
Step 4: Cool the Cheesecake
The most difficult part of making cheesecake is waiting for it to cool! Once the baking time is over, turn off the oven and keep the cheesecake inside with the door shut for about an hour. This ensures that the cheesecake doesn’t cool too quickly, further preventing any cracks from forming.
Chill the cheesecake in the refrigerator for at least 6 hours (preferably overnight!) before removing it from the pan and slicing it.
Step 5: Serve!

While New York cheesecake is delicious on its own, try topping it with fresh strawberry sauce, hot fudge sauce, caramel sauce, or berry sauce (use any fresh fruit!).
How to Store Cheesecake
Cover the cheesecake with plastic wrap and refrigerate it for up to 1 week. To freeze, freeze the cheesecake uncovered until solid. Wrap it tightly in plastic wrap or aluminum foil and freeze for up to 3 months.
Tips, Tricks, and Techniques
- It is super important to use room temperature ingredients before making the cheesecake filling. Room temperature ingredients ensure the filling has an incredibly creamy texture!
- When mixing the cheesecake filling, make sure to use the paddle attachment, not the whisk attachment. Cream cheese can separate if it is not beaten properly.
- This cheesecake filling is enough to fill a 9 inch (23 cm) spring form pan all the way to the top. It won’t overflow because the initial blast of heat prevents it from becoming any taller.
- Cheesecake is a great make ahead dessert recipe because it needs so much time to bake, cool, and chill. Refrigerate the cheesecake for at least 6 hours before slicing so the filling has time to fully set.
- With a simple graham cracker crust, this classic New York cheesecake is truly amazing on its own and makes for a great canvas for fresh berries, chocolate sauce, strawberry sauce, or caramel sauce!
- For a flavorful twist, swap the traditional graham cracker crust for an oreo crust, shortbread crust, or gingersnap crust.
MORE RECIPES FROM BAKER BETTIE!
If you enjoyed this recipe, you might like to try another cheesecake dessert that’s perfect for Valentine’s Day, Mother’s Day, or any other special occasions.

New York Cheesecake
Authentic New York Cheesecake is a tall, dense, and incredibly creamy style of cheesecake made with sour cream. The technique for mixing and baking this cheesecake makes it truly the best!
Ingredients
For the Crust
- 186 grams (about 12 sheets) graham crackers, or another type of crunchy cookie like a digestive biscuit or gingersnap
- 50 grams (¼ cup) granulated sugar
- 113 grams (½ cup, 1 stick) unsalted butter, melted
For the Filling
- 904 grams (4- 8 ounce packages) full fat cream cheese, room temperature
- 300 grams (1 ½ cups) granulated sugar
- 22 grams (3 tablespoons) all-purpose flour
- 4 large eggs, room temperature
- 240 grams (1 cup) sour cream, room temperature
- 1 teaspoon vanilla extract
- 1 teaspoon lemon zest
Instructions
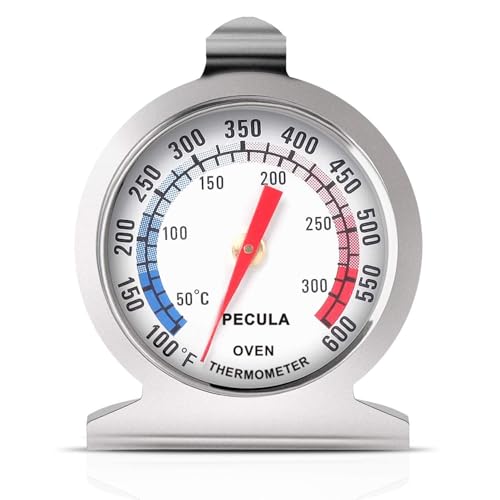
Note: It is extremely important that your oven is truly heated to 475°F/250°C before baking the cheesecake. An oven thermometer can help determine if your oven is heating hot enough. It usually takes at least 20 (sometimes longer) full minutes for ovens to reach a temperature this high. It is also essential that you do not open the oven door during the baking process. Letting out the heat can cause the cheesecake to not set.
Prep:
- 1 ½ hours before preparing the cheesecake, set out the cream cheese (904 grams/ 4- 8 ounce packages), eggs (4 large), and sour cream (240 grams/ 1 cup) to come to room temperature. It is extremely important for a creamy cheesecake that your ingredients are not cold.
- You will need a 9 inch (23 cm) spring form pan for this recipe. Right before starting the crust, preheat your oven to 375°F/190°C and position your oven rack in the center position. (Do not use the convection setting if you oven has it for this recipe)
Prepare the Crust:
- Place the graham crackers (186 grams/ about 12 sheets) in a food processor and pulse until you have cookie crumbs. Alternatively, you can put them in a plastic zipper bag and use a rolling pin to roll back and forth until they are crumbs.
- Place the cookie crumbs in a medium bowl and mix with the granulated sugar (50 grams/ ¼ cup) and melted butter (113 grams/ ½ cup). Firmly press the crust into the bottom and about 1 inch (2.5 cm) up the sides of the spring form pan.
- Bake the crust at 375°F/190°C for 8 minutes. Set the crust aside to cool while you prepare the filling.
Prepare the filling:
- Increase the oven temperature to 475°F/250°C. It needs to be preheating for at least 20 minutes before the cheesecake goes in.
- In the bowl of a stand mixer fit with a paddle attachment (or in a large bowl with a hand mixer) combine the softened cream cheese, granulated sugar (300 grams/ 1 ½ cups), and flour (22 grams/ 3 tablespoons). Beat on medium speed for a full 6 minutes until light and fluffy.
- Beat in the eggs one at a time while the mixer is running on low speed. Add the sour cream, vanilla extract (1 teaspoon), and lemon zest (1 teaspoon). Turn off the mixer and scrape down the sides and bottom of the bowl to ensure all of the mixture is evenly combined.
- Pour the mixture into the prepared crust. It will completely fill up the pan and then place the pan onto a sheet pan. Place the sheet pan on the center rack and bake for 8 minutes.
- Leave the door closed and reduce the oven temperature to 200°F/93°C for 1 hour. Turn the oven off (do not open the oven door!) and leave the cheesecake in the off oven for 1 more hour.
- Remove the cheesecake from the oven and let cool at room temperature. Move to the refrigerator and chill for at least 6-8 hours (or overnight) before removing the sides of the pan and slicing.
Notes
*Recipe adapted from The Baker's Manuel New York Style Cheesecake
Recommended Products
As an Amazon Associate and member of other affiliate programs, I earn from qualifying purchases.


175 Comments on “New York Cheesecake”
I would love to use this recipe for a cheesecake, but would also like to add the flavor of lemon to it as well as create a raspberry puree for a topping. I grow my own lemons which are close to 5lbs each, so I get more juice and zest than I know what to do with! If I wanted to add lemon flavor to this, would adding fresh lemon juice change the consistency enough that I’d have to change any of the other amounts of ingredients?
You can add it! I would add 2 TBSP lemon juice and 2 TBSP lemon zest to your filling. You don’t need to change any ingredients.
I do a New York cheese cake every Christmas. I am excited to try your recipe with the flour and extra cheesecake and sour cream. The top breaking is one of my concerns every year. Thanks
Can I half this recipe?
This was absolutely delicious thank you. Do you have oven temp and time for a 6×3 inch spring form pan? I just to scale it down.
which shelf should be used to bake the cheesecake? It is usually the middle. Is that correct?
Correct!
I made the cheescake today. Followed the instructions, but I have a few cracks . I also noticed my oven was a bit too hot so I reduced the temp slightly.
Great article
Could you add Oreos to this recipe or other mix in?
Cami add mini chocolate chips to this cheesecake
Yes you can!
Of course! I would suggest adding about 1 cup of chips.
Hey love your recipe but quick question, what if I’m allergic to sour cream and yogurt can i substitute it with milk or something else??
I’ve made this several times and I love the flavor and texture but it always cracks.
That’s a pretty common problem. Do you have an oven thermometer? If so, I wonder if that’s the case that your oven is either too hot or not warm enough. That’s sometimes the culprit.
I really love this recipe. The smoke one responder noted was likely caused by butter running out the bottom of the pan and onto the bottom of the oven. I have had the same problem. I tried putting the springform pan directly on a sheet pan but then the cheesecake cracked. I found putting the sheet pan on the lower rack catches the butter and the cheesecake does not crack. Hope this helps.
Thank you for the tips! It’s greatly appreciated.
This is soooo good!! I had never made a cheesecake before, had always heard they were too fussy and difficult to make. Well, this one came out perfect and the taste is awesome! Followed the directions as written and watched the video. Thank you so much for these great recipes, and the videos really help me. I’ll be making this again.
I’m so glad you like it!
About to try this version Cheese Cake out for the 1st time right now !!!
Enjoy!
The cake it self was wonderful but even though I paid close attention to instructions, I still had 2 huge cracks on the top. So I covered it up
with raspberries and whip cream and everyone loved it.
I am concerned that the oven will remain too hot after reducing from 475 degrees F to 200 degrees F. After reducing the temp to 200 degrees F can I open the oven and allow the heat to escape or trust that it will reduce without my fretting? I really want to make this cheesecake.
This recipe has been tested many many times! You want it to slowly cool down or it will crack. If you open it, it will cool down too quickly.
I followed directions and confirmed temperatures- my cheese cake looks over browned and cracked. It rose a couple of inches over pan height. I hope not too dry or burnt. I won’t follow these temperatures again.
I’m sorry it didn’t work out! How did it taste? Did you use the center position for your oven rack? Did you leave the door closed the entire time?
This is the best cheesecake recipe I’ve tried… and I’ve tried a bunch!! The texture and flavor are spot on! One thing I do with any cheesecake recipe is a water bath – I’ve never had a cheesecake crack, not once – I use the water bath with this recipe and it works great as usual. The only thing that doesn’t work for me is only cooking it for an hour 200° F after turning it down from 475° F. It’s probably just my oven but I find the very middle to be a little runny if I don’t cook it longer and turn the temp up just a bit. I know it’s fine if the middle is runny because the eggs are cooked through but I like a fairly firm cheesecake and cooking it a few extra minutes with a slightly higher temp seems to make it be just right for my liking. Other than that, it’s a great recipe that I’ve used for at least a year now and will continue to use!
I’ve got my cheesecake baking right now. Following instructions to the letter. I’m wondering if you would advise me about the best time to circle cut cake from the pan before releasing clasps on pan. Should I cut before placing it in the refrigerator or after it’s gotten cold for six plus hours? I plan on wrapping it with plastic wrap afterwards and store in fridge until Christmas Eve. Thank you!
I have made this cheesecake twice – perfect both times! I wanted to do a marble cheesecake and found a recipe that added an additional 8 oz block of cream cheese and 4 oz melted chocolate. I wondered if I can use your technique (temperature) for baking and if so, how much time would I add (if any) for the extra ingredients.
Hi, I’m unsure about the extra cream cheese but for a marble cheesecake I would simply: take out 2 cups of the batter and stir in the melted chocolate. I would then pour that chocolate mixture over the rest of the cheesecake batter in the pan and swirl it around with a butter knife.
Thank you so much. I feel kind of silly – your suggestion seems so obvious! Again, your NY cheesecake recipe has worked perfectly for me both times. I did what you recommended and purchased an oven thermometer to check accuracy before my first cheesecake. Discovered my oven runs 25 degrees hotter so made my adjustments. No cracks at all and produced a very creamy cheesecake.
Oh wow! That’s a big temperature difference. I’m so glad you discovered it!
I finally made the marble cheesecake and this time, it cracked fairly deeply. My first two plain cheesecakes were picture perfect so I was very disappointed. I wondered if the swirling through the batter with the 2 cups of chocolate batter made a difference as I used the same temperature settings as the original. I always leave the cheesecake in the closed over for 2 hours after baking – just to be sure. That said, the cheesecake was still delicious and creamy – maybe not as creamy as my previous.
Thanks for sharing! You should have had the same success with the marble. I’m sorry about that!
Hello! I was wondering if this recipe is like a Master one from your cookbook where we can add different flavors? Thank you!
Me again – I wasn’t clear in my question – I was wondering if the Master Cheesecake recipe in the cookbook or this one could be modified to make flavors like chocolate, peanut butter, espresso, etc. Thank you!
Yes, either one! The cookbook has some ideas for flavor variations.
Hey love your recipe but quick question, what if I’m allergic to sour cream and yogurt can i substitute it with milk or something else??
Hi, I’m sorry I don’t suggest it as it won’t setup properly or have the right flavor.
I have used thick Greek yogurt and crème fraiche and both work as good as sour cream:)
I would like to try out this cheese cake but what can I substitute with sourcream? We do not have sourcream anymore in all our shops for I don’t kwon how long
Do you have yogurt? Use whole fat plain. Regular or greek should work.
This looks awesome! Your next challenge is to come up with a dairy-free soy-free version please 🙂 I’ve developed a dairy-free soy-free etc no-bake version. When I tried a baked version, the filling melted!
I bought your “Baker Bette’s Better Baking Book” and it has changed my baking forever for the better. I rewrote all of my recipes in grams and everything is turning out better than I thought it would. I have been baking since I was little and your book has transformed how I look at baking. I can’t believe how off some of the ingredients were when you start to weigh them. No wonder I was so disappointed in the end results. Thank you for writing this wonderful book. Love all of the selections of recipes.
Sincerely,
Debra Frause
Hi Debra, thank you so much for your kind words! I am so happy to hear it. Thank you so much for loving the book and following me! Happy baking!
I have had great success with this recipe in the past. Today I tried making 2 smaller cakes (7”) from it. I reduced the cooking time to 50 minutes, but left them in the oven for the full hour after cooking. Both developed cracks.
I have previously checked and adjusted my oven so I know it is spot on. There was no noticeable jiggle at the center of either at the end of cooking (50 minutes). Should I further reduce the cooking time to the point where there is a slight jiggle when I turn off the oven?
Hi, I haven’t tested this recipe using a smaller pan however yes, I think it best to reduce the cooking time as you’ve noted.
It was very challenging to start this Cheesecake. I end up throwing my crushed graham with sugar at the start. The measurement was not right. Good thing i haven’t combined the melted butter. I was very careful in adding the ingredients and kept reading through. The New York Cheesecake turned out really good. No cracks, very smooth and beautiful. My patience and dedication was worth it. Also,it was a perfect timing for Father’s Day. It’s my husband’s favorite dessert. Thank you, thank you.
I’m so glad it worked out for you! Great job!
I absolutely LOVE this recipe and my 9″ cheesecake turns out perfect! I do have a question though. I wanted to make one for an elderly couple at our church and they only need maybe a 6″ version. Are there instructions for the smaller version?
You can divide the recipe and only make 2/3 of it or you can make it as is and have leftover filling. Bake as instructed!
Thanks Bettie, your recipes always work so well. I originally found your site when doing Belgian waffles. This recipe worked like a charm although being out of town in an Airbnb I used a ready made graham crust. I think some people miss the critical points you have which is ingredients at room temperature and making sure oven is actually 475.
Thanks for sharing! Glad you like it!
In the recipe itself, you do not mention placing the filled springform pan on a sheet pan to bake. Is that an omission or not actually important to do?
Yes, I put it on a sheet pan so it’s easier to transport and better in the oven. I will make that note in the recipe. Thanks!
I want to cut the recipe in half since I need to use lactose free ingredients and I already have a smaller pre-made pie crust. Would the temperatures and timing be the same or need to be adjusted??
It cannot be dense and creamy at the same time. If there is one thing I totally “dislike ” is dense cheese cake. That is why I never make it. NO DENSE CHEESE CAKE.
Absolutely love this cheesecake! It has been my go to, never fail Cheesecake recipe for at least 3 years now! Thanks
I have made this cheesecake twice now and have followed directions to the letter… both times I have had large splits in them. Thoughts on fixing the problem?
Made this today following the directions exactly. The top was burnt and completely cracked. I am so disappointed.
Hi, I’m so sorry you had that experience! Can you tell me what went wrong? Were you able to check your oven temperature to make sure it’s accurate?
I didn’t check the oven temp although I bake sourdough weekly at the suggested temps and it works. I’m not blaming the recipe, it was probably me. After I turned it down to 200, I looked the other oven door after 30 minutes. The top was already cracked and over browned. At that point I did put foil over the top to try and salvage it but it was too late.
Have you tried this with a gluten-free flour substitute? My wife has a sensitivity to gluten.
Hi, I have not. I would search for a cheesecake recipe without flour.
I just finished baking a GF version using this recipe. Substitute GF flour. I use GF BETTER BATTER flour. For the crust, I used a GF Snickerdoodle cookie recipe using the above flour. My cheesecake did not crack.
Thanks for the GF tips! That’ll definitely come in handy for GF-free bakers.
I thought I was doing so well until I realized I forgot the flour!! I just shut oven off for final hr. Is the cake ruined? 🙁
This is by far the BEST cheesecake ever. It is a fantastic base recipe that you can make literally any cheesecake you want with. I have done many bases off the recipe… Vanilla (swap out the zest for a double helping of vanilla), lemon (leave out the vanilla and zest two lemons)…. Even Pumpkin! I think I’ve made 3 renditions of the vanilla… Best yet is the apple pie vanilla cheesecake. I’ve made 5 lemon versions and peach Melba on a lemon cheesecake was the winner there. You can never go wrong with a pumpkin marble on Thanksgiving.
I have been using this recipe for about 5 years now and hands down this is the best I’ve tried… And I’ve tried a LOT. I get so many compliments on it. Hell, my dad who is the ultimate cheesecake snob won’t go anywhere else for one.
Thank you for sharing this recipe. It is truly amazing!
Hi Camille, thanks so much for sharing! I’m SO glad you love the recipe. An apple pie version sounds AMAZING!
Hello, love your book! I made a bunch of stuff for family at Christmas following many different recipes from it. So now, I am making this for my grandma’s birthday next week and I was wondering if it matters what form of cream cheese I use (as in the blocks vs spreadable versions). I know there’s a texture difference so just wanted to be sure which one. My instinct would be the block forms. But I can get the spreadable one in bulk from Costco. So just wanted to check which one you used, and if it even matters. Thank you! Big fan.
Hi Valerie, for this recipe you should use the blocks. Happy Birthday to your grandma! She’ll love the cheesecake 🙂
I followed the recipe as written except for using only one cup of sugar and making up the difference with stevia. I was afraid that it would not bake as you had said but it was perfectly cooked. This will be my go to recipe. Thank you for it and the clear instructions.
I’m so glad it worked out well!