How to Make Biscuits, Biscuit Mixing Method
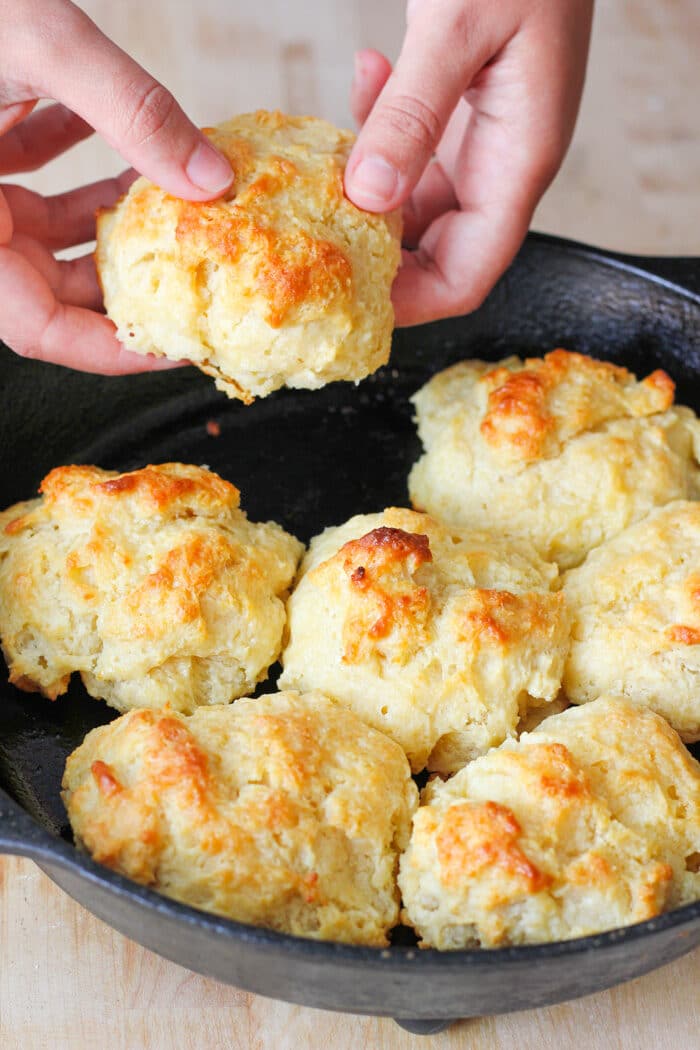
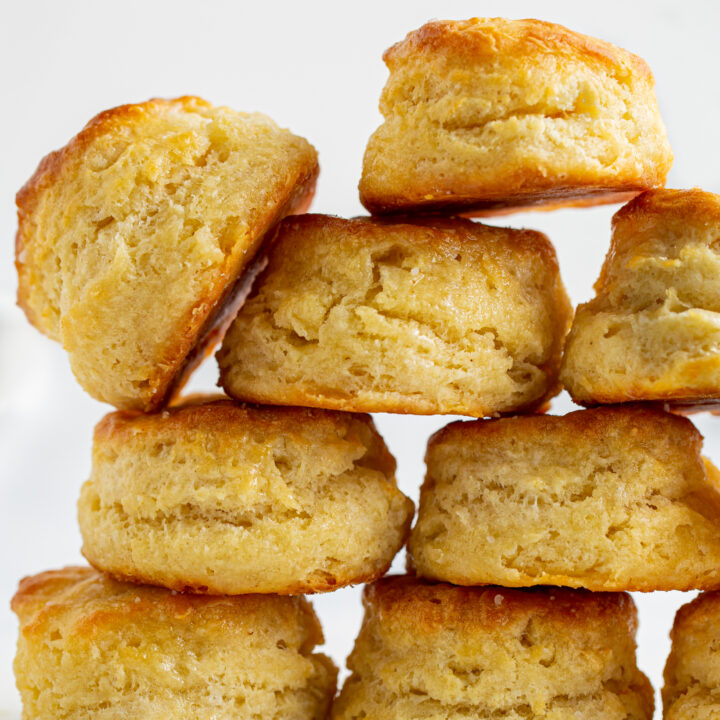
Learn how to make homemade biscuits that are fluffy, flaky, and tender using The Biscuit Mixing Method. These homemade biscuits can be made with butter, lard, or shortening.

What is the Biscuit Mixing Method?
The biscuit mixing method is the technique used to make biscuits that are fluffy and flaky. The purpose of the method is to reduce gluten development which keeps the biscuits light and tender while also working to create layers in the dough to create flakiness.
Baked Goods Made Using the Biscuit Mixing Method

The Biscuit Method is used for quick breads that are made from a dough. This includes:
- Classic American style biscuits (butter biscuits and lard biscuits)
- Drop Biscuits
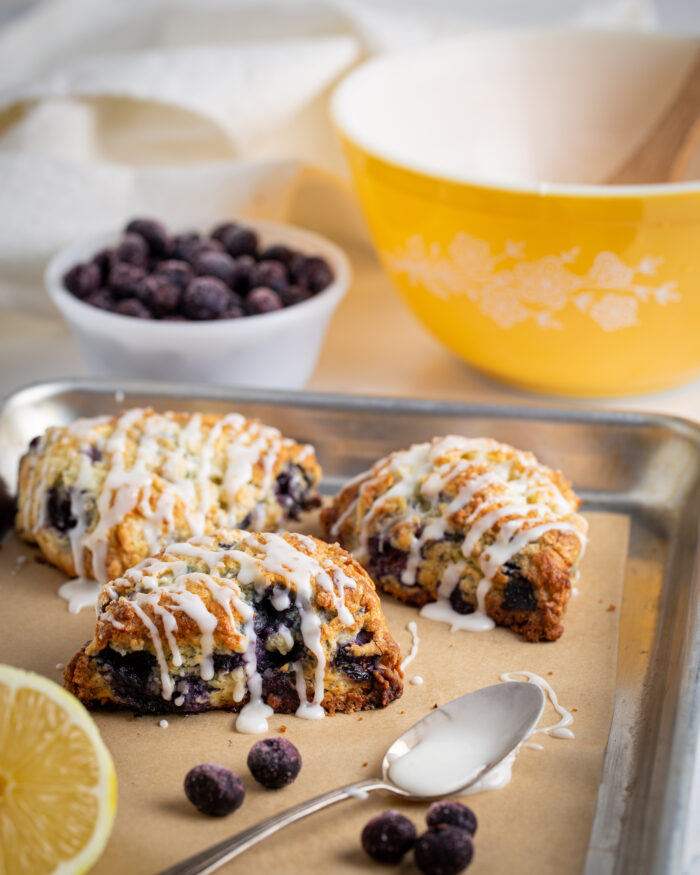
- Scones
- Soda Breads
Which Solid Fat to Use?
There are a variety of solid fat options to use in your biscuits. Butter, shortening, or lard are the most commonly used.
Butter creates a quick bread with the most rise because of its water content. When butter melts in the oven water evaporates off of it creating steam and more rise in your baked goods. Butter also has a melting point around body temperature which can make for a more pleasant eating experience since it melts in your mouth.
Shortening and lard are both 100% fat and do not have any water present in them. This means that while they do not allow quick breads to rise quite as high, the extra fat present creates an even more tender and flaky texture. However, these fats can leave a bit of a film in the mouth if not eaten while warm, due to their higher melting point.
With this knowledge, you can decide which fats have the characteristics you are looking for in your quick bread. You may even decide to use a combination of two!
Flavor Ideas
These are some of my favorite recipes for flavored biscuits, scones, and soda bread- all using the Biscuit Mixing Method!
The Biscuit Mixing Method Process
To review this method we are going to make my homemade buttermilk biscuit. The principles of executing this method for other things, like scones and soda bread, are the same.
How to Make Homemade Biscuits
Before starting, make sure the fat and buttermilk are very cold.
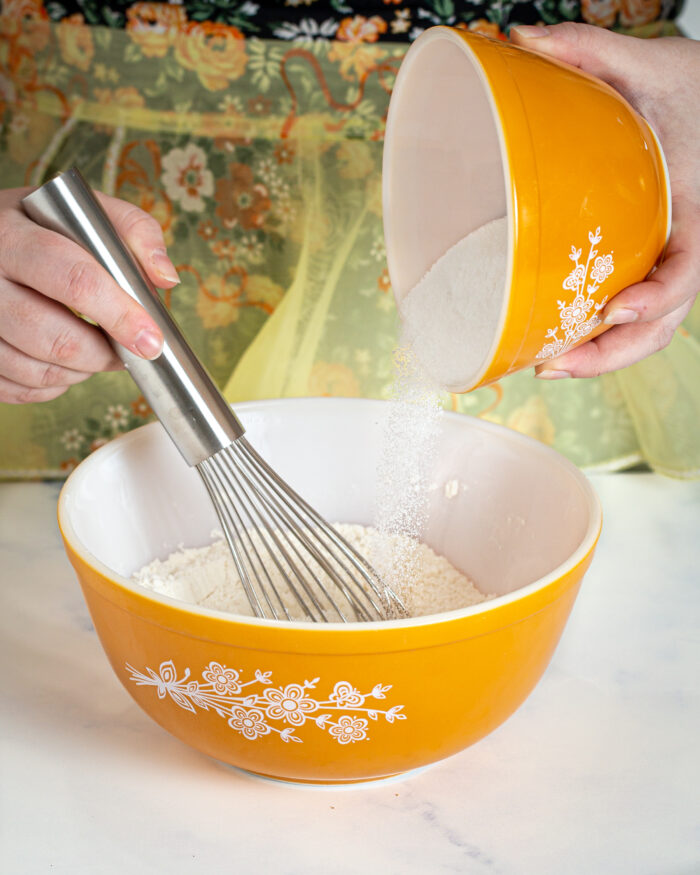

- Whisk together the dry ingredients.
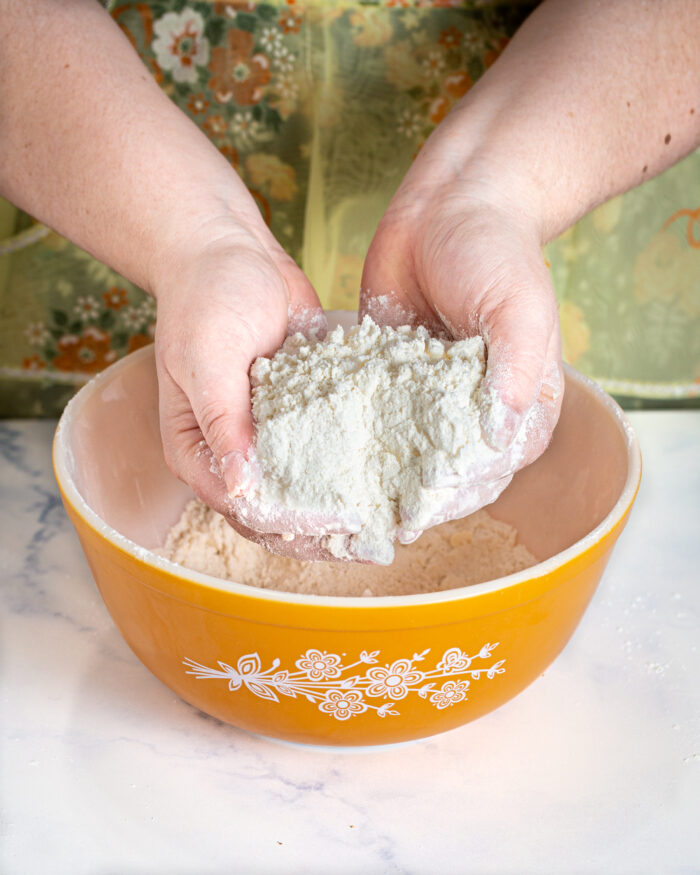
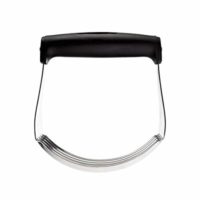
- Use a pastry blender or a fork to cut the fat throughout the flour mixture. To do this, press down on the fat with the wires of the pastry blender as you move it around the bowl.
- Continue cutting the fat into the flour until most of the pieces of fat are about the size of peas with some pieces about the size of a walnut half.
- Add the cold buttermilk to the mixing bowl and combine very gently. The dough will look very incohesive and “shaggy.”
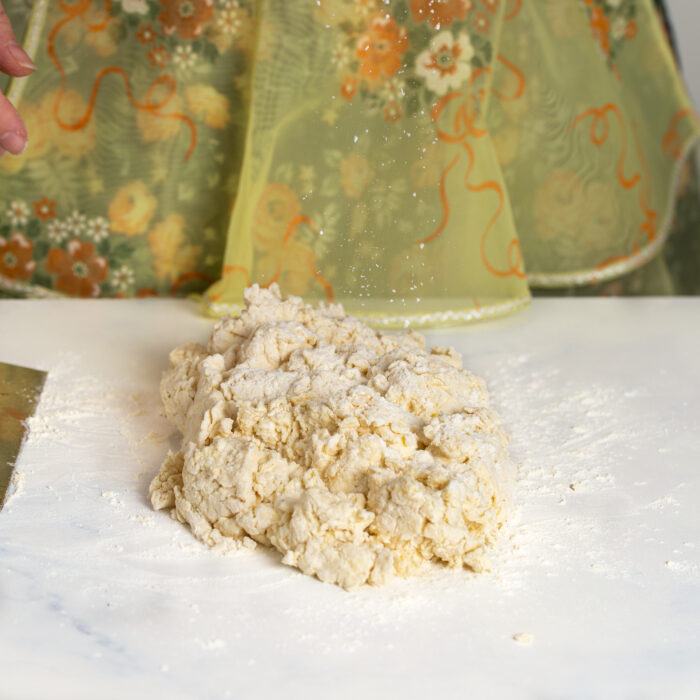

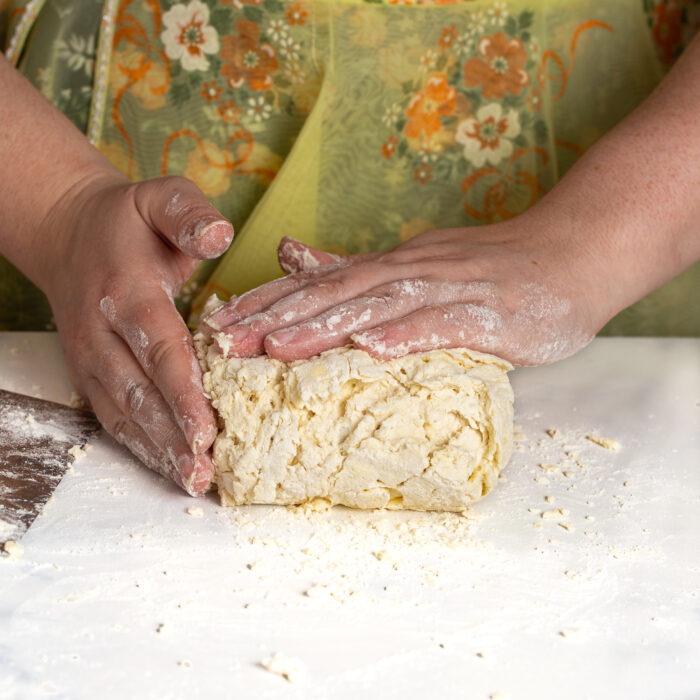
- Transfer the dough to a lightly floured work surface and press it together into one mass.
- Gently fold the dough over itself a few times to create layers which will lead to a more flaky final texture.
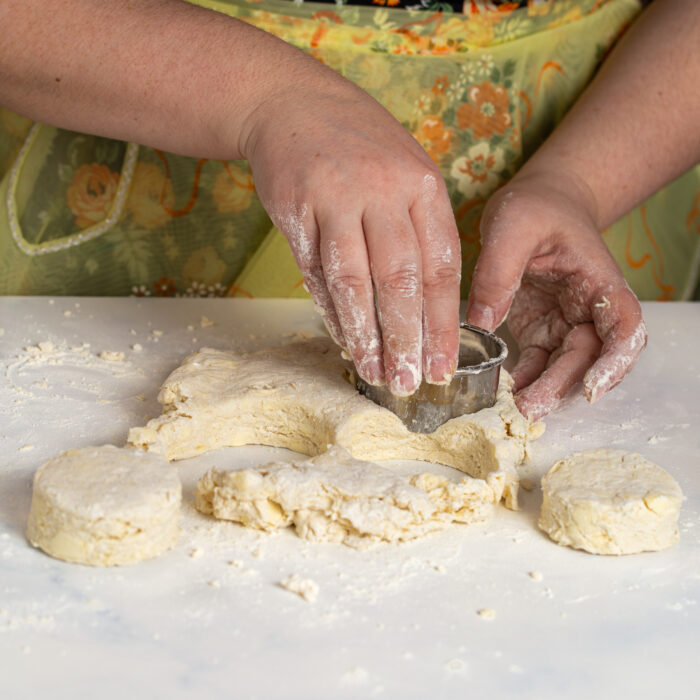
- Shape the dough into desired shapes like rounds or squares. Be gentle as you shape so that you do not overwork the gluten structure.
Note: If the dough does not feel cold, place in the freezer for a few minutes before baking to resolidify the fat.
Watch the video!
Homemade Biscuits Tips and Tricks
There are a few things to keep in mind when using the biscuit mixing method:
- Be careful to mix as little as possible once the liquid hits the flour. This will reduce gluten formation and keep your baked goods tender.
- When using this method you want the solid fat and liquids very cold. This will create flakier and taller biscuits and scones.
- Make sure to use buttermilk for this recipe. It helps create tenderness and adds a little bit of a tangy flavor that is iconic of classic biscuits. It also activates the baking soda which helps the biscuits to rise. See the recipe notes for buttermilk alternatives.
Learn more from Baker Bettie!
If you enjoyed this article, you might enjoy learning about other mixing methods in baking.
Homemade Buttermilk Biscuits
These homemade buttermilk biscuits are incredibly fluffy, tender, and flaky. You can make them with butter, lard, or shortening and the technique used will give you the best biscuits every time!
Ingredients
- 240 grams (2 cups) all-purpose flour
- 10 grams (1 tablespoon) baking powder
- ¼ teaspoon baking soda
- 6 grams (1 ¼ teaspoons) kosher salt
- 25 grams (2 tablespoons) granulated sugar, optional
- 85 grams (6 tablespoons) unsalted butter, lard, or shortening, cold
- 240 grams (1 cup, 240 milliliters) buttermilk, cold, *see note for substitution
Instructions
PREP
- Line a sheet pan with parchment paper or a silicone baking mat.
- Measure out all ingredients. Keep the buttermilk and butter (or lard or shortening) cold in the refrigerator.
Make the Biscuits
- In a large mixing bowl, whisk together the flour (240 grams/ 2 cups), baking powder(10 grams/ 1 tablespoon), baking soda (¼ teaspoon), salt (1 ¼ teaspoons), and granulated sugar(25 grams/ 2 tablespoons) if using.
- Add the cold butter, lard, or shortening (85 grams/ 6 tablespoons) to the mixing bowl and cut it into the flour mixture. To do this, press down on the fat with the wires of the pastry blender or the tines of a fork as you move it around the bowl. Continue cutting the fat into the flour until most of the pieces of fat are about the size of peas with some pieces being about the size of a walnut half.
- Add the cold buttermilk (240 grams/ 1 cup) into the bowl and stir with a spoon or a silicone spatula just until combined. This should only take a few turns. The dough will be pretty wet and sticky.
- Turn the dough out onto a lightly floured counter. Dust flour over the top of the dough. With floured hands bring the dough together into one mass.
- Pat the dough out (do not roll with a rolling pin) until it is about 1-inch (2.5 cm) thick. Using a bench knife (or a metal spatula can be helpful if you do not have a bench knife), fold the dough in half and then turn it 90 degrees. Pat out and fold again for a total of 6 times. This process is creating layers that will create flaky biscuits.
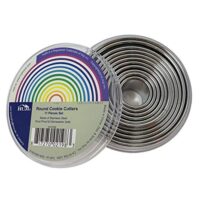
- Press the dough out to about 1-inch (2.5 cm) thick and use a round cutter that is about 2.5-inches (6 cm) in diameter to cut out your biscuits. When cutting out, dip your cutter in flour, press straight down, and pull it back up without twisting it. Twisting can seal the edge of your biscuit, not allowing it to rise fully. Gently pat the scraps together to cut out the rest of your biscuits. Alternatively, you can pat the dough into a rectangle and use a sharp knife to divide the dough into 8 rectangular-shaped biscuits.
- Place the biscuits on a parchment-lined baking sheet with the edges touching so they will rise up against each other.
- As an optional step, place the sheet pan in the freezer for 10 minutes before baking. This will ensure that your biscuits will not spread too much and will allow your oven to fully pre-heat.
- Bake at 450°F/230°C for 13-15 minutes until golden brown. Do not open the oven door for at least the first half of baking time. You want the steam to stay trapped in the oven to help with the rise.
- Brush biscuits with melted butter and sprinkle with flaky salt if desired.
- Biscuits are best eaten fresh, but they can also be stored after completely cooled at room temperature and wrapped in foil for 2 days. Alternatively, you can freeze the biscuits raw and bake straight from frozen at 425°F/220°C for 18-21 minutes, until baked through.
Notes
*A note on buttermilk substitute: Buttermilk is acidic which adds a slightly tangy taste to these biscuits and also tenderizes and activates the baking soda, helping the biscuits to rise. If you do not have buttermilk on hand you can make a substitute using one of the options below.
- Sour Cream or Plain Yogurt: Combine 3/4 cup sour cream or plain yogurt with 1/4 cup water and use in place of the buttermilk. This is the best option for buttermilk substitute.
- Milk: Combine 1 TBSP lemon juice or white vinegar with enough milk to equal 1 cup. Let stand for 5 minutes before using. The higher the milk fat the better the substitute will be. 1% or skim milk is not ideal.
Recommended Products
As an Amazon Associate and member of other affiliate programs, I earn from qualifying purchases.

141 Comments on “How to Make Biscuits, Biscuit Mixing Method”
Of course I have not made these yet because you just posted this wonderful recipe but I have to tell you that just looking at those biscuit pictures has my mouth watering (and I just had breakfast !) I can’t wait to follow your suggestions and try this recipe for biscuits this weekend. Thanks so much for all of your great tips and words of wisdom.
You HAVE to tell me if you make them and how they turn out! I’ve actually been fantasizing about making them again this weekend. Editing the photos was making me salivate too!
What a great post! I really needed that because I’m biscuit-challenged. Thanks for all the great info!
You can’t fail if you use this method Michele! Light and fluffy every time!
These biscuits really are PERFECT!!! Love the info too! 🙂
Thanks so much lady!
After I saw this recipe I scurried straightaway to make these biscuits! And now here I sit, burnt fingertips and all, to tell you that they were SO GOOD! The recipe is really easy, and I was able to make them and have them in the oven in probably 5 minutes! I’m eating my 3rd one right now, with Ollalaberry jam. It’s a shame no one is home to enjoy them with me… Guess I’ll have to eat them ALL!
I made these for dinner last night and they came out perfect. Thanks for the detailed instructions and photos.
I just made them with sausage and gravy and they were DELICIOUS! You have to use this recipe.
How do you measure 6 tablespoons of butter. Do you have a weight equivalent for that measurement please.PS they are exactly what we call scones
Hi there. A tabelspoon of butter is half an ounce, so 6 tabelspoons is 3 ounces or 85 grams. Yes, I am aware many people who are not american call what we call biscuits, scones. However, most scone recipes use cream instead of buttermilk. Scones are also different in that they typically call for an egg and biscuits do not and scones typically call for more liquid which gives a slightly different texture. These are subtle differences, but when baked there is definitely a difference between american biscuits and a true scone.
Dear Luv,
Thank you for such a wonderful biscuit recipe! This is one of the best, if not THE best biscuit recipe I’ve tried over the years! I I’ve made the biscuits about 5 or 6 times and they come out prefect entry time. I will say, for those with high blood pressure (like me) reduce the salt a little. Initially, my biscuits were a little salty, but now they’re just right!
All the best,
XceednglyBlessed
Not properly method to site step is wrong first add fat and suger
Can you use a food processor instead of a pastry blender? My pie crust is netter with a processor. Thanks!
Hi Sherri! Yes, you can. Just be careful not to over-process it! Enjoy!
Yummy! These turned out great. Very moist and fluffy. Followed recipe exactly. Beats the pants off of a lot of restaurant biscuits which tend to be dry and crumbly. You need butter and other things to make them more edible. Thanks for taking the time to post this, now my go to biscuit.
Just to be clear, when I said “You need butter and other things to make them more edible”, I meant the restaurant biscuits.
Hi Anthony, thanks so much! I’m so glad you enjoyed them. They are definitely my go-to biscuit recipe as well!
Instead of cutting the butter into the flour I grate frozen butter onto a a plate/sheet pan, then refreeze. I can then weigh out the butter, mix it in quickly to flour Ive also placed in freezer. It distributes quickly and evenly without softening. Any remaining butter can be kept in freezer for future use or melted and brushed over finished biscuits
Hi Kaye! Yes, I have seen that technique before! Definitely does work well! Thanks so much for sharing it! <3
Thank you for all of the wonderful tips! I can’t wait to try this biscuit recipe with a savory stew on a cold winters day!
You’re welcome Alise! I hope you enjoy!
Why after 4 years did this recipe get changed?
Hi Ana! The recipe ingredient quantities have not changed. I did update this article recently to add more details, to include a video, and to update the way I now make biscuits which is slightly more simplified than the original version and I believe actual produces a superior biscuit. Hope that clarifies! Let me know if you have any questions.
I apologize, I didn’t mean to sound negative! I was just scared that the recipe was changed as this is the BEST biscuit recipe on the entire internet. There were a few “less simple” little tips from the old version that I always used, but if this is superior to you then I trust it! Again, apologies, I was just anxious this wasn’t the right website or something. Thank you for the years of tasty biscuits!
No worries Ana! I totally get it! Just wanted you to know that the actual recipe hasn’t changed. Just the technique a little bit!
Hi! You are hilarious! Thanks for these tips!! The butter biscuits recipe are baked at 475, but these say 450. Which temp do you suggest? Also if I have a convection oven, would you recommend 400 & less time? Thanks!
If you have a convection oven, I would reduce the temp down to 425 and watch them. Pull them out when they are golden brown!
I love homemade biscuits! Looks so delicious!
Thank you Natalie! Let me know if you try it! <3
When I first married the love of my life, he hated the biscuit recipe I always used given by my mother, I’ve been searching ever since for a recipe that made his tastebuds dance…..when I fixed yours he told me “this is it!” I’m so happy for your recipe and instructions, apparently all those other recipes never included folding the dough! Thanks so much!!
Oh that makes me incredibly happy Sarah! That is just so great!
Never ever made buttermilk biscuits before and this recipe sold me. Didn’t have unsalted butter so I used 1/2 the salt recipe called for, and they came out perfect. Made in my 12 inch cast iron skillet. Came out flaky .a keeper!!
That’s so great to hear! So glad you enjoyed them!
Can a stand mixer be used to combine ingredients?
Hi Jim! A stand mixer will mix the ingredients too much. You want to only mix just a little bit and keep the dough very crumbly.
Finally! I have been trying for years to get mike-high flaky biscuits at home, these are the ones I’ve been looking for
That’s so great to hear Andrea!
Delicious recipe! I am a midwest girl married to a southern guy (for 31 1/2 years!) and could never quite get the biscuits like his mama did…until now! He couldn’t stop commenting on how good they were this morning, yet no lard…makes me happy. Thank you for video and such specific instructions so I can now show my girls how to do the same. I’ve been making homemade cakes and cookies all of my life, so glad to finally ban the store bought biscuits too!
I’m so glad you and your family enjoyed this recipe, Mary! Now you can use this recipe as a basis for other flavors for your biscuits.
Is it OK to use self rising flour?
These were absolutely phenomenal. Thank you so much for sharing. The in-depth instruction and recipe notes were extremely helpful. Will be making these again!!
That’s so great to hear Zoe!
Hi there i would like to extend my warmest thanks for the wonderful tips about baking
i learned so much
More power and God bless you!
This is very helpful and Healthy Recipe keep it up ❤️
Just made your recipe for the first time and WOW!! Delicious! Only thing different, is I folded the dough over itself about seven times which I saw on another video. Wish I could send a picture! They rose up and there were many layers!! My husband said they were better than Popeyes!! LOL!
Do you grease the pan before baking the biscuits?
Yes, either grease them or line the pan with parchment paper.
This is my first time making biscuits from scratch and I love it! Thank you!
I’ve read everything about making these biscuits, and I am sure that when I make them I will not have any problem as you explained all the process very well. I will like to know if I can prepare the mix the night before and keep It in the fridge. Although I can see that this is a fast method, sometimes I really do not have those few extra minutes in the morning to prepare the mix.
First time I ever tried biscuits and they turned out great. Baked on a SILPAT and on a flat baking pan and they were really delicious. Easy to make and great instructions, both written and in video. Thank you so much for a perfect recipe!
Recipe for biscuits using butter, butter flavored Crisco yeast, AP flour, buttermilk and mix in a
STANDMIXER
I used to be the queen of making small dense biscuits that came out more like hockey pucks. I have made this recipe several times and if you follow her recipe and instructions they come out perfect. My husband is extremely appreciative, as is my daughter and son-in-law.
Whoever thought this Yankee could make perfect southern biscuits! My husband said they taste even better than Hardee’s.
I make a couple batches ahead of time and keep them in the freezer and then I can just pop out what I need and bake it.
I did a happy dance when I took these out of the oven! They were perfect. Exactly like your picture.
I have tried to make biscuits so many times and they never turned out right. I used the sour cream method for the buttermilk. Delicious! Your video really helped. I did exactly as you said. Thank you!
You’re welcome! I’m so glad you like them!
This is a very good article. Thank you for sharing. I look forward to publishing more such works. There are not many such articles in this field.
My first biscuits – half the recipe and good!
Hi. My real name is Bettie, too. Anyway, I want to try your biscuit recipe and was wondering why you wouldn’t recommend pastry flour, as it has less gluten, and therefore overworking would not be an issue. As you can tell, I am not an experienced baker, or I’d be able to figure this out! In any case, I really appreciate all those detailed instructions.
Love your full instructions on this biscuit recipe. Thank you so much.
You’re welcome!
I jumped out of bed and made these. They are SO good! Thank you!!
Wonderful! Great way to start the day 🙂
I will never buy store bought biscuits again. This is the first time I have ever made biscuits from scratch and it was so easy. This is the perfect recipe, since it makes exactly six 2.5 inch biscuits every time.
Glad you like them!
Made these today. Recipe is detailed and easy to follow. Made exactly 7. They turned out big, fluffy, flaky and DELICIOUS. My husband was very impressed I impressed myself!!
Awesome!!
Mrs.Bettie, your video over your biscuits look so easy and so wonderful! I have loved biscuits ever since I ate one during elementary school. I have decided that I would like to learn how to make biscuits because of their fluffiness on the inside, tenderness on the outside, and perfect match with sausages and gravy. I am in 7th grade right now and I have been getting the same breakfast ever since 4th grade; sausage, biscuits, and white gravy.
I have a quick question about the buttermilk. Will whole milk bought from stores do?
Thanks, Grayson.
I have tried for a long time to make a really good biscuit and now I’ve finally found it. This is a good recipe. All I had was powered buttermilk but it worked well.Most of all,I think the tips you post helped the most. Thanks!
BEST. BISCUIT. RECIPE. EVER!! I’ve made other buttermilk biscuit recipes before and they were just .. ok. Your recipe KILLED!!! SO light and fluffy!!! DELISH!!!! THANK YOU!!!
I’m so glad you like it!
Is it ok to use sea salt or table salt? Do you use the same amount if substituting?
Either one! You can use the same amount.
This is a great recipe with great tips. I’d like to throw in another tip for getting those lovely layers. Use the fold method like the way you would do when making puff pastry dough, just be really gentle with the dough. You’ll get tons of layers and seriously high rising biscuits 🙂 Happy Baking to All
Hi Inga! Yes, that is the method I describe in the recipe! It works very well!
I’ll be honest, my first attempt with this did NOT go well. (Mind you, I’m very much a novice baker; this was only the second recipe I’ve ever attempted, so I’m certain that this is a personal failure and not a recipe failure.) My dough ended up being way too sticky and wet to actually fold, pat down, and work with. I floured all of my surfaces and my hands as instructed, but it simply just wouldn’t play with me. The only thing that I can think of is that my butter just wasn’t cold enough; is butter straight from the refrigerator not cold enough for this recipe? Could really use a pointer or two to get this right!
Add as much flour as you need so it’s not too sticky to handle. Butter straight from the fridge is cold enough! For starters, I would try my Drop Biscuit recipe as there is no shaping involved and you just “drop” the dough off a spoon and bake!
It took me a while to finally get time to try this recipe again and this time I had much greater success! Thanks so much for your advice!
I’m so glad! Great job!
I came here looking for a biscuit recipe and got distracted a little by the background…”This lady is serious about her coffee!” I like making my own cappuccinos, so I was drooling over that espresso machine. Anyway, your biscuit recipe looks very tasty and I cannot wait to try it out.
I hope you try them! Haha I do love my espresso machine.
i just made these biscuits with just 2 % milk and made some porkchop gravy to bury them in . the biscuits are just great . just had the bottom of a large one smothered in homemade pear preserves while waiting for the gravy to cool .
thanks for the lessons in technique .
I like this recipe, but what about the measurement for all of the ingredients?
Hi Bettie,
I made these Biscuits t5his morning and they turned out delicious!
Thank you,
Joe
Wonderful!