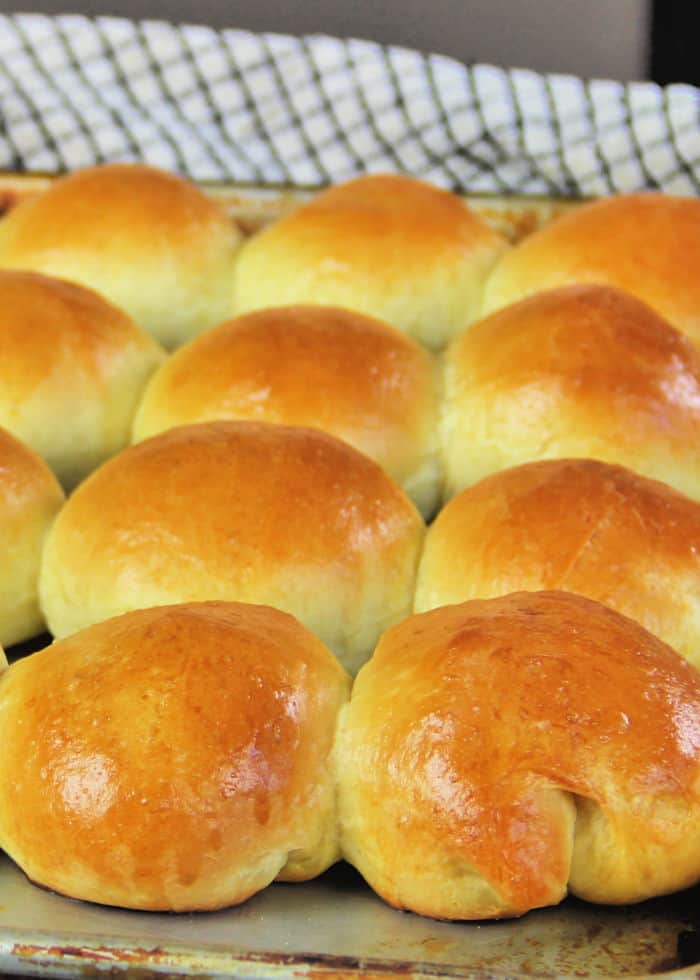
How to Make Yeast Rolls
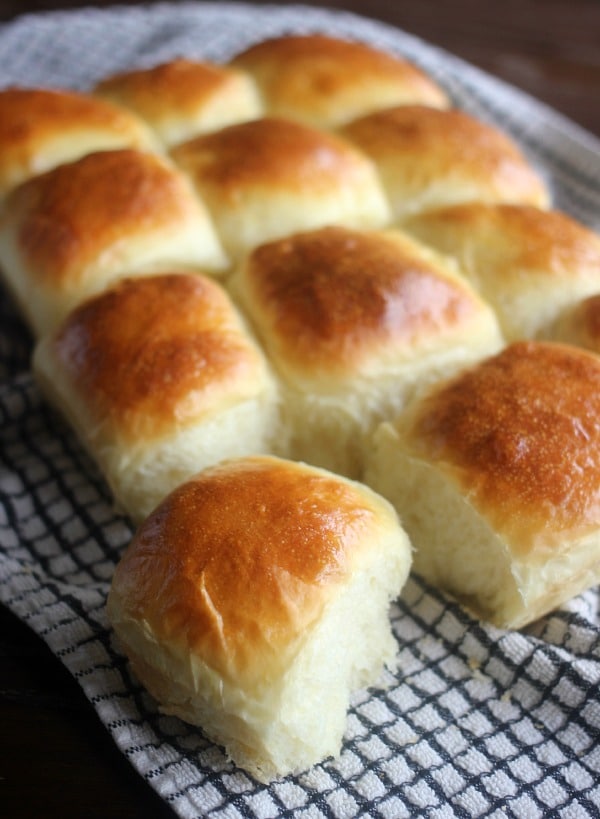
Learn the step-by-step process of how to make yeast rolls. These soft yeast rolls are tender and incredibly fluffy. I am breaking down all of the steps to make the process very easy to follow!
Overview
- Skill Level: Intermediate
- Skills Used: Modified Straight Dough Method
- Master Recipe Used: Enriched Dough Master Recipe
Soft dinner rolls are made from an enriched yeast dough. This means the dough contains fat, eggs, and sugar making a yeast bread that is soft and tender.
These yeast rolls can be made the day they will be served or can be prepped the day ahead and baked the next day. The rolls turn out soft, tender, and slightly sweet. This dough is also the same dough I use for my classic crescent rolls, which means you can make either once you learn how to make the dough!
How to Make Yeast Rolls Step-by-Step
Yeast dough can feel intimidating for people but it really can be easy once you get conformable with it. I’m going to break it down for you!
Watch the video tutorial!
Step 1: Mix Butter, Sugar, and Salt Together
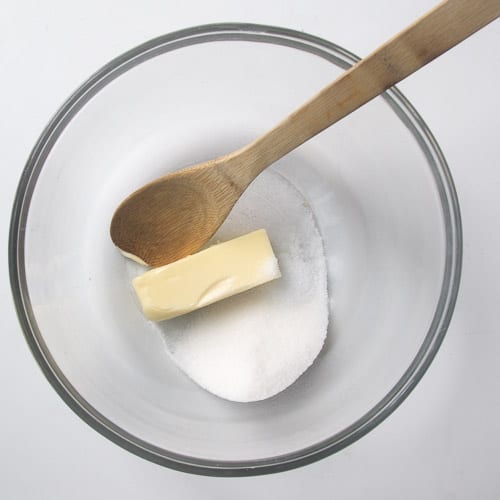
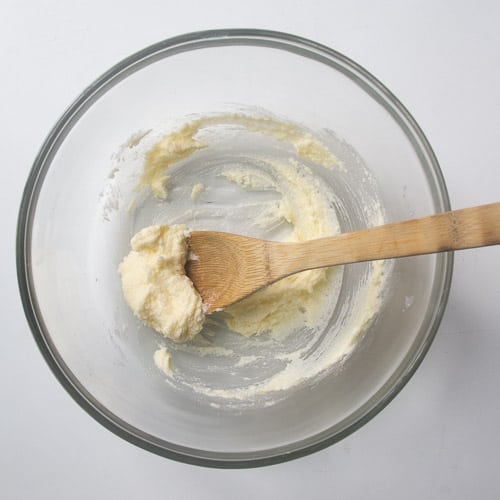
In a large mixing bowl, mix together your butter with the sugar and salt. You want your butter to be at room temperature so that it will easily mix in.
You don’t need to cream these ingredients together like when making cookies. Just make sure they are well combined.
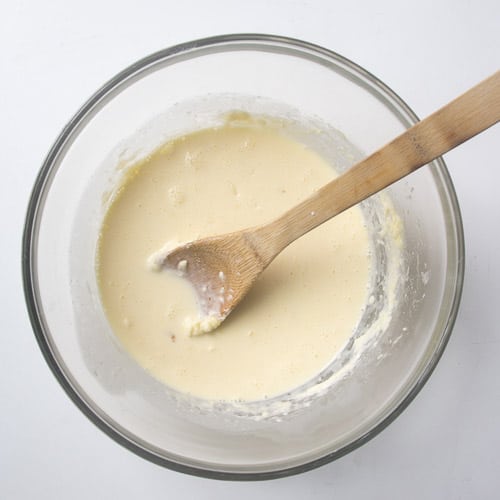
Step 2: Add the Eggs
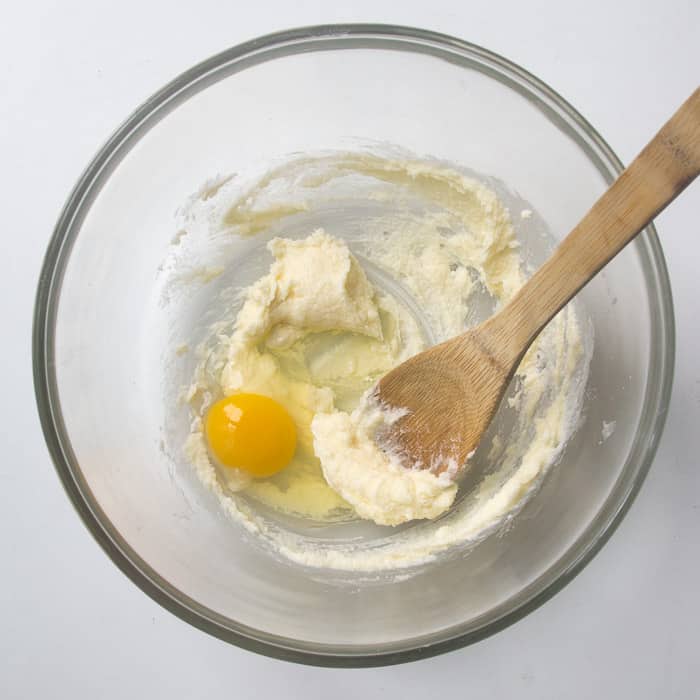
Stir in the room temperature eggs into your butter/sugar mixture. Your mixture will likely look somewhat curdled at this point. That is okay!
Step 3: Add the Warm Milk
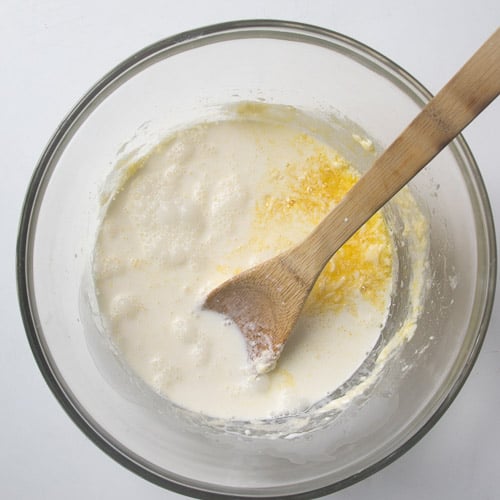
You want the milk for your yeast rolls to be warm, somewhere around 110 F (43 C). Yeast loves warm temperatures and it will wake it up quickly. However, if your liquid is too hot you can kill the yeast. It is best to error on the side of using liquid that is cooler rather than too hot.
I typically warm my milk in the microwave for about 30 seconds. It should be just slightly warm to the touch and not hot.
Step 4: Mix in the Flour and Yeast
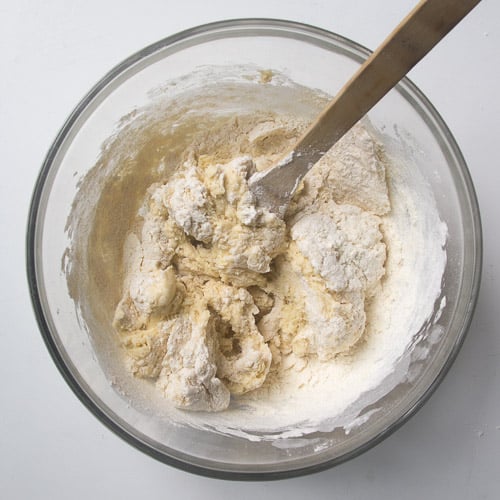
Most yeast bread recipes will list a range in the amount of flour used in the recipe. This is because flour is temperamental and depending on where you live you might need more or less for your dough. Start with the lowest amount of flour listed and then you can add more in while kneading the dough.
You can use active dry or rapid rise yeast for these rolls. Both will work well and can be added right in with the flour, no hydrating needed. Note: If you are making make-ahead yeast rolls (prepping the day before), you want to be sure to use active dry yeast.
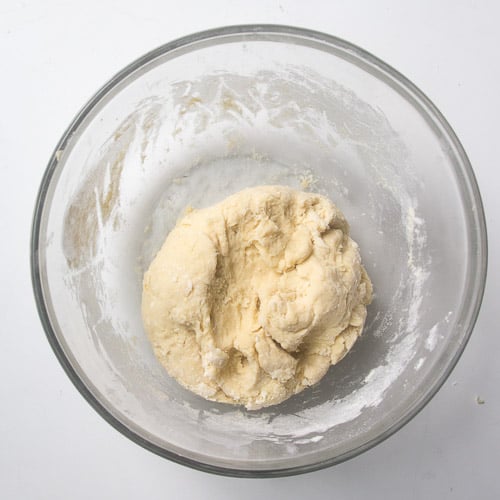
Step 5: Knead the Dough
This yeast dough can be kneaded by hand or with a stand mixer using the dough hook. You want to knead the dough until it is smooth and elastic but still slightly sticky. Add more flour as needed while kneading your dough.
Step 6: Let the Dough Rise (Fermentation)
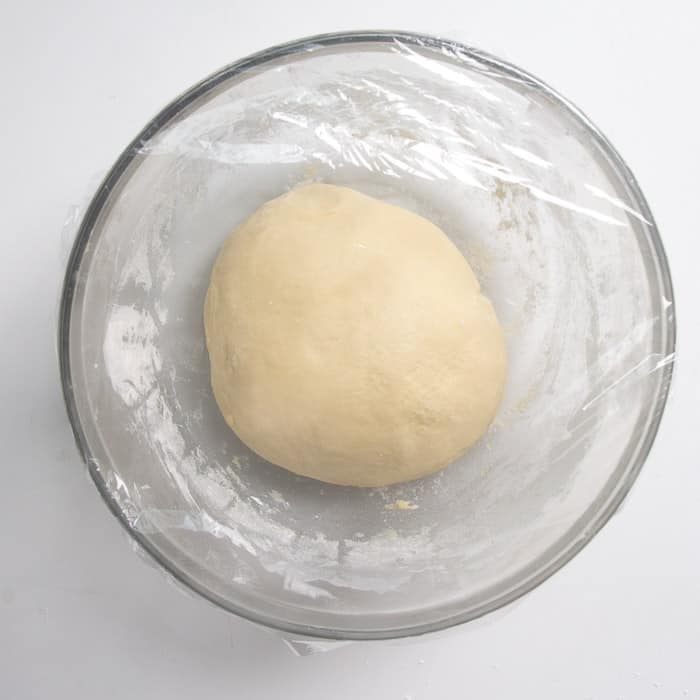
Now your dough needs to rise until about double in size. This process is called fermentation. The dry yeast, which was in a dormant state, is now awake and it needs time to feed. The yeast will feed on the starches and sugars in the dough and will create carbon dioxide gas which allows the dough to rise.
You have two choices here, you can let it rise at room temperature or you can put it in the refrigerator to slowly rise. If you let your dough rise at room temperature this will take about 45 minutes if you used rapid rise yeast, or it could take about 90 minutes if you used active dry yeast. If you let it rise in the refrigerator, you can let it stay in there for about 12-16 hours.
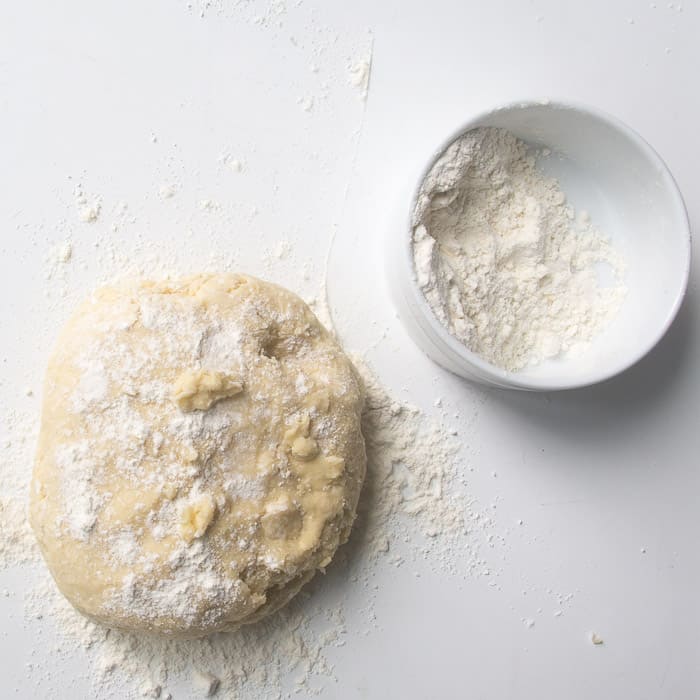
Step 7: Deflate the Dough
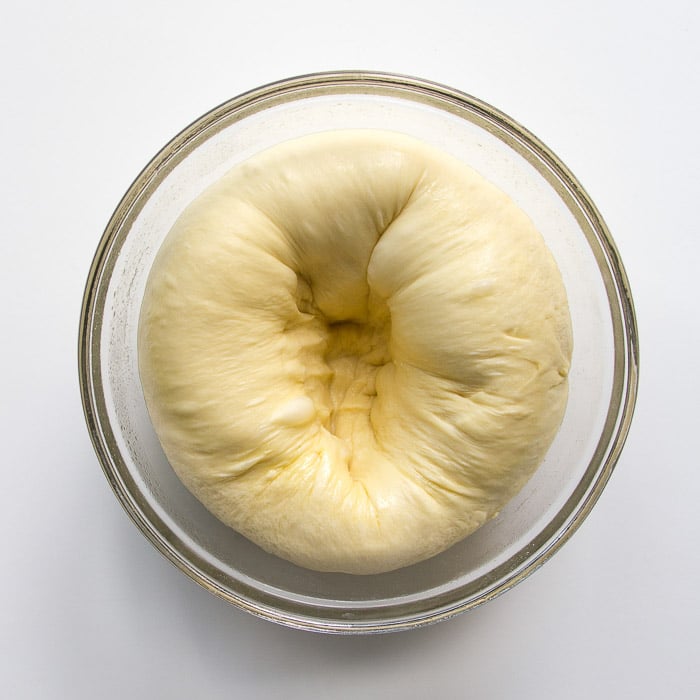
Gently press down on your risen dough in the center to deflate the gas out of it. Turn it out onto a lightly floured work surface.
Step 8: Divide your Dough
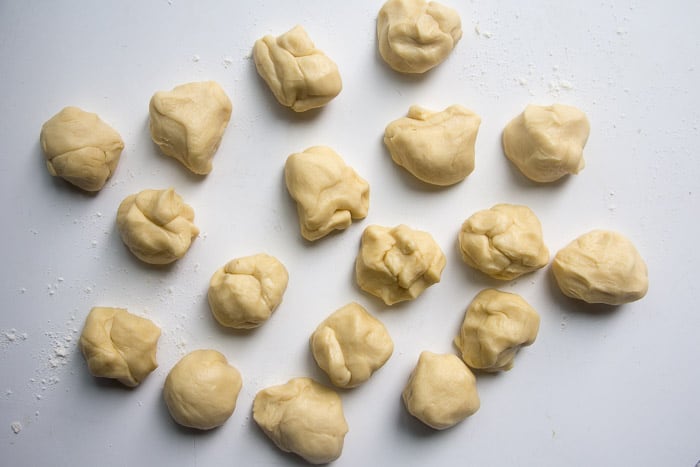
Divide the dough into equal pieces for the rolls. You don’t want to stretch and tear the dough, rather use a knife or a bench scraper to cut it.
I like to make 16 rolls if making these for a big holiday dinner, like Thanksgiving or Christmas. And I usually make 12 if making it for a dinner where there aren’t as many sides being served.
Step 9: Shape the Rolls
(if you press play on the above video it will start at the part of the process where the rolls are being shaped)
Take piece of dough and pull down on the sides creating a seam at the bottom. Set the piece of dough, seam side down, on an un-floured part of the counter top. Roll the dough gently under your hand to create a smooth ball.
Step 10: Bake the Rolls
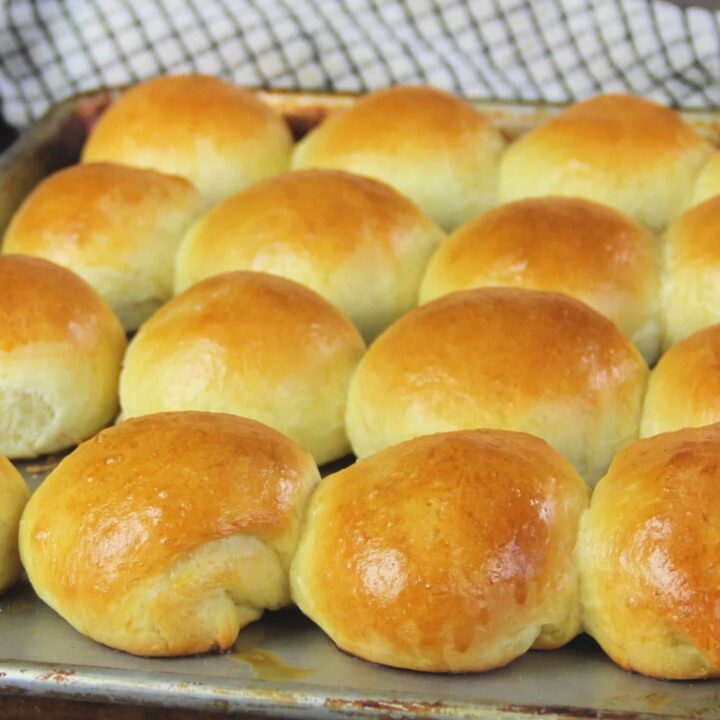
You can bake these rolls in a 9X13″ baking dish or on a parchment lined baking sheet. Using the baking dish will allow them to grow taller as they all bake up against each other. On a baking sheet will produce a little flatter rolls, but both are equally delicious!
Before the rolls go into the oven I like to brush them with a little bit of egg wash. Whisk 1 egg with about 1 tablespoon of water and brush on top of the rolls. This gives the rolls those pretty shiny tops.
MORE RECIPES FROM BAKER BETTIE!
If you enjoyed this roll recipe, you might like to try these other dinner side dishes.
This soft yeast roll recipe is the basis for my Hot Cross Bun recipe!
Soft Yeast Rolls
Super soft and fluffy yeast dinner rolls are the perfect side dish. This recipe can be made the day of serving or prepped overnight to bake off the next day.
Ingredients
- 2 ¼ teaspoons (1 package) active dry or instant yeast
- 227 grams (1 cup, 240 milliliters) whole milk (lower fat or non-dairy can be substituted)
- 50 grams (¼ cup) granulated sugar
- 480-600 grams (4-5 cups) all-purpose flour
- 1 ½ teaspoons salt
- 85 grams (6 tablespoons) unsalted butter, very soft
- 2 large eggs, room temperature
Instructions
- Warm the milk (227 grams/ 1 cup) about 110-115°F/43-46°C. In a large mixing bowl add the warm milk, the yeast (2 ¼ teaspoons/ 1 package) and ½ teaspoon of sugar and stir to combine. Let sit for 5-10 minutes until you see some bubbles and foaming.
- Add the smaller amount of flour (480 grams/ 4 cups), the rest of the sugar (50 grams/ ¼ cup), salt (1 ½ teaspoons), soft butter (85 grams/ 6 tablespoons), and eggs (2 large) to the mixing bowl. Use clean hands to mix together until a sticky dough forms.
- If kneading by hand, turn the dough out onto a floured countertop. Dust flour over the top of the dough and knead the dough by hand for about 8-10 minutes until smooth and elastic. If kneading with a stand mixer, fit the mixer with a dough hook and knead at medium speed for 6-8 minutes. Add more flour as needed while kneading the dough. When the dough is finished being kneaded it will still be slightly sticky to the touch, but feels smooth and elastic and should stand tall when rounded into a ball.
- Move the kneaded dough to a lightly oiled bowl, turn to coat, and cover with a piece of plastic wrap, a damp cloth, or a shower cap (my preference) to bulk ferment until doubled in size, about 1 hour for instant yeast and 2 hours for active dry yeast.
- After proofing, turn the dough out onto a lightly floured countertop and divide it into 12-16 equal pieces.
- To shape the rolls, pull down on the sides of the dough creating a seam at the bottom.
- Place the piece of dough seam side down on an un-floured part of the countertop. Cup your hand over the dough and roll it under your palm to form a smooth piece of dough.
- Place the shaped rolls on a parchment lined sheet pan or in a 9 x 13-inch (23 x 33 cm) baking dish that has been lightly greased. Cover the rolls with plastic wrap.
- Proof the rolls for about 45 minutes if using instant yeast and about 75 minutes if using active dry yeast.
- Position an oven rack to the center position. Preheat the oven to 375°F/190°C.
- Brush with an egg wash if desired. Bake for 15-20 minutes, until golden brown. If desired, brush baked rolls with melted butter and sprinkle with flaky salt.
Notes
*To prep ahead: Refrigerate the pan of unbaked, shaped rolls for up to 18 hours. 90 minutes before serving, remove from the refrigerator. Let them stand at room temperature for 75 minutes before continuing with step 10.
103 Comments on “How to Make Yeast Rolls”
You always have us covered!!!! I looooove rolls
Rolls are THE BEST!
I love home made rolls, definitely I’m going to try them.
Great recipe! I’m a newbie to bread baking so your clear instructions demistified the whole process! Thanks!
That’s so great to hear Troy! So glad you enjoyed them!
great recipe which is a must try. suppose I hydrate the yeast into milk for some while before mixing in the flour what could be the results
Hi Anne, you can proof the yeast if you like. I don’t do that if I am making overnight rolls because they might over proof. But you can do it if you will be baking them that day! Just pour the yeast in the milk and let it sit for about 5 minutes. Make sure your milk isn’t too hot!
Fantastic yeast roll recipe! Made these for a family gathering (36 of them !) and not even a smell left! As a newbie baker these were a smashing success! Can’t wait to try some of your other recipes.
Hi Phillip! That makes me so happy! Good work making that many rolls for the gathering. I bet your family was so happy to have fresh bread!
Oh, yeah! I’m the roll guy now.
Do u need to oil the mixing bowl prior to putting the dough in it?
Haven’t worked with yeast since I was your age 🙂 which I am no longer. I found your recipe and it sounded so easy I just had to try it once. OMG best dinner rolls ever. Thank you so much for making baking with yeast fun again. I am anxious to try some of your other recipes soon.
I’ve never had homemade rolls turn out. Thank you for making this video and recipe. They turned out perfect. I used salted butter and 2 % milk because that’s what I had on hand. They were big, fluffy and tasted so yummy. Everyone bragged on the taste and how pretty they were. The yeast rolls made my house smell amazing!!! Cant wait to make them again!!
That makes me so happy Leslie! Now you can use this dough to master other things! It is the same dough I use for cinnamon rolls and yeast donuts too!
Can you substitute buttermilk for whole milk?
Hi Ben, I haven’t tried it, but I don’t see why not. Will have a bit more of a sour flavor!
These rolls are AWESOME! Recipe written perfectly, demo video gave great tips. Made the 16 count batch using the make-ahead method with 1.5 Oz. of Sharp cheddar wrapped inside. Turned out perfect! Bumped up the cook time slightly to brown deeper. Thank you Baker Bettie for a great way to have my Eastern NC Cheese Biscuits. Can’t wait to make them again!
I love to watch the videos they are very helpful. Thanks for sharing
You’re welcome!
Can you freeze the dough before the 2nd rise?
Can I use instant yeast (like the red SAF instant?) or instant quick rise (like red star)? If so, what would I change? Thanks.
Tried these but they came out dense and chewy. What did I do wrong?
Hello Bettie
I just found you while searching for a dinner roll recipe. After thanksgiving, I know, but the rolls someone brought for thanksgiving dinner were not at all yummy and I thought, how hard can it be. I just watched your YouTube video on making rolls and just love the way you explain everything, especially about how the yeast works! So, I’m making my first batch of rolls today and have started following you on Instagram and YouTube. I have a feeling I’ll be visiting you very often.
Lynn
I have to compliment and thank you! This recipe turned out great and my family loved them. The YouTube video was very helpful and easy to follow. I look forward to cooking with you more!!
This recipe was actually really easy to follow which I love. And everything looked the way it showed via the video. I can’t wait to see how they taste once done baking
Thanks Victoria! I hope you enjoyed them!
Can I use your roll recipe for bread too. I already made the rolls and they were great!
Thank you very much for the recipe it worked out great I will always use this recipe and I have a mixer coming that will have the dough hooks on it so it’ll make it a lot easier for me but thank you again it was great.
I appreciate your detailed recipe. I used active dried yeast so I proofed the yeast first with 1/4 cup from the whole milk at 110 degrees and 1 teaspoon from the sugar before adding it to the recipe. Wanted to ensure it was good before going through the entire procedure. The rolls were beautiful but unfortunately they didn’t have much flavor. Any suggestions?
Can almond milk be used or can I just use water instead of milk?
I too was wondering if you can use almond milk instead of whole milk … did you find out? If so, I would love to know. Thanks!
Unfortunately, I did not find out.
Thank you so much for replying! I decided to run to the store and buy some whole milk… I haven’t baked them yet. Fingers crossed they turn out!
Made these yeast rolls per instructions and they turned out perfect. My only question is to the use unsalted butter but to add kosher salt. Why not just use salted butter. I look forward to trying many of your other recipes.
that is a very informative video presentation and it is easy to follow. thank you and i would like to see more of your baking lesson in the video.
OMG, WHY SO HATEFUL, BRITLAND over a RECIPE??? Are YOU LIKE THIS TO EVERY ONE around you or JUST THOSE YOU CAN HIDE BEHIND A SCREEN FROM??
It’s a RECIPE & ALL people have different tastes but that’s CERTAINLY NEVER A REASON TO BE SO UNKIND, DISRESPECTFUL & HATEFUL just because YOU DID NOT LIKE.
PLEASE BE KIND!! Our WORLD is HATEFUL ENOUGH WITHOUT YOU SCREAMING OVER A BREAD RECIPE THAT COSTS MAYBE $5 to TRY! I don’t even KNOW THE PERSON THAT POSTED THIS RECIPE, YET, however I’d be willing to BET EVERYTHING I HAVE & SAY THEY DID NOT GET UP & DECIDE, “LETS POST a RECIPE THAT WILL PISS OFF BRITLAND & ONE THEY WON’T LIKE!”
You might NOT OF LIKED IT but did you EVER CONSIDER YOU MAY HAVE DONE SOMETHING INCORRECTLY, MADE A MISTAKE &/OR ARE YOU PERFECT TOO???
#HURTpeopleHURTpeople
#BEKIND
#onlyYOULOOKBADhere
#LOVEWITHYOURLIFE
#BULLIES…YOUWILLREAPWHATYOUSOW
They sure look good now to taste them, thank you the video was very helpful
I was going to upload a pic but could not find anyway to upload
Liz
Hi Liz, so glad you liked the recipe! There’s no way to add a photo to a comment on my website but you can post and tag me on Facebook or Instagram! @bakerbettie
If I do my second proof and baking in a 9×13 glass pan, does it need to be buttered first?
Yes, I would butter it lightly or spray with nonstick spray.
I made these at Thanksgiving and used the method where I placed them in the Frig overnight. They was fantastic!!! This morning I am making them to eat this evening. My question–I’m afraid of the timing. If I proof them on the counter, but not ready to bake can I place them in the Frig for a while until after they have risen the 2nd time but I am not ready to bake? Thanks for a great recipe and for your help.
Yes you can! Just make sure they have time out of the fridge to get to room temperature and rise a bit more before baking.
Can you freeze the dough?
You can! Shape your rolls and place in a greased casserole dish, wrap in plastic wrap and then freeze. When you are ready, thaw in the fridge overnight, then bring back to room temperature and let rise until puffy then bake.
Your instructions are really soo good, I have tried this and every thing came out soo well. Thank you soo much.
I found your video very helpful. My mom made yeast rolls a lot when I was growing up. I tried to make them and failed miserably. This is the second time I have used your recipe and video so I feel more confident when using yeast.
These turned out beautiful. Loved working with this dough, so soft and pliable. I made 12 rolls but they were pretty big (great for a sandwich or burger maybe), so next time I will make the smaller size. Light, fluffy and delicious. Thanks for the recipe.
You’re welcome!
Thank you so much for sharing this recipe and the video with step by step instructions. I appreciate the detail and recipes that you share. It helps even a novice like myself be able to pull off impressive baked goods. These rolls turned out fantastic!
Loved this video,thx
Hi, thank you for sharing your recipe. I’m really searching sweet dinner roll recipe to sell at farmers market. I think this recipe is best to sell. Thanks for all information you shared that if you prep yeast roll ahead you need to use active dry yeast. Different time of rising a rapid yeast and active yeast. The best tips I learned that I can surely use is, I can refrigerate my dough for 12 to 16 hrs if I prep it ahead, this way i can bake fresh dinner rolls to sell at Farmers Market. Thanks.
by: fluffy cupcakes and sweet.
You’re welcome!
Can i use 2 percent Milk. Will they come out just as good.
Thanks Nicole
I suggest whole milk because it will be more rich however 2% is fine. You may not even notice the difference.
Making some rolls today
Enjoy!
Awesome! Enjoy!
Totally unnecessary to be such a jerk. This recipe was provided as a gift, and you were provided not only the recipe but also the science behind the recipe. I really can’t understand why any person would take the time to write such a hateful comment. If you spent as much time following the recipe as you did spewing your vitriol, your rolls would have turned out well.
These look amazing. I love making bread, and have perfected my recipe for making saffron bread and was wondering if saffron could be added to this recipe? My Grandmother used to make the most amazing saffron buns with candied fruit.
Of course! That would be wonderful.
can you freeze this rolls?
This recipe is pure gold! I was able to make a double batch for thanksgiving and the images helped me feel like a bread super hero. I seriously won thanksgiving (with the kids) “that roll
Filled me up Aunt Katie” “those were the best bread I ever eaten, Auntie Kt”.
So glad you all liked them!
Thank you for this step by step recipe it came out beautifully. Now I know how to make my grandma’s recipe work for me. Thank you so much
You’re welcome!
Is there a way to make them less dense and more soft like. In the inside ?
I have been working on trying yeast roll recipe for a couple of weeks. I’ve made 7 batches of rolls and none were soft and all that good. I found your recipe today and decided to try it. Cook time was 15-20 minutes. I know my gas over cooks so hot so I set the timer for 12 minutes at 475. When the timer rang I opened the over and the rolls were very dark, a little darker than I liked but I thought I’d see how they tasted. They were good. But I noticed when I picked up one the bottoms weren’t done; they were wet doughy. I realized I should have cooked them at a lower temperature. Now I’m wondering how to get the bottoms done on all these rolls. I have 16 rolls. Should I cook them on 350 a while or what?
And advice will be appreciated. I don’t want to throw these rolls out.
Thanks so much. Emilie LaFave in North Carolina
I made these Yeast Rolls today and they were delicious. I also added some honey butter. Thanks so much .
Wonderful!
looks yummy, thanks for the recipe, it easy and simple
you’re welcome!
Thank you for explaining this very clearly. I couldn’t understand why my roles were coming out so dense. I’m going to try your recipe it looks like it would be much better than the one I was using. Thanks again
Good luck! You can do it!
This is definitely a perfect video describing the process. I will practice with it
. Thank you so much
Thanks so much!
I teach high school cooking classes. I only have 42 minute periods, so I need to make dough on day 1 and let rise in the fridge overnight; shape rolls on day 2 and let rise in the fridge overnight; and bake the rolls on day 3. Will this recipe work? I don’t usually try to do yeast breads because of the time limitations, but I have a great group of kids this year, who really want to work with yeast. Also, should I use active dry or rapid rise yeast? Any tips you have would be greatly appreciated. Thank you.
That will work! I would use active dry.
PLEASE HELP i used regular all purpose flour and used your recipe to the tee but they smell so good but taste and texture like a soft biscuit
Are they flaky? They should not be flaky. Did you measure your ingredients? I can’t think of any reason they would taste like a biscuit. They should be soft and fluffy.
Great!
My rolls didn’t rise the second time why
I didn’t get the response
Used your receipe and my rolls came out tough. Can’t figure out what did wrong. If didn’t knead ten minutes, would that make them tough? Will keep watching your tutorial just before make rolls, see if that will help.. Really want to figure out how to make them. Love the fresh dinner roll. Thank you Patty Danelek, Thornton, Colorado
I like this recipe. Easier to make these rolls and not difficult. I make my rolls and have been since 1979. Your recipe will surely be welcomed at my table.
Wonderful!
I made these today and they are the best rolls I’ve ever had! My husband loved them!! Thank you for your wonderful recipe!!
You’re so welcome!