Chocolate French Silk Pie
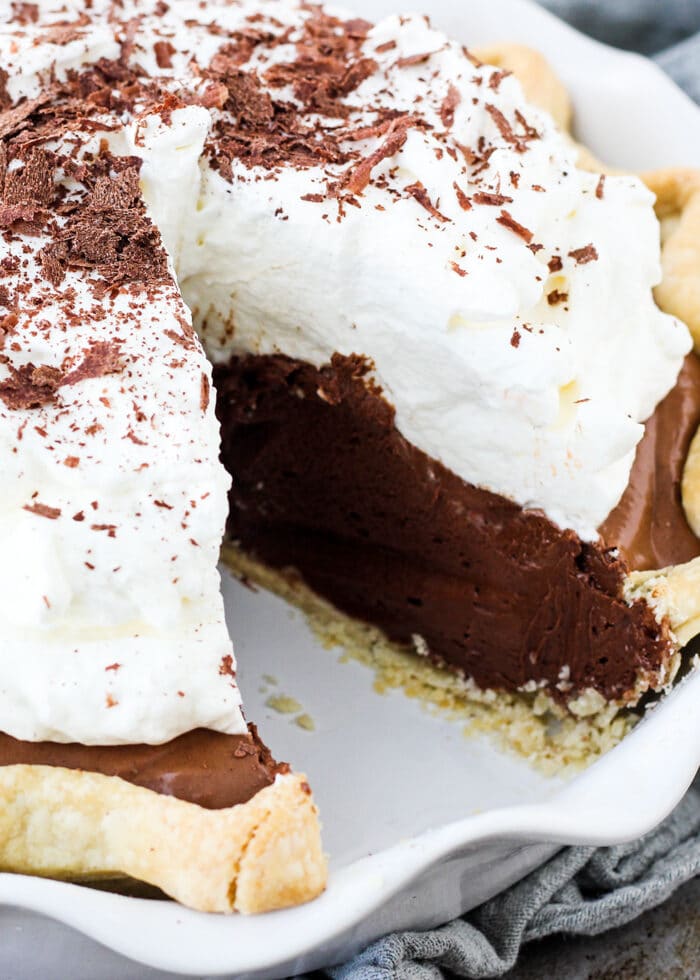
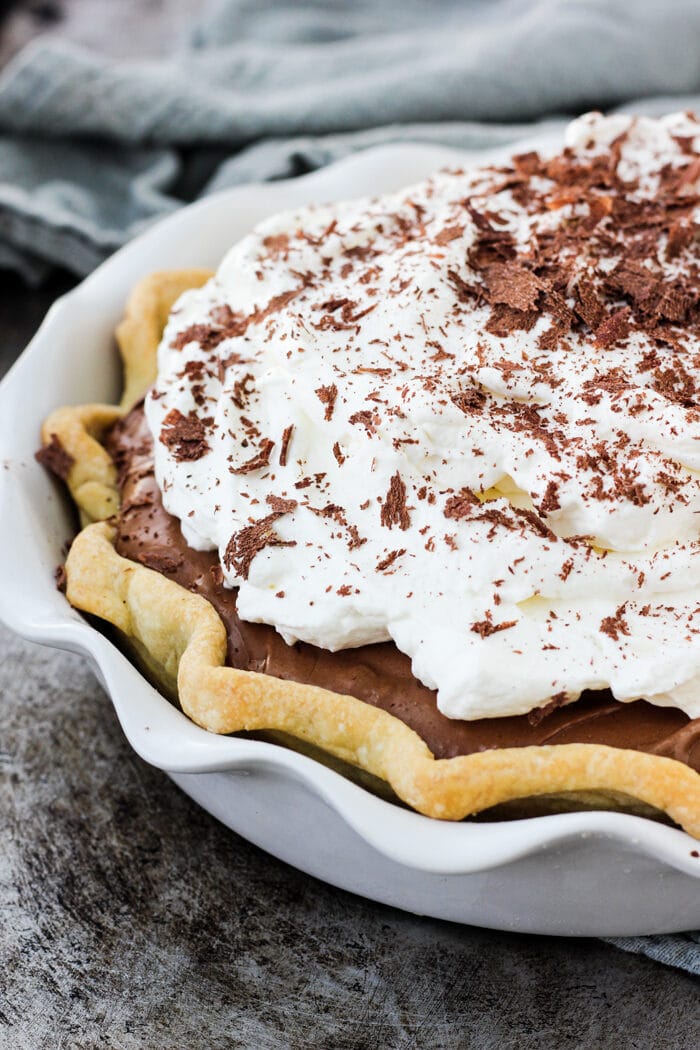
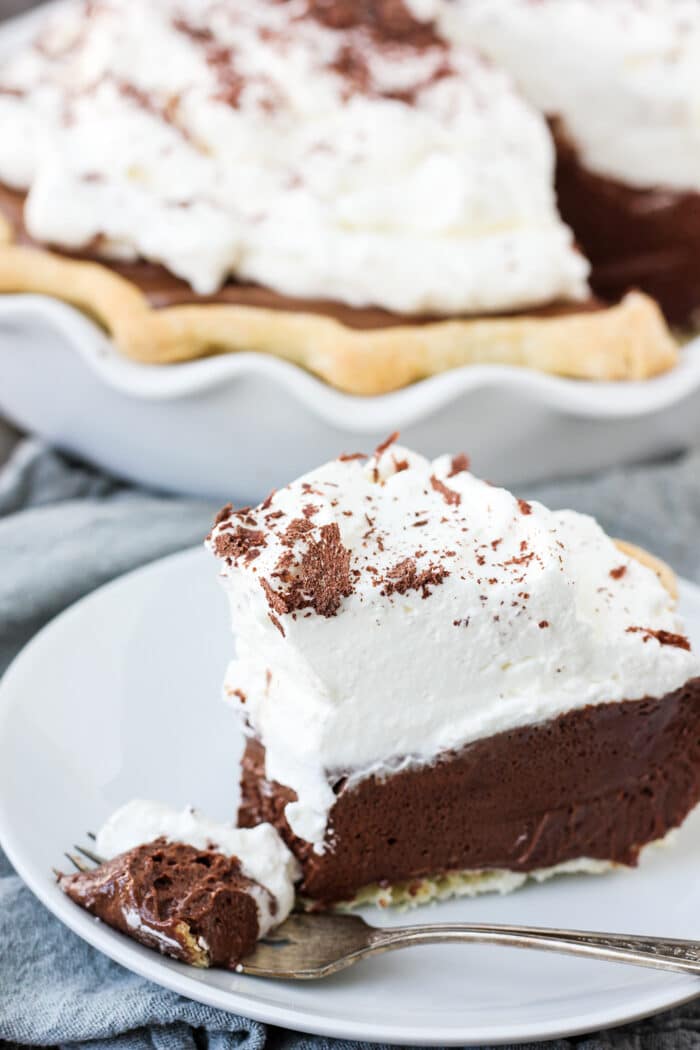
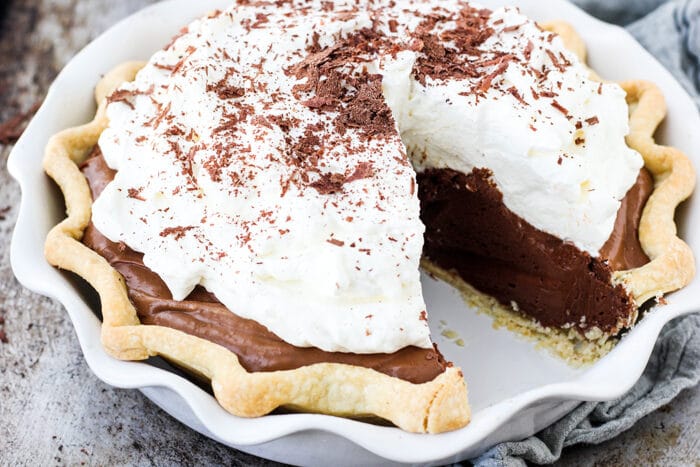
Rich and decadent chocolate French Silk Pie is the perfect chocolate pie! The filling requires no baking and is a silky smooth texture with whipped cream topping and chocolate shavings.
Overview
- Skill Level: Intermediate
- Components Used: All-Purpose Pie Crust, Whipped Cream Topping
Chocolate French silk pie is an incredibly rich chocolate pie with a chocolate mousse filling and a whipped cream topping. The filling is intensely chocolate in flavor and is very rich from the high ratio of butter and eggs in the mousse.
Traditional French silk pie is made with a classic pie crust which is what I prefer. I think the contrast of the salty crust is perfect with the rich filling. However, if you prefer, you can use a graham cracker or oreo crust.
This pie is always a showstopper! I bring this along to most holiday gatherings and it is always the most popular dessert offered.
What is French Silk Pie Made Of? Why is it Called French Silk?
French silk pie is made from a rich chocolate filling that is, as its name suggests, incredibly silky. The filling is essentially a rich chocolate mousse made from butter, sugar, eggs, and chocolate. The filling is kept raw giving it a unique texture.
There is some debate about when this pie first originated. Some believe it came about in the 1950s as a winner of a Pillsbury bake-off, others think it first appeared in the 1980s created by a famous pastry chef. Whenever it first started, it is a hit!
How to Make French Silk Pie
I highly recommend to read the recipe all the way through before starting. Make sure that you do not rush the filling process as it needs the full mixing time to really set up.
Prepare the Crust
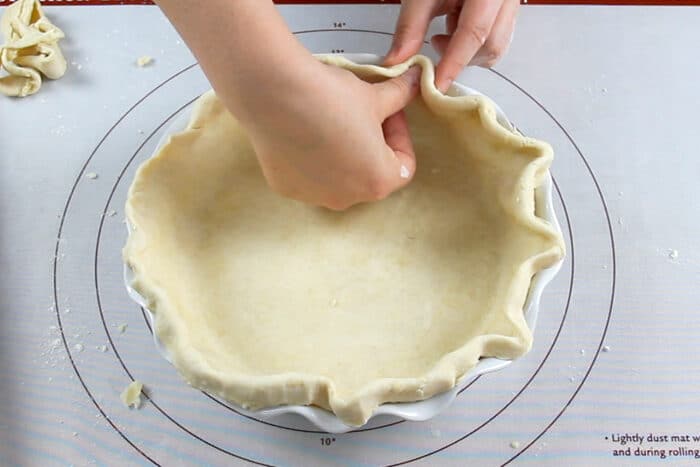
I prefer a traditional pie crust made without sugar for this pie. However, if you prefer, you can make a graham cracker crust or an oreo crust. Oreo is my husband’s favorite crust with this pie but I think it’s a little too rich.
Bake & Cool the Crust
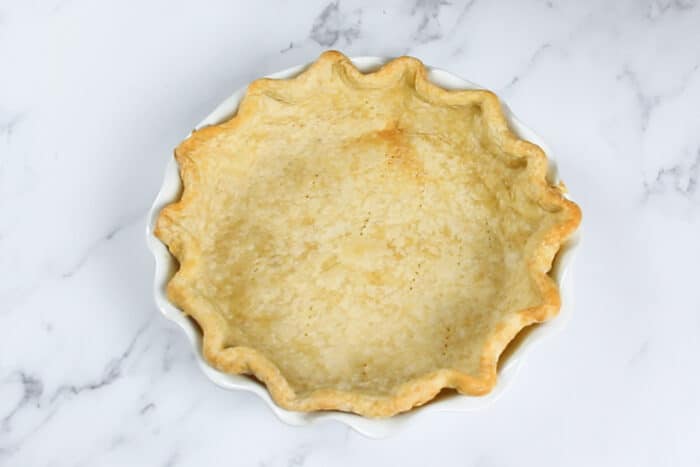
Blind bake the crust and allow to cool completely before adding the filling. Because the filling is kept raw, the crust must be baked all the way through before the filling is added.
Cream the Butter & Sugar for the Filling
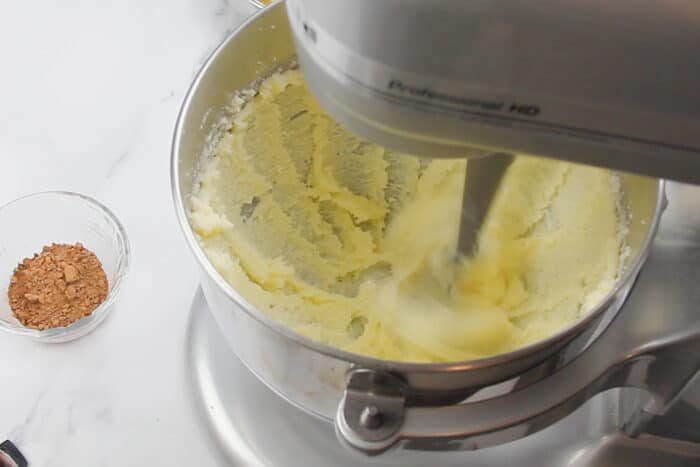
Cream together the butter and sugar until light and fluffy. This will take about 3-4 full minutes of mixing. It’s very important for the butter to be at a soft, room temperature in order to properly cream.
Add the Chocolate
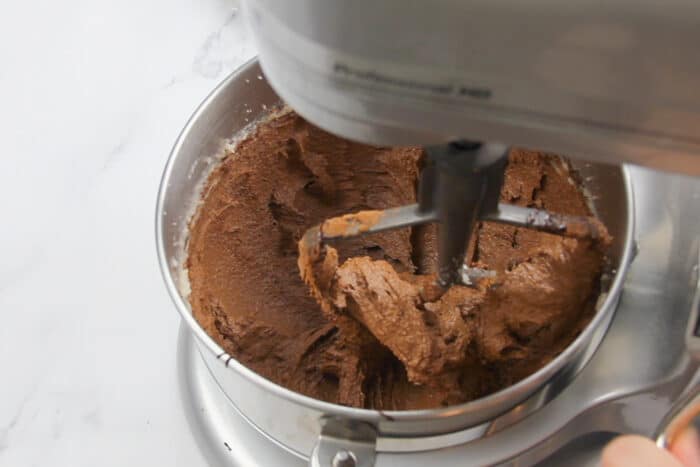
Add the melted and cooled chocolate into the mixing bowl along with the cocoa powder and espresso powder, if using. The cocoa powder and espresso powder are optional but really help intensify the chocolate flavor. I wouldn’t leave it out!
Add the Eggs one at a Time
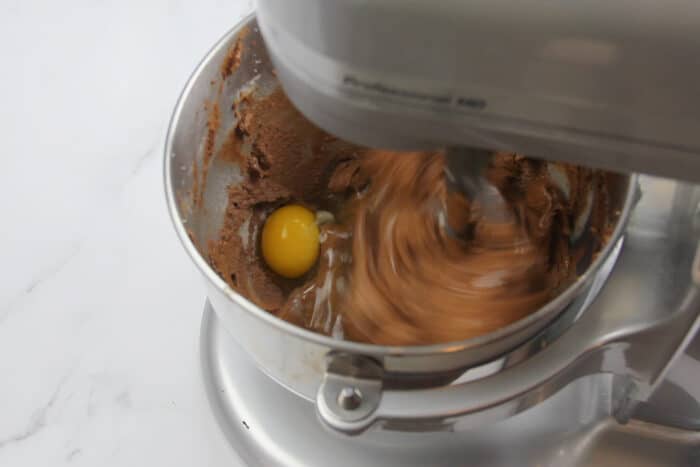
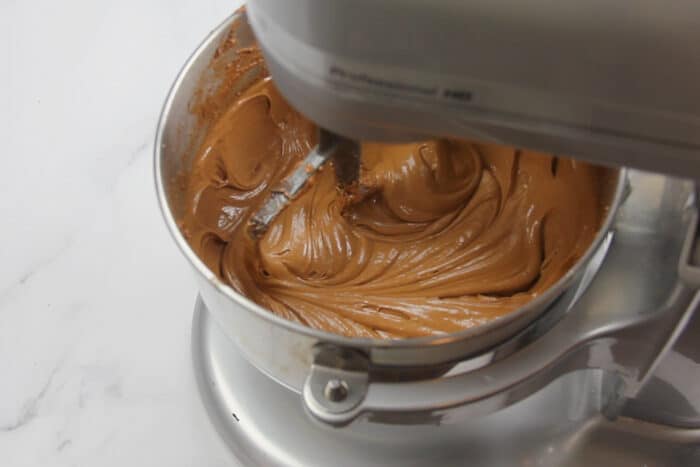
Add the eggs into the mixer one at a time, mixing on high speed for 5 full minutes after each egg addition. This is extremely important for the filling to be able to set. For this reason, I highly recommend using a stand mixer so you can set a timer and do other things while it mixes. I’ve also made this filling using a hand mixer and while time-consuming, it can be done.
Do not rush the process of mixing and adding of the eggs. You will be mixing for a full 20 minutes at high speed, 5 minutes for each of the 4 eggs.
Allow the Filling to Set & Top
Pour the filling into the cooled pie crust and let set for at least 4 hours in the refrigerator. After chilling, top with whipped cream, chocolate shavings, and serve! I would recommend waiting until you are ready to serve if you’re using fresh whipped cream.
If you’d like to make the whipped cream in advance, make a stabilized version that contains gelatin. My recipe for stabilized whipped cream can be made up to 4 days in advance.
FAQ
Does French Silk Pie Need to Be Refrigerated?
French silk pie definitely needs to be kept in the refrigerator due to the eggs in the filling. The filling will start melting if it becomes too warm.
How Long Can You Keep French Silk Pie?
French silk pie can be refrigerated and loosely covered for 3-4 days. It is best eaten the day after it is made for the best texture.
Is French Silk Pie Safe to Eat?
The concern of whether French silk pie is safe to eat stems from the fact that it is traditionally made with raw eggs in the filling. There are versions out there that call for cooking the filling, however I find the filling to be inferior to the classic version.
Because this recipe uses raw eggs it is important to use pasteurized eggs if you are concerned about foodborne illness. Pasteurized eggs have been heated to a point where any bacteria present will be killed to eliminate the risk of illness but the egg remains raw.
You can look for eggs that are labeled as pasteurized in the grocery store or if you are unable to find them you can pasteurize eggs yourself using this tutorial.
Watch the Video Tutorial!
MORE RECIPES FROM BAKER BETTIE!
If you enjoyed this recipe, you might like to try other silky pie recipes!
Chocolate French Silk Pie
French silk pie has a rich, silk smooth, decadent chocolate filling in a perfect classic pie crust. Top with whipped cream and chocolate shavings!
Ingredients
For the Crust
- 180 grams (1 ½ cups) all-purpose flour
- ½ teaspoon kosher salt
- 85 grams (6 tablespoons) unsalted butter, cold
- 30 grams (2 ½ tablespoons) shortening
- 57-85 grams (4-6 tablespoons, 60-90 milliliters) ice water
For the Filling
- 226 grams (1 cup) unsalted butter, room temperature
- 300 grams (1 ½ cups) granulated sugar
- 113 grams (4 ounces) unsweetened chocolate (I use 100% chocolate), melted and slightly cooled
- 2 teaspoons vanilla extract or paste
- 10 grams (2 tablespoons) cocoa powder, optional but intensifies the chocolate flavor and color
- ¼ teaspoon espresso powder, optional but intensifies the chocolate flavor
- 4 large eggs, room temperature (*use pasteurized eggs to eliminate risk of foodborne illness)
For the Topping
- 235 grams (1 cup, 240 milliliters) heavy cream, cold
- 1 teaspoon vanilla extract or paste
- 40 grams (⅓ cup) powdered sugar
- chocolate shavings, optional
Instructions
NOTE: There have been several reviews that the filling has ended up with a grainy texture. After extensive testing, here are some tips to prevent this issue: Make sure you are using a paddle attachment (not the whisk attachment) for your mixer. Mix each egg for a full 5 minutes. Do not rush this part! Make sure you scrape down the sides of the bowl and the bottom of the bowl between each egg addition to insure that all of the sugar is getting mixed fully and is not sticking to the sides or bottom.
Prep:
- Measure out all of the ingredients.
- Set out the ingredients that need to be room temperature including the butter for the filling and the eggs.
- Cut the butter for the crust into small pieces, about ½-inch (1 cm) size. Make sure it is very cold. If it has started to warm up, you can place it in the freezer for a few minutes before starting.
Make the pie Dough:
- In a large mixing bowl, whisk together the flour (180 grams/ 1 ½ cups) and salt (½ teaspoon).
- Add the cold, diced butter (85 grams/ 6 tablespoons) and shortening (30 grams/ 2 ½ tablespoons) to the bowl and toss with your hands so all of the fat is coated with flour. Use the tips of your fingers and thumbs to press down on all of the pieces of fat, creating little sheets of fat throughout your mixture. Continue working the fat through the flour until all of the fat has been worked through.
- Add the ice water little by little into the mixture. Fold the mixture gently with a silicone spatula to incorporate. Use a light hand to slowly hydrate the flour as you add more water. You may not need all of the water. Gather the dough up and press it together. If it crumbles then you need to add a little more water. If it holds together then you are ready to chill the dough.
- Bring the dough together on your counter and press into one mass and knead very gently for one or two turns to bring it into a cohesive dough. Press flat into a round disk and wrap in plastic wrap. Chill in the refrigerator for a minimum of 30 minutes, but preferably an hour, to allow the gluten to relax and the flour to fully hydrate.
Roll the dough and blind bake:
- Preheat the oven to 400°F/205°C.
- Lightly flour a clean work surface and place your chilled dough on top. Lightly flour the top of the dough and your rolling pin. Roll the dough out to about 1 ½ - 2-inches (4 -5 cm) wider than your pie dish all the way around. This is important so that your dough doesn’t need to stretch to fit down into the plate, which can cause it to shrink.
- Gently transfer it into the pie plate. Lift up on the sides of the crust to allow it to fall naturally into the pie plate without having to stretch it. Trim the excess dough leaving about ½-inch overhang all the way around the pie plate. Fold the extra dough under, creating a lip all the way around. Leave as is or crimp the edges for decoration.
- Dock the crust a few times by pricking it with a fork on the bottom and up the sides.
- Place a piece of parchment paper over top of the pie crust and fill it with dry beans, rice, or pie weights; they should fill the pan all the way to the top. This will help the crust hold its shape and not shrink while baking.
- I suggest placing your crust in the freezer for at least 10 minutes or in the refrigerator for at least 30 minutes to firm up before baking to prevent shrinkage.
- Bake in the bottom third of the oven for 20 minutes.
- Remove the parchment paper and pie weights from the crust. Return the crust to the oven. Bake for another 12-15 minutes, until the bottom is golden brown and fully set.
- Let the crust cool completely before adding the filling.
Make the filling:
- In the bowl of a stand mixer fitted with the paddle attachment (make sure not to use a whisk attachment), beat together the room temperature butter (226 grams/ 1 cup) and sugar (300 grams/ 1 ½ cups) on medium-high speed until light and fluffy, about 3-4 minutes.
- With the mixer still running, pour the cooled melted chocolate (113 grams/ 4 ounces) into the butter/sugar mixture. Add the vanilla (2 teaspoons), cocoa powder (10 grams/ 2 tablespoons), and espresso powder (¼ teaspoon) if using. Scrape down the bowl.
- Add eggs (4 total) one at a time, beating for 5 full minutes in between each addition (20 minutes total) at a high speed. Scrape down the bowl making sure to get the sides and the bottom of the bowl between each egg addition. This is important to make sure all of the sugar is getting fully mixed and the texture will be silky.
- Pour the filling into the cooled crust and allow to set in the refrigerator for at least 4 hours and up to 2 days before serving.
Topping:
- Pour the heavy cream (235 grams/ 1 cup) and vanilla (1 teaspoon) in the bowl of a stand mixer fit with the whisk attachment or in a large bowl with a hand mixer. Whip on high speed and slowly stream in the powdered sugar (40 grams/ ⅓ cup). Whip until the cream reaches stiff peaks.
- When ready to serve, top the pie with whipped cream and chocolate shavings or curls.
Notes
- Filling recipe adapted from Martha Stewart's French Silk Pie Recipe
- Disclaimer: Consuming raw or under-cooked eggs may increase your risk of food borne illness, especially if you have a medical condition. Use pasteurized eggs to reduce risk.
Recommended Products
As an Amazon Associate and member of other affiliate programs, I earn from qualifying purchases.




177 Comments on “Chocolate French Silk Pie”
The heck w/ breakfast…pie all the time…
I always eat leftover pie for breakfast, especially a fruit pie.
KRISTIN!!! THIS PIE IS GORRRRRGEOUS!!! And I could totally eat a whole piece, I loooove French Silk Pie!!!
and I’m with you—I have a difficult time making food pretty, yummy I can do, pretty is harder. You totally did it here though, made this pie super beautious! Love it want it!
Pie for breakfast. Yes!
Sometimes on Thanksgiving or Christmas we have the desserts for lunch, because we're all too full after dinner. It works out quite nicely!
This pie is singing to me sweet melodies. I need a slice right now!
Ooh, I LOVE French Silk Pie! This looks SO delicious!
I hear ya on attractive desserts…About the only things I can make look good are cupcakes. Regular-sized cakes are out of the question! 🙂
This pie is absolutely GOREGOUS!!!! I love how sophisticated some shaved chocolate makes a dessert! So fancy! I love this!
Thank you so much Liz! Shaved chocolate does make everything look fancier doesn’t it?!
Your French Silk Pie is amazing – thank you for sharing! I know the last few pieces were fought over at Thanksgiving. 🙂
I made this pie and had it in the fridge for over 4 hours. It never set. So I put it in the freezer and left it all night. It still never set. Did any of you have problems with this?
I’m so sorry you had problems with this recipe. Did you beat it for the full time indicated? It takes 20 full minutes of beating to get the right texture otherwise it will not have the right consistency and will not set. The mixture will be quite thick after beating. Almost thick enough to slice right then.
I have made this pie numerous times and one time it didn’t set up. It seems that 5 minutes after each egg was too long and my mixer was actually heating up and making it warm. The next time I did 4 minutes after each egg and it was perfect again.
Same problem here. I made the pie, followed all the directions. It sat in the freezer for 4 hours and still had the consistency of melted ice cream.
Hahahahahha….you cook like your aunt. Lol…
I made this pie…and I almost wish I hadn't! It was sooooo good that I want to make it over and over. I was kinda shocked at how the beating of the eggs made it "set." Who knew that was the secret. 🙂 If someone's didn't set then they clearly didn't follow the instructions. Yummy. Thanks for sharing.
Pingback: French Silk Pie | Bananas for Baking
Thank you for the recipe my pie was absolutely awesome. I also added a tablespoon of brandy and used a butter based crust recipe from Joy of Cooking. Other than having to borrow my neighbors stand mixer this recipe is perfect.
Sorry, but I don't make anything with eggs in it that isn't baked.
You would use pasteurized eggs. If you are unable to locate then you could google “how to pasteurize eggs”.
You can use egg beaters in place of eggs, they are pasteurized and you can’t tell the difference.
Hi Erin,
Egg beaters will likely not work. I haven’t tried it, but I do not believe they will whip to the volume needed to set the pie. However, you can find pasteurized whole shell eggs that you can use.
Hi there! Could I use a pasteurized product like Egg Beaters? Thanks!
I’m not sure, I don’t use them. I use “safest choice” pasteurized eggs, found locally at a grocery store called “Price Chopper” and according to their website at Walmarts through out the nation.
I really don’t think that will work Linda. I can’t say for certain because I haven’t tried it, but egg beaters do not whip up the way eggs do. You need to air to whip into the eggs for this to set. Like Lisa said, pasteurized whole eggs would be fine.
There really is no substitute for fresh, lovely eggs; however, because my mother-in-law was immuno-compromised, I did not like to use raw eggs in the final product of my desserts. For my silk pie, I simply changed up the method a little and used an electric hand mixer to blend 1 cup of the sugar and all of the eggs together (and liqueur, if you’re using any), then placed the bowl over simmering water (where the water doesn’t touch the bottom of the bowl, or use a double-boiler) and mixed for 8 to 10 minutes until the sugar dissolved, the mixture was hot and the volume increased significantly; at that point the eggs are beyond foamy, looking almost like a meringue. Essentially, I was making a zabaglione (sabayon). I set it aside to cool and, when it was, I beat the butter with the rest of the sugar, added the chocolate and then added the egg mixture, last. It lent an even more silky texture to the final product and I could feel more peace of mind serving it to my beautiful mother-in-law.
you can always use pasteurized eggs. I have done it before and everything turned out fine.
Pingback: French Silk Pie » Swanky Recipes
I have been making this recipe for years! It is BETTER than Baker's Square!
Pingback: Chocolate French Silk Pie | Food- Mafia
Your ‘Chocolate French Silk Pie’ most certainly looks ‘Pretty & Beautiful’ to me!
You have perfected the pie crust, it all looks amazing, luxurious & decadent to me…
Picture perfect..I too could quite easily eat a huge slice of this glorious, rich chocolate, silky pie no problem…
Could eat some now for breakfast at 8.30 am. G.M.T. that’s how delicious it looks, if only I had some made!
Loving your recipes, posts & detailed explanations, looking forward to many more to come, looking forward to making this…
Makes a great change to serve to guests over the holidays, I’m sure that they will love it as much as I will.
Many, many thanks from us here in the U.K.
Pingback: The Ultimate Pie Round-up
Pingback: Chocolate Cream Pie Recipe- Baker Bettie
Pingback: French Silk Pie Recipe | First Recipe
Pingback: French Silk Pie Bakers Square | We Get Healthy
My filling went flat and yes, I did beat it the full 5 minutes between eggs. Half way through when I added the 3rd egg it died. Didn’t work for me. Disappointed as this was for a party tomorrow and I don’t have more ingredients.
Pingback: Top 100 Sweet Treat List (#52WeekA4A) - Chasing My Halo
I’ve been searching all over for a good French Silk Pie recipe. I think I found it here! YUM!!
My family has egg alergies .
Is there a substitute for eggs?
Hi Linda,
Unfortunately, for this particular recipe, real eggs are very essential to making the pie set. I did a quick google search though and I found another recipe for egg free french silk pie you might be able to try! http://addapinch.com/cooking/french-silk-pie-recipe/
I have always made this pie with a chocolate wafer crumb crust( 1-1/2 cup crumbs, 1Tbsp of sugar, 4 oz melted butter). It makes the pie even more decadent . You can add some plain gelatin (1 package softened with water and then cooked to clear on the stove and cooled) to the whipped cream and it will hold up for days, if the pie lasts that long.
Hi Ginny,
That is also how my mother in law makes it! My husband also loves it that way. I personally prefer a less sweet crust for some contrast. Use the crust recipe you love and make it your own!
How much ice water in the crust??????
Hi Rebecca,
It really depends on a number of things such as the humidity that day and where you live to how accurately you measured to flour. The recipe states to add ice water 1 TBSP at a time and stir gently until the crust comes together. This typically takes anywhere from 1/4 cup- 1/2 cup.
Been making this since for 50 years and it is now my 6 Grandson’s favorite dessert…which I only make for holidays. Yes, use very fresh raw eggs; butter and real whipping cream! For those who use only low or non-fat products, don’t bother making this; substitutes will not work!
You are so right Sheila! This is not a recipe that works well with substitutions!
Pingback: 19+ Pie Recipes For The Holidays |
The person that wrote the part about the freshness of the eggs don’t know what they are talking about. The B, A, and AA only refers to the size of the eggs not the freshness. AA=Extra Large. A=Large. and B=Medium. The carton has the date on it.
Here in central Kansas to get fresh eggs we have to buy them from a farmer.
To check the eggs for freshness put them in a bowl of water. If they float they are fresh. As the air leaks out of them and they get older they will sink.
I’m 79 years old and have never gotten sick from raw or partly cooked eggs.
Lee.
Hi Lee,
Thanks for the comment. I do have to disagree with you however. Grading has nothing to do with the size of the egg. The way eggs are graded is by measuring the intereior and exterior quality of the egg. The density of the white and the air pockets in the egg are measured, as well as an inspection of the exterior shell. As eggs age the air cell grows and the whites loose density. So as eggs age their grade level changes based on the density of the whites and the air cell size inside. Therefore, fresher eggs have higher grades and older eggs have a lower grade. The size is not taken into account when grading. You can read more about egg grading here: http://curbstonevalley.com/blog/?p=3354
Here’s a thought…. Instead of being rude, you could try saying, “I disagree…” or “I believe you are mistaken”.
Sooo I doubt you’ll read and reply to this as I’m doing it, but thought I’d ask anyhow. I added the eggs beating after each addition. However, I didn’t see the part about 5 minutes in between each…so I’m letting it beat for 20 minutes now. Do you think it will set up or should I go to a back up recipe? Thanks
Hi Melissa, I do not know for sure as I haven’t tried it, but if you do please report back as to what happens.
I do not own one of the fancy mixers with a beater paddle. Does this significantly affect how I should prepare the pie?
I followed the directions but even after all the mixing it is still sugary/ grainy. is this normal??
Hi Michelle,
No, the mixture should not be very grainy. You might notice it a tiny bit after its done mixing, but it should be pretty smooth and silky. Did you mix for the full 20 minutes at medium-high speed?
My filling
was grainy until I added the last egg, and wala, French silk. beautiful !
This our freezes very, very well. I always make my Thanksgiving pies in Oct. I put two in the freezer in Oct a few years ago and forgot about one. (I know, HOW could I forget this awesome pie?) I pulled it out in August, and it was still as yummy as ever. I freeze these in large plastic zipper bags.
I made this yesterday. I did use a different crust. It’s very similar to the recipe above but with butter instead. This turned out amazing!! So rich and so delicious. I used everything except the espresso powder as I didn’t have any and used the recommended Ghirardelli. Soooo good with homemade whipped creme. Mmmm. Definitely try it. I have no problem with mine falling when adding my eggs.
Ahhh at our house we call a slice of apple pie and scrambled eggs “the breakfast of champions”. The best!
Am going to try your recipe for this lovely pie for my birthday, INSTEAD of cake!
I made this last night and it is REALLY good. Rich so cut small slices. Everyone loved it. I made it with an oreo crust.
Pingback: 25 Delicious Pie Recipes to Celebrate Pi Day - Sincerely, Mindy
Pingback: 20 Award Worthy Pie Recipes - Beautifully BellaFaith
EXCELLENT recipe! I pinned this over a year ago and finally made it tonight when we had friends over and it was most definitely a hit. I’ll be cutting smaller pieces next time because it’s so rich – but we loved it! I’m amazed that beating the eggs that long stabilizes them and sets up that firm. Thanks for the recipe!
Pingback: Tried It Tuesday #116 - The Scrap Shoppe
This pie is AMAZING! HUGE hit. It seriously was soooo good. I get it requested all the time. I used a different crust though. It’s a pretty similar recipe only it uses butter instead of shortening.
Hello! For really long time I want to make this amazing cake, but I have one question-after its chill in the refrigerator for 4 hours, cake may be kept at room temperature?
Hi Zane! No, you do not want to store this pie at room temperature. You need to keep it cold for several reasons. It will not stay firm at room temperature and also the pie contains raw eggs so you definitely want to keep it chilled so that it stays safe to eat.
My Mom started making this pie in the 1970’s and I’ve been making it for years. It’s the absolute best French Silk pie I’ve ever tasted, and believe me, I’ve tasted a lot of them…LOL
This is the French Silk pie my mother always made,The best chocolate pie I’ve ever eaten. We call it “Fudge on a Fork”. I’m making one today to bring to the office tomorrow for a birthday celebration.
Pingback: 15 Thanksgiving Pie Ideas That Will Make You Forget the Turkey